How to Take Captivating Photos Using 32 Powerful Composition Techniques

How to Take Captivating Photos Using 32 Powerful Composition Techniques

Whether you’re using a DSLR, mirrorless camera, or just your phone, learning photography composition is the fastest way to take more captivating, intentional photos. Composition is what turns everyday images into visual stories—it’s the art of placing elements with purpose, guiding the viewer’s eye, and creating emotion.

Composition is the silent force that guides your viewer’s eye, stirs emotion, and transforms a moment into a powerful visual story. It’s what separates a quick snapshot from a photograph people remember.

This guide introduces 32 powerful composition techniques—each one designed to improve your photography regardless of gear or skill level. You’ll get a short, practical explanation of each technique, along with a direct link to a full, in-depth article where you can learn more.


1. Rule of Thirds Photography Composition


Divide your frame into a 3×3 grid and place your subject along the lines or intersections. This simple technique instantly brings balance and focus to any photo.

Read the full guide →


2. Leading Lines in Photography Composition


Use natural or man-made lines—like roads, fences, or shadows—to guide the viewer’s eye directly to your subject.

Full article →


3. Symmetry and Pattern Composition Techniques


Symmetry adds calm, while repetition creates rhythm. Master both for elegant, structured photos.

Explore the technique →


4. Framing in Photography Composition


Use windows, doorways, trees, or even shadows to frame your subject within the shot. It adds context and visual focus.

Learn how to use framing →


5. Cropping for Better Composition


Cropping eliminates distractions. It helps tighten your message and draw the viewer’s attention where you want it.

See how cropping helps →


6. Depth in Photography Composition


Use foreground, middle ground, and background to build visual layers. It adds realism and immersion to flat images.

Guide to building depth →


7. Using Contrast in Photography Composition


Contrast—light vs. dark, rough vs. smooth—helps define your subject and build visual drama.

Learn to use contrast →

Lorem ipsum dolor sit amet, consectetur adipiscing elit. Ut elit tellus, luctus nec ullamcorper mattis, pulvinar dapibus leo.


8. Mastering Negative Space in Composition


Leaving empty space around your subject gives the image room to breathe and emphasizes what matters most.

Use it creatively →


9. Fill the Frame Composition Technique


Get closer. By filling the entire frame with your subject, you eliminate distractions and intensify focus.

Try it now →

Lorem ipsum dolor sit amet, consectetur adipiscing elit. Ut elit tellus, luctus nec ullamcorper mattis, pulvinar dapibus leo.

Lorem ipsum dolor sit amet, consectetur adipiscing elit. Ut elit tellus, luctus nec ullamcorper mattis, pulvinar dapibus leo.

Lorem ipsum dolor sit amet, consectetur adipiscing elit. Ut elit tellus, luctus nec ullamcorper mattis, pulvinar dapibus leo.

Lorem ipsum dolor sit amet, consectetur adipiscing elit. Ut elit tellus, luctus nec ullamcorper mattis, pulvinar dapibus leo.

Lorem ipsum dolor sit amet, consectetur adipiscing elit. Ut elit tellus, luctus nec ullamcorper mattis, pulvinar dapibus leo.

Lorem ipsum dolor sit amet, consectetur adipiscing elit. Ut elit tellus, luctus nec ullamcorper mattis, pulvinar dapibus leo.

Lorem ipsum dolor sit amet, consectetur adipiscing elit. Ut elit tellus, luctus nec ullamcorper mattis, pulvinar dapibus leo.

Lorem ipsum dolor sit amet, consectetur adipiscing elit. Ut elit tellus, luctus nec ullamcorper mattis, pulvinar dapibus leo.

Lorem ipsum dolor sit amet, consectetur adipiscing elit. Ut elit tellus, luctus nec ullamcorper mattis, pulvinar dapibus leo.

Lorem ipsum dolor sit amet, consectetur adipiscing elit. Ut elit tellus, luctus nec ullamcorper mattis, pulvinar dapibus leo.

Lorem ipsum dolor sit amet, consectetur adipiscing elit. Ut elit tellus, luctus nec ullamcorper mattis, pulvinar dapibus leo.

Lorem ipsum dolor sit amet, consectetur adipiscing elit. Ut elit tellus, luctus nec ullamcorper mattis, pulvinar dapibus leo.

Lorem ipsum dolor sit amet, consectetur adipiscing elit. Ut elit tellus, luctus nec ullamcorper mattis, pulvinar dapibus leo.

Lorem ipsum dolor sit amet, consectetur adipiscing elit. Ut elit tellus, luctus nec ullamcorper mattis, pulvinar dapibus leo.

Lorem ipsum dolor sit amet, consectetur adipiscing elit. Ut elit tellus, luctus nec ullamcorper mattis, pulvinar dapibus leo.

Lorem ipsum dolor sit amet, consectetur adipiscing elit. Ut elit tellus, luctus nec ullamcorper mattis, pulvinar dapibus leo.

Lorem ipsum dolor sit amet, consectetur adipiscing elit. Ut elit tellus, luctus nec ullamcorper mattis, pulvinar dapibus leo.

Lorem ipsum dolor sit amet, consectetur adipiscing elit. Ut elit tellus, luctus nec ullamcorper mattis, pulvinar dapibus leo.

Lorem ipsum dolor sit amet, consectetur adipiscing elit. Ut elit tellus, luctus nec ullamcorper mattis, pulvinar dapibus leo.

Lorem ipsum dolor sit amet, consectetur adipiscing elit. Ut elit tellus, luctus nec ullamcorper mattis, pulvinar dapibus leo.

Lorem ipsum dolor sit amet, consectetur adipiscing elit. Ut elit tellus, luctus nec ullamcorper mattis, pulvinar dapibus leo.

Lorem ipsum dolor sit amet, consectetur adipiscing elit. Ut elit tellus, luctus nec ullamcorper mattis, pulvinar dapibus leo.

Lorem ipsum dolor sit amet, consectetur adipiscing elit. Ut elit tellus, luctus nec ullamcorper mattis, pulvinar dapibus leo.

Dynamic Aquatic Center exterior in Stratford.

How to Get Better Results from Architectural Photography in London


How to Get Better Results from Architectural Photography in London

If you’re a firm in London already working with architectural photographers, chances are you’re not trying to fix something broken. Instead, you’re looking to sharpen something that already works. You want to give it a new edge. A different voice. One that deepens the way your projects are seen and felt. And when it comes to architectural photography in London, where visual standards are high and creative expectations even higher, subtle shifts in how a space is photographed can completely reshape how your work is received.

Projects are often stunning in person. However, when it comes to how they’re captured, the image either elevates the space or leaves something behind. Somewhere in that gap—between what a space is and how it’s interpreted—is often where new creative partnerships begin.

If you’re already investing in photography but feel your visuals could do more, this guide is written for you.

Why Architectural Photography in London Needs to Evolve with Your Projects

Your projects have grown more complex

Whether you’re designing residential spaces in Hackney or commercial interiors in Clerkenwell, your visuals should evolve with the scale and intention of the work. Over time, I’ve seen firms lose momentum not because the design lost power, but because their photography didn’t evolve alongside it. Sometimes, that shift is subtle. Place two years of your projects side by side and you may find they feel visually similar. Often, the design has changed. But the photography hasn’t.

Your audience expects layered storytelling

In today’s landscape, a photo isn’t just a record. It’s a statement. It says who you are, who the project is for, and why it matters. Moreover, clients and editors now expect to feel something in the frame that reflects what they would experience if they walked through that space. This is where architectural photography in London must balance clarity with emotional depth.

One style can’t serve every project

I’ve worked with firms who are deeply loyal to their go-to photographers. That kind of trust matters. Even so, I also know what happens when every project gets interpreted through the same visual lens. The result can be a portfolio that begins to flatten. When projects feel similar, it’s not always the design. Often, it’s how the story is being told.

How Top London Firms Maximise Architectural Photography

They match photographers to the project

Not every project needs the same perspective. Residential interiors benefit from softness and restraint. On the other hand, commercial exteriors may require boldness, sharp lines, and atmosphere. Leading firms in London curate their visual collaborators with intention. The result is a portfolio that feels purposeful, not repetitive.

They avoid visual fatigue

Repetition can dull even the most compelling design work. If every shoot looks and feels the same, even excellent spaces lose their impact. Top firms avoid this by working with photographers who bring different tones to different briefs. This variation, when intentional, keeps their visual identity feeling alive.

They work collaboratively, not transactionally

The best results happen when photography is part of the creative conversation—not just the final checklist. In my experience, when a firm invites the photographer into the narrative early, the images carry more weight. They don’t just document the space. They interpret it. That shift in approach often makes the difference between a photo that lands in a project folder and one that ends up in a press kit.

Dynamic Aquatic Center exterior in Stratford.


Where I Add Value to the Visual Process

Combining clarity with narrative

With every shoot, I try to give your design language a second voice. One that reinforces, but never overwhelms. I look for the emotional center of the space, not just its geometry. The goal is to create images that are structured, human, and quietly immersive. Sometimes that means letting a shadow stay. Other times, it means resisting the urge to over-style a frame. Often, the most powerful visual choices are the most restrained.

Adapting without diluting

My role isn’t to impose a look. It’s to listen—to the space, to your brand, to the way you speak about the project—and then respond visually with care. Clients tell me that the best collaborations are the ones where they still see themselves in the final work, only with more depth. That’s what I try to bring.

Integrating seamlessly with creative teams

Having worked with design leads, branding teams, and developers, I understand what structured collaboration looks like. You shouldn’t have to over-explain. You shouldn’t have to chase assets. I aim to bring clarity, efficiency, and images that feel like they belong in your system—not something bolted onto it.

What to Consider When Adding a New Photographer

Start with a project that feels different

You don’t have to test a new photographer on your highest-stakes brief. In fact, it’s better to begin with something slightly more open. It might be a show flat. A special feature. A quietly personal project that hasn’t yet found its visual voice. That’s where new perspectives shine.

Set boundaries, then open space

If brand consistency matters—and it always should—set expectations up front. Let the photographer know what defines your look, what’s flexible, and what’s sacred. Once that frame is in place, give them space to work inside it. That balance between definition and freedom often leads to the most original results.

Use difference to your advantage

When a new voice enters the mix, your visual identity doesn’t break. It sharpens. The contrast between familiar and new adds richness. It shows your firm knows how to evolve without losing who you are. And for the viewer, that subtle variation creates rhythm across your portfolio.

Final Thoughts

You probably don’t need a new photographer. But you might need the right one for what’s next. That next project. That shift in tone you’ve been sensing but haven’t yet articulated.

Photography, when chosen well, becomes a second act of design. It shows not only what you built, but what you meant. It makes the work feel seen.

If your next space calls for a photographic voice that brings calm, structure, and quiet narrative to the frame, I’d be glad to bring it to the table.

You can explore my architectural photography work here, or get in touch if you’d like to discuss an upcoming project.

For additional perspective, Dezeen and RIBA provide insight into how architectural photography in London is shaping design visibility today.

Dynamic Aquatic Center exterior in Stratford.

How to take professional interior photos

The First Thing You Need to Know About Shooting professional interior photos

Capturing the beauty of an interior space is harder than it looks. Whether you’re an interior designer documenting your work, a photographer building your portfolio, or a property developer showcasing a project, learning how to take professional interior photos can set your visuals apart—and attract the right kind of attention.

In this guide, I’ll walk you through the exact process I use as a London-based architectural and interior photographer. From lighting and lenses to composition and color accuracy, you’ll learn how to elevate your interior photography from “good enough” to “publishable.”

Choose the Right Time of Day to make professional interior photos

Lighting is the most important factor in interior photography—and often the most overlooked.

Rely on natural light when possible

Natural light creates softer shadows and more authentic tones. Aim to shoot during the day when the space is naturally well-lit, but avoid harsh midday sun that can create blown-out highlights or sharp contrast.

Create your own “golden hour”

While golden hour is often associated with exteriors, the warm, diffused light of early morning or late afternoon can fill interiors with soft ambient glow—especially in London, where low-angle sunlight adds texture and warmth.

Be mindful of mixed lighting

Turn off overhead spotlights if they cast harsh shadows or mix poorly with natural daylight. If you must use artificial light, try to keep the color temperatures consistent throughout the space.

Use the Right Lens — But Don’t Go Too Wide

Choose the right focal length

A 24–35mm range is ideal for most interior shots on a full-frame camera. It’s wide enough to show the space without introducing heavy distortion, which is a common giveaway in amateur photos.

Avoid the ultra-wide look

Using a 14mm or 16mm lens might seem like a way to capture “more,” but it often creates stretched, unrealistic proportions. Stick to lenses that reflect the space as it actually feels.

Dynamic Aquatic Center exterior in Stratford.


Staging Matters – Simplify and Guide the Eye

A beautiful space doesn’t always translate into a beautiful photo without a little preparation.

Declutter, straighten, and soften

Remove unnecessary items, adjust furniture alignment, and fluff pillows or drapes. Clean surfaces and simplify wherever possible.

Style with intention

Keep key decorative items that reflect the mood or design intention—like a single vase on a table or carefully placed books.

Master Your Composition to  make professional interior photos

Composition transforms a technically decent image into a compelling one.

Use leading lines and symmetry

Architectural lines (floorboards, countertops, beams) should guide the viewer’s eye. Align your camera to emphasize geometry, and when possible, compose with symmetry to create visual balance.

Shoot slightly above eye level

Position the camera around chest height or slightly higher to avoid distortion and to keep vertical lines straight.

Keep verticals vertical

Use a tripod and level the camera—especially in tight spaces. Correct verticals in post-processing if needed, but it’s best to get them right in-camera.

To make professional interior photos always use a Tripod and Shoot with Intention

Eliminate motion and increase control

A tripod gives you full control over composition and exposure. It allows you to shoot at lower ISO, use longer shutter speeds, and keep everything sharp.

Try bracketing for high-contrast interiors

Shoot multiple exposures to blend later in post—this helps when one window is too bright or a corner is too dark.

Control White Balance and Color Accuracy

Getting colors right is essential, especially if your photos represent someone else’s work.

Use a grey card

This helps you lock in correct white balance during shooting and ensures consistency across a full set of images.

Avoid harsh color casts

Turn off lamps with yellow-orange bulbs if they conflict with natural daylight. If you’re using flash or LEDs, match their color temperature with the environment.

Edit with Restraint

The goal isn’t to fake the scene, it’s to reveal it beautifully.

Keep contrast and clarity subtle

Over-processed interiors lose authenticity. Bring out shadow details, clean up highlights, but maintain a natural feel.

Use lens corrections

Apply lens profiles to fix subtle distortion and vignetting. Straighten lines and crop carefully.

Bonus Tips for Small Spaces

Shoot corners, not just walls

Position yourself diagonally to show depth. A single wall often flattens the image.

Use doorways or mirrors creatively

Mirrors can open up a space if used intentionally—just avoid reflections of yourself or your gear.

Don’t overfill the frame

Leave breathing room. Allow negative space to do its work. Don’t try to show everything in one shot.

Final Thoughts – Photographing Interiors with Purpose

Professional interior photography is all about respect for the space, for the designer’s vision, and for the viewer’s eye. With the right tools, timing, and mindset, you can take interior photos that don’t just show a room, they express what it feels like to be there.

If you’re in London and need help capturing your space or want to collaborate on a project, feel free to get in touch. I’d love to hear what you’re working on.

Dynamic Aquatic Center exterior in Stratford.

How to Hire the Right Architectural Photographer in London

Why Hiring a Professional Architectural Photographer in London Matters

If you’re planning to hire an architectural photographer in London, understanding what to expect can save you time, money, and ensure your project looks its best. London is one of the most architecturally diverse cities in the world, blending centuries-old landmarks with cutting-edge modern design. In such a dynamic environment, capturing architecture demands more than a camera; it requires a trained eye, professional technique, and a deep understanding of space and light.

Whether you’re an architect, designer, or property developer in London, hiring a local architectural photographer ensures your work is documented with both precision and artistic sensibility. Great images don’t just show buildings—they sell projects, win awards, and tell stories.

Know What You’re Looking for When Hiring an Architectural Photographer in London

Before you contact a London-based photographer, get clarity on your objectives.

Define your project goals

Are the images for a RIBA submission, a design portfolio, marketing collateral, or a press feature? Knowing this helps the photographer plan the shots, format delivery, and guide the creative direction.

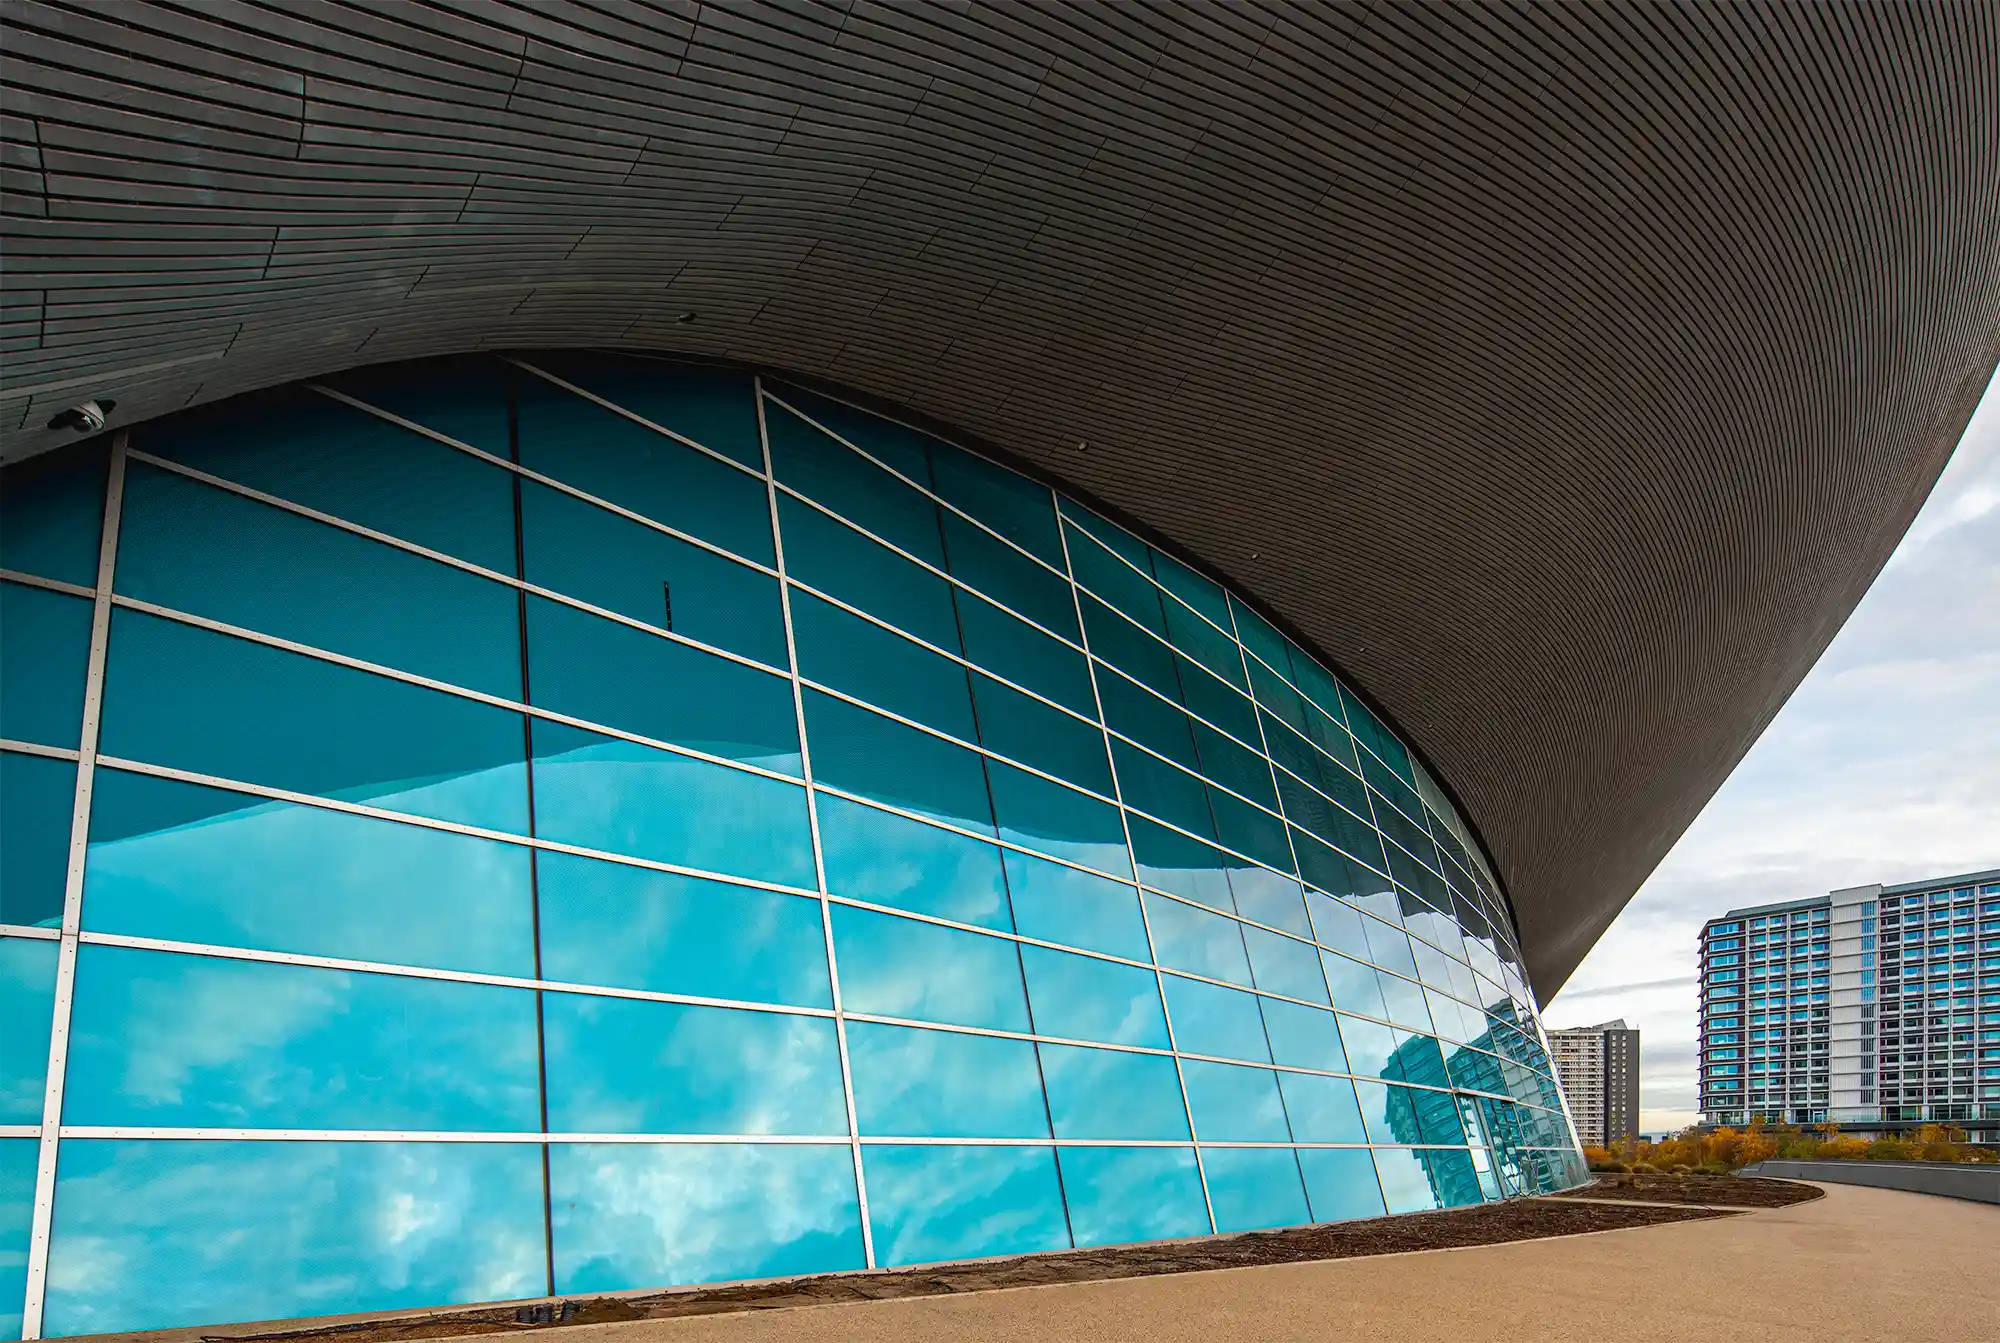
Interior, exterior, or mixed-use photography?

London interiors are often tight, light-challenging spaces. Exteriors may involve crowded streets or protected heritage sites. Make sure you know what kind of expertise your shoot demands.

Research the Photographer’s Style and Experience in London

Working with a local London photographer brings huge advantages—they understand the city’s architecture, light conditions, regulations, and even the seasonal timing for exteriors.

Review London-based portfolios

Look for experience with buildings similar to your project: Victorian restorations, Brutalist spaces, or glass-clad offices in Shoreditch or Canary Wharf.

Understand specialisation

Does the photographer work more with residential interiors, commercial developments, or cultural institutions? London projects often have tight access or time restrictions—a seasoned local knows how to work efficiently.

Questions to Ask Before You Hire an Architectural Photographer in London

To avoid surprises and miscommunication, ask:

What’s your shoot process in London?

From location scouting to traffic planning and permit needs (especially for outdoor shots), a local pro can guide the logistics.

Do you work with available light or bring your own?

Some older London buildings have challenging lighting. Find out how the photographer handles mixed light, reflections, or heritage-listed spaces.

What’s included in your fee?

Ask if travel within London is included, how many edited images you’ll receive, and if they offer image formats for press, awards, and online use.

Understand Pricing, Licensing, and Usage Rights

How architectural photography is priced in London

Day rates in London can vary significantly depending on the project, the shoot duration, the number of images required, and complexity. Be transparent about your budget—many photographers offer flexible packages.

Licensing in the UK

Standard licensing often covers editorial and web use. If you need images for advertising, third-party resale, or long-term use, negotiate those terms upfront.

Prepare for the Shoot (London-Specific Considerations)

Clean and prepare the site

In a fast-paced city, time is money. Ensure the property is ready to go when the photographer arrives—clean, staged, and lit.

Be mindful of timing

London’s weather can change quickly. Schedule accordingly, especially for exteriors. Morning light varies in Mayfair compared to South Bank due to building density.

Plan for street access and permissions

Shooting in public areas, even outside private properties, can sometimes require permits or consideration of foot traffic.

Dynamic Aquatic Center exterior in Stratford.


Build a Collaborative Relationship

Communicate clearly

Share visual references, your vision, and key project goals in advance.

Respect their creative process

A skilled London photographer brings experience with some of the world’s most photographed architecture—give them space to work.

Agree on review timelines

Understand how proofs are delivered, how long revisions take, and when you’ll receive final images.

Final Deliverables and Ongoing Collaboration

What should you expect to receive?

Typically: high-resolution images for print, web-optimized files, and a clear license outlining usage.

How to credit the photographer

On social media, architecture awards, or design publications, proper credit helps both parties—and ensures ethical representation of the work.

Consider future work

If the collaboration goes smoothly, consider bringing the same photographer into future London-based projects. Consistency in style and workflow is a major plus.

Final Thoughts – London Projects Deserve London Expertise

When it comes to architecture, London offers endless complexity, beauty, and contrast. Capturing it requires not just photography skills—but local insight, professional communication, and a collaborative mindset.

Hiring a professional architectural photographer in London is an investment in your project’s legacy. The better you prepare, the better the results. And when done right, those images will speak louder than any brochure or pitch deck ever could.