Want better photos? Use leading lines like this
Introduction: The Power of Leading Lines
Leading lines are a foundational element in the art of photographic composition. They act as visual guides, leading the viewer’s eye through the image and towards the main subject or focal point. This technique is incredibly effective in creating a sense of movement and depth, making your photographs more engaging and dynamic.
Understanding Leading Lines
Leading lines can be anything in your scene that creates a line or path, such as roads, fences, shorelines, or architectural elements. They can be straight, curved, diagonal, or even zigzagged. The key is how these lines guide the viewer’s eye and how they interact with the other elements in your frame.

O Carroll, B. (2016). 28 Composition Techniques That Will Improve Your Photos.
Creative Process: Implementing Leading Lines
- Identifying Lines in Your Environment: Begin by observing your surroundings and identifying potential leading lines. Pay attention to how these lines interact with the scene and your subject.
- Strategic Placement: Position your camera so that the leading lines start from the edge of your frame and guide towards your main subject. Experiment with different angles and perspectives.
- Balancing the Composition: Ensure that your leading lines enhance, not overpower, the main subject. The lines should be a part of the story, not the entire story.
Tips for Photographers
- Use Lines to Create Depth: Leading lines can add depth to a flat image, creating a more three-dimensional feel.
- Experiment with Different Types of Lines: Not all leading lines need to be obvious. Sometimes subtle lines, like a row of trees or a pattern on a floor, can be very effective.
- Combine with Other Composition Techniques: Leading lines work well when combined with other composition rules like the Rule of Thirds or Framing.
- Pay Attention to Line Direction: The direction of the lines can affect the mood of the image. For example, vertical lines can convey power and strength, while curved lines can create a sense of calm and flow.
Advanced Techniques in Using Leading Lines
- Leading Lines in Portraits: Use environmental elements to guide the viewer’s eye towards the subject in portrait photography.
- Urban and Architectural Photography: Urban landscapes are filled with leading lines. Use them to create compelling compositions in cityscapes.
- Natural Leading Lines: In landscape photography, use natural elements like rivers, coastlines, or rows of trees as leading lines.
Practical Applications in Various Genres
- Landscape Photography: Use paths, rivers, or mountain ridges to lead the eye through the landscape.
- Street Photography: Streets, sidewalks, or architectural features can create dynamic leading lines in urban settings.
- Architectural Photography: Use the lines of buildings, windows, and stairs to guide the viewer’s eye.
Conclusion: Elevating Your Photographic Vision
Understanding and utilizing leading lines can significantly elevate your photographic vision and storytelling. This technique is crucial in engaging the viewer and adding depth and direction to your images.

Tutorial: Creating Leading Lines Using the Pen Tool in Photoshop
Step 1: Open Your Image
- Load the Image: Start by opening the image you wish to edit in Photoshop. Ensure you’re working on the correct layer in case your project has multiple layers.
Step 2: Selecting the Pen Tool
- Accessing the Pen Tool: Locate the Pen Tool in Photoshop’s toolbar, typically on the left side of the screen. The icon looks like a fountain pen tip. Click on it or press
Pon your keyboard to select it.
Step 3: Drawing with the Pen Tool
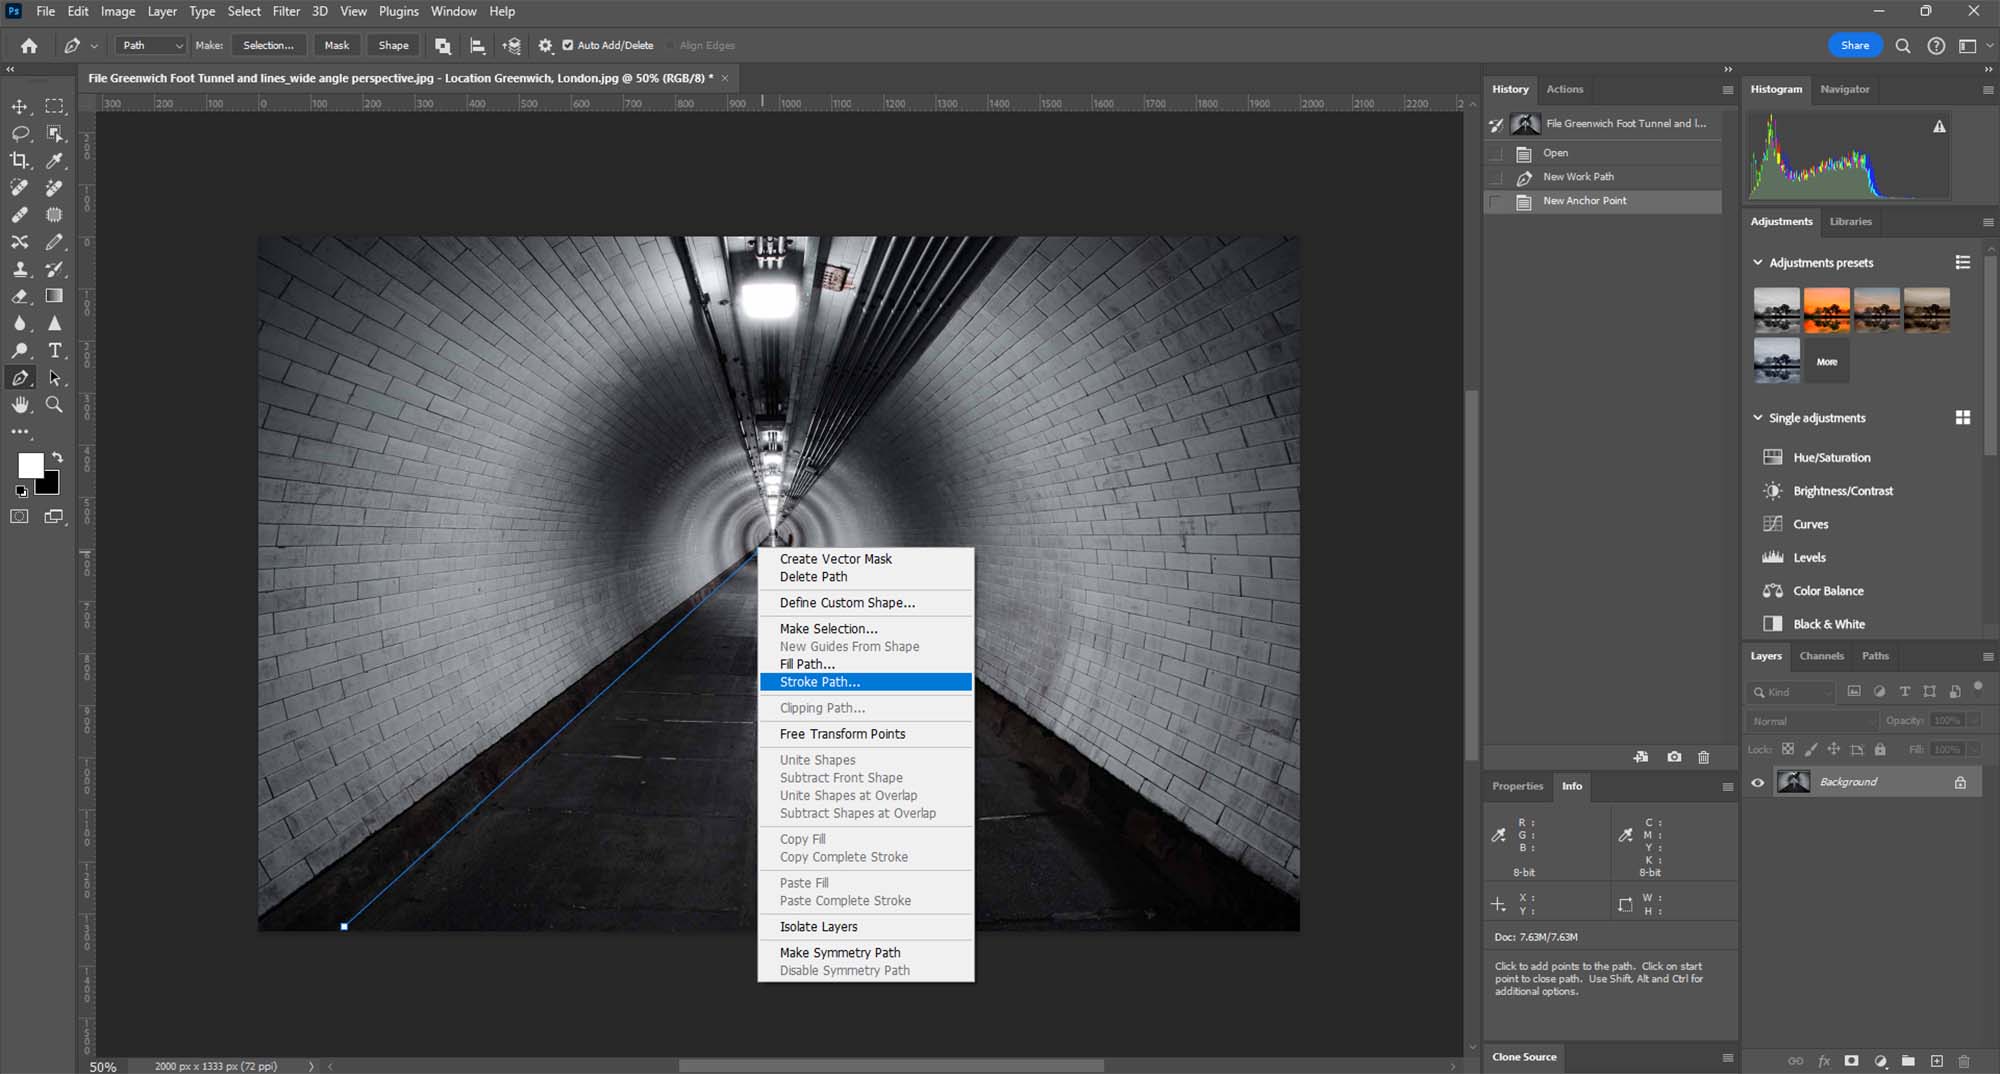
- Creating a Path with Anchors: Click on your image where you want your leading line to start. This creates the first anchor point. Click again where you want the line to go, creating a path between the two points. You can click and drag to create curved lines. Continue this process to trace or create leading lines within your image.
Step 4: Stroking the Path
Choosing the Stroke Path Option: Once you have your desired path, it’s time to turn it into a visible line. Right-click (or Control-click on a Mac) on the path and select ‘Stroke Path’ from the context menu.
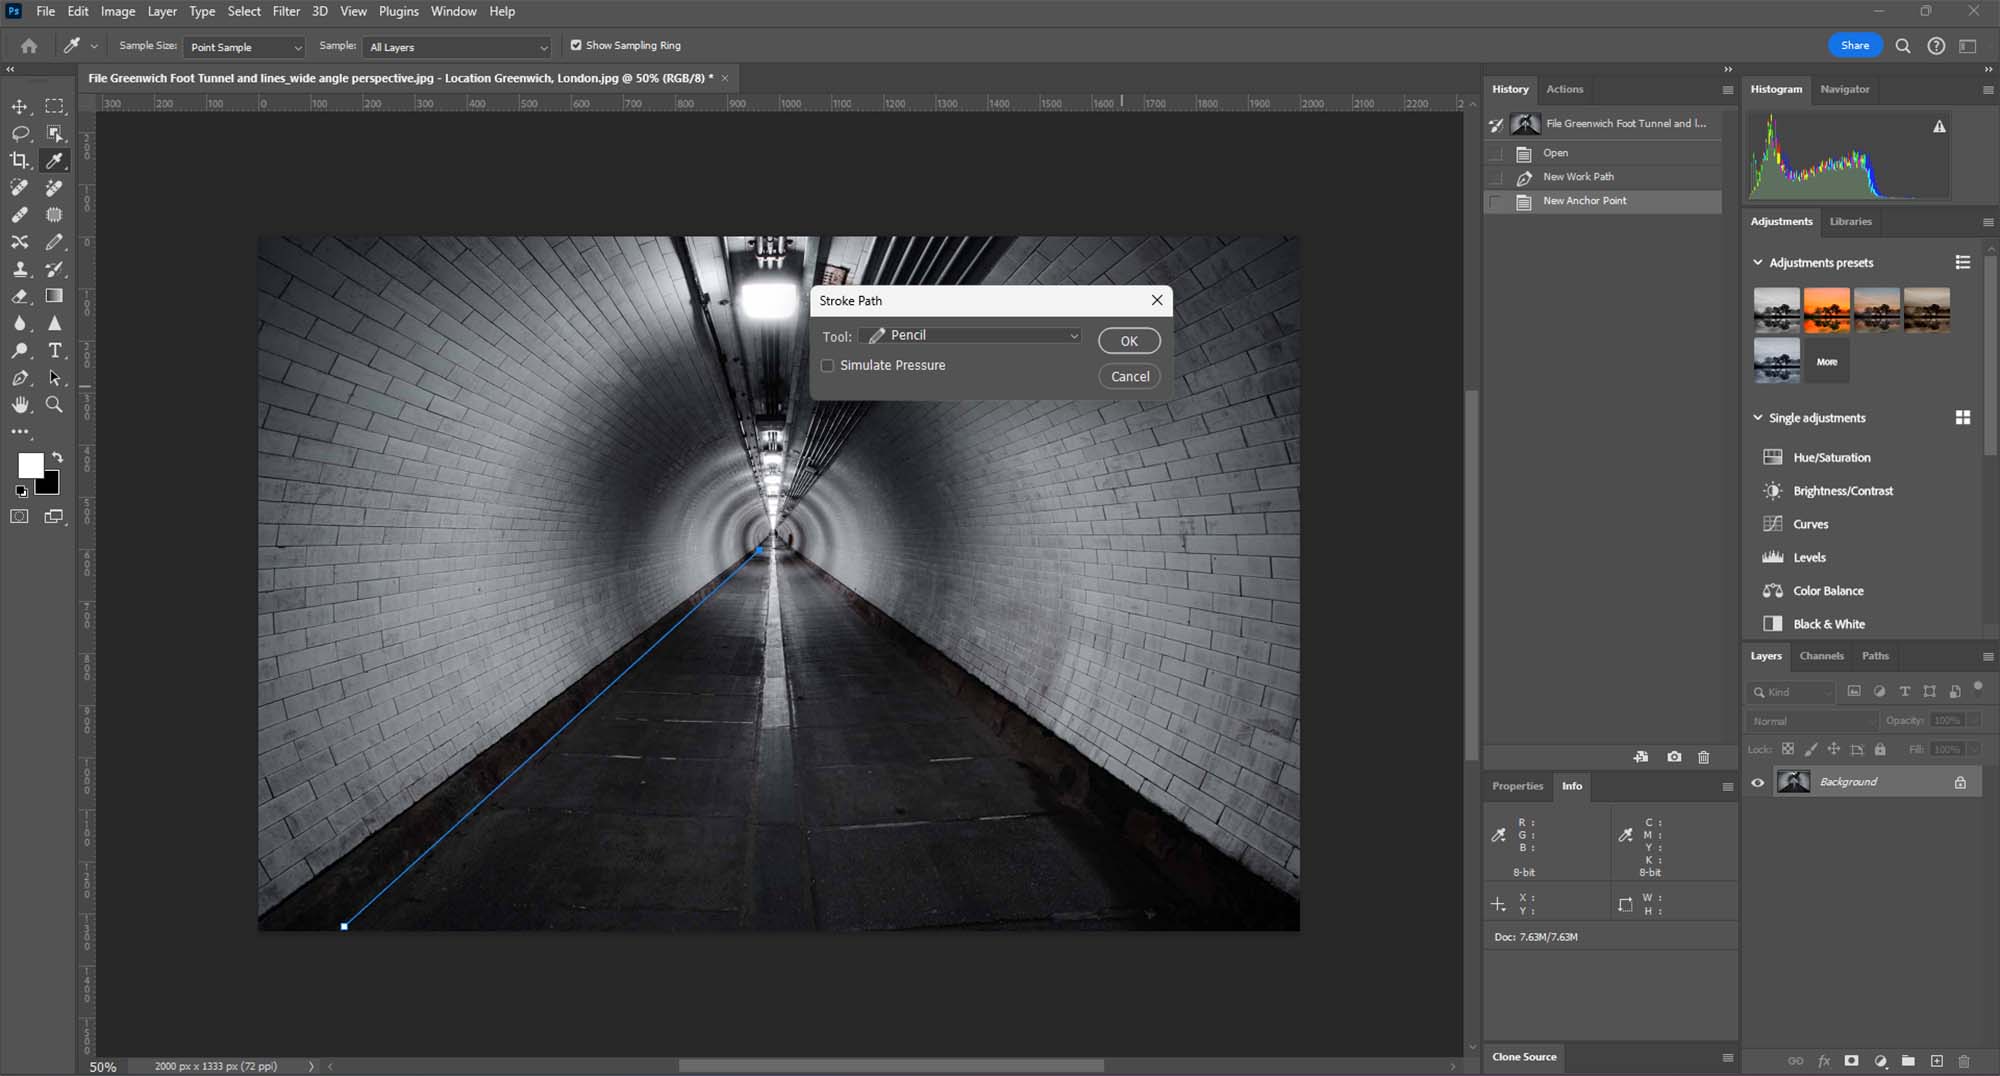
Selecting the Pencil Tool: In the Stroke Path dialog box, choose the Pencil tool. This will create a more defined and solid line. Adjust the size and properties of the Pencil tool beforehand as needed.
Applying the Stroke: After selecting the Pencil tool, click ‘OK’ to apply the stroke to the path. This will render the path as a visible line on your image, creating the effect of leading lines.
Step 5: Removing the Path
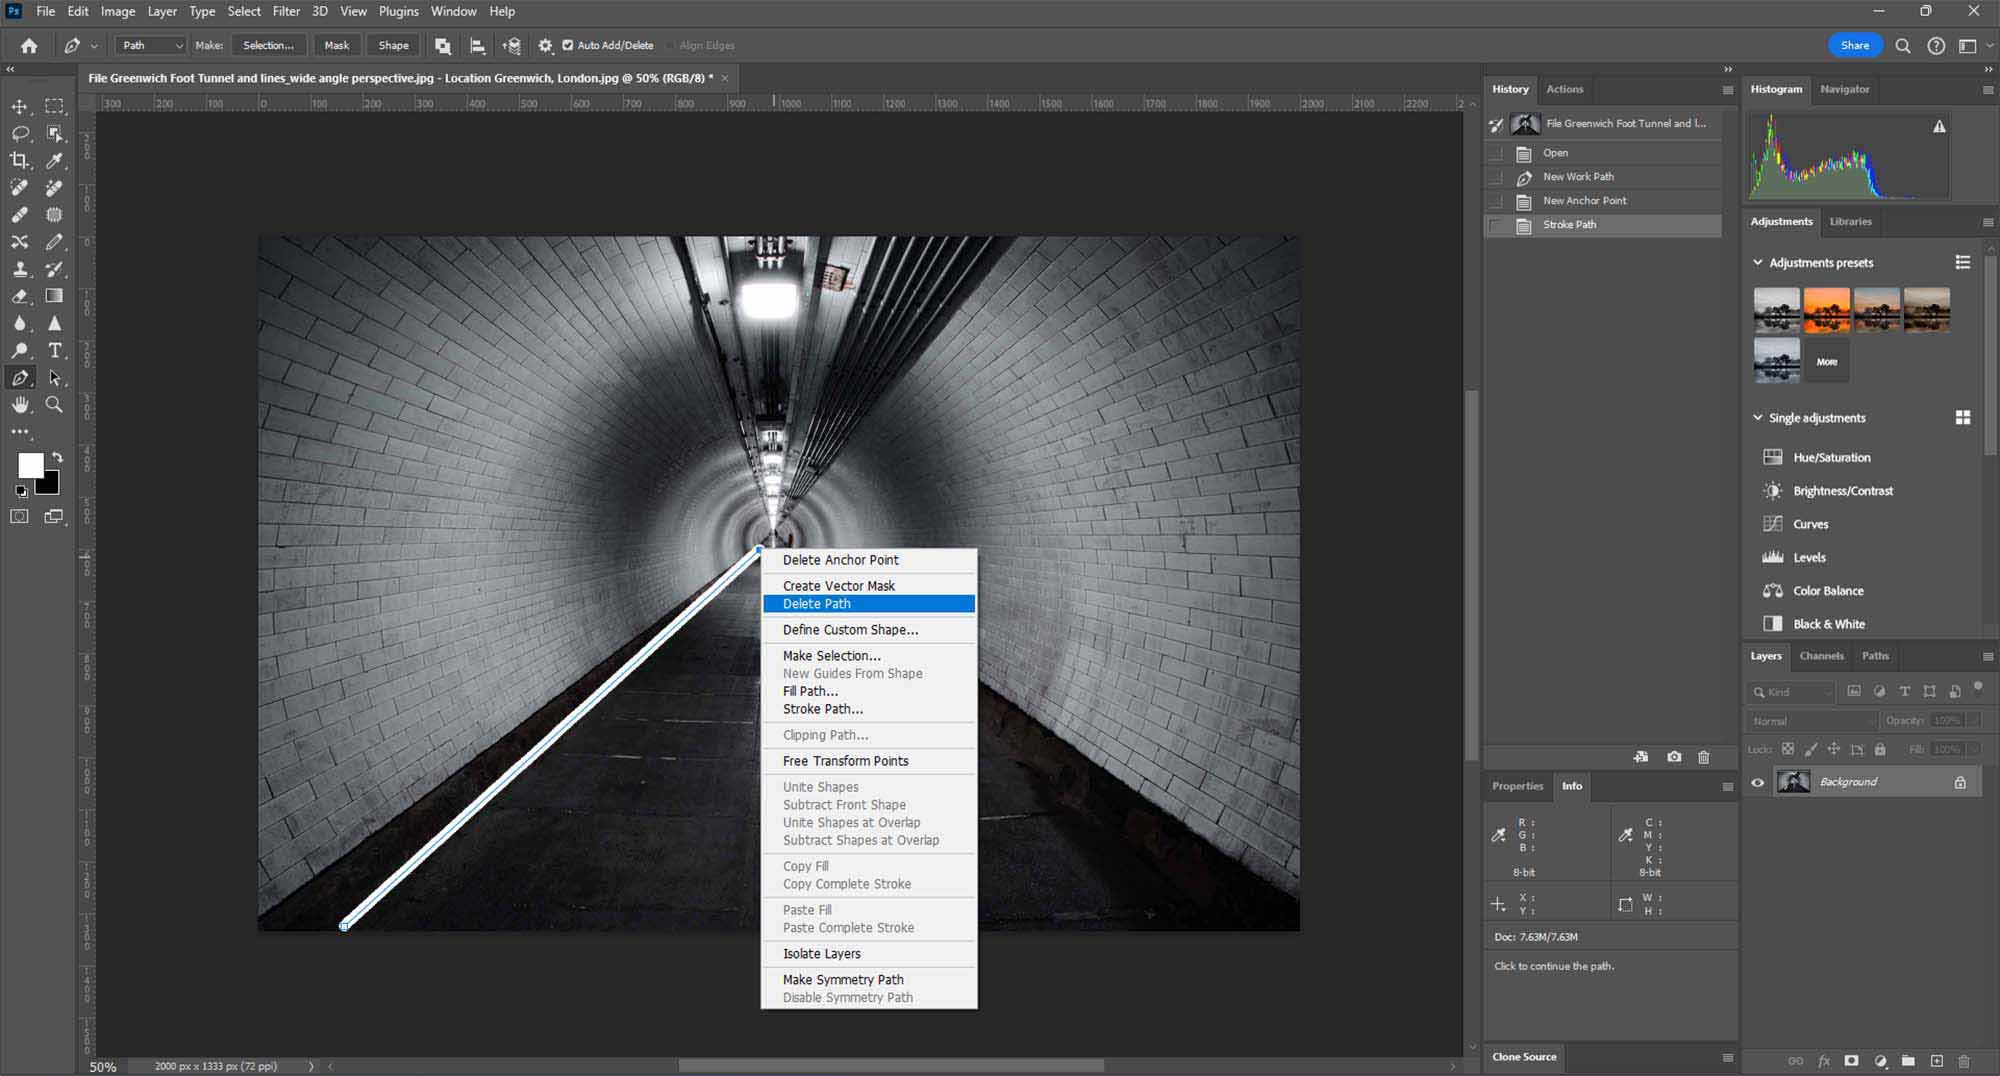
- Deleting the Path: Once the stroke is applied, you don’t need the path anymore. To remove it, either go to the Paths panel and delete the current path or simply hit the ‘Delete’ key while the path is active.
Conclusion
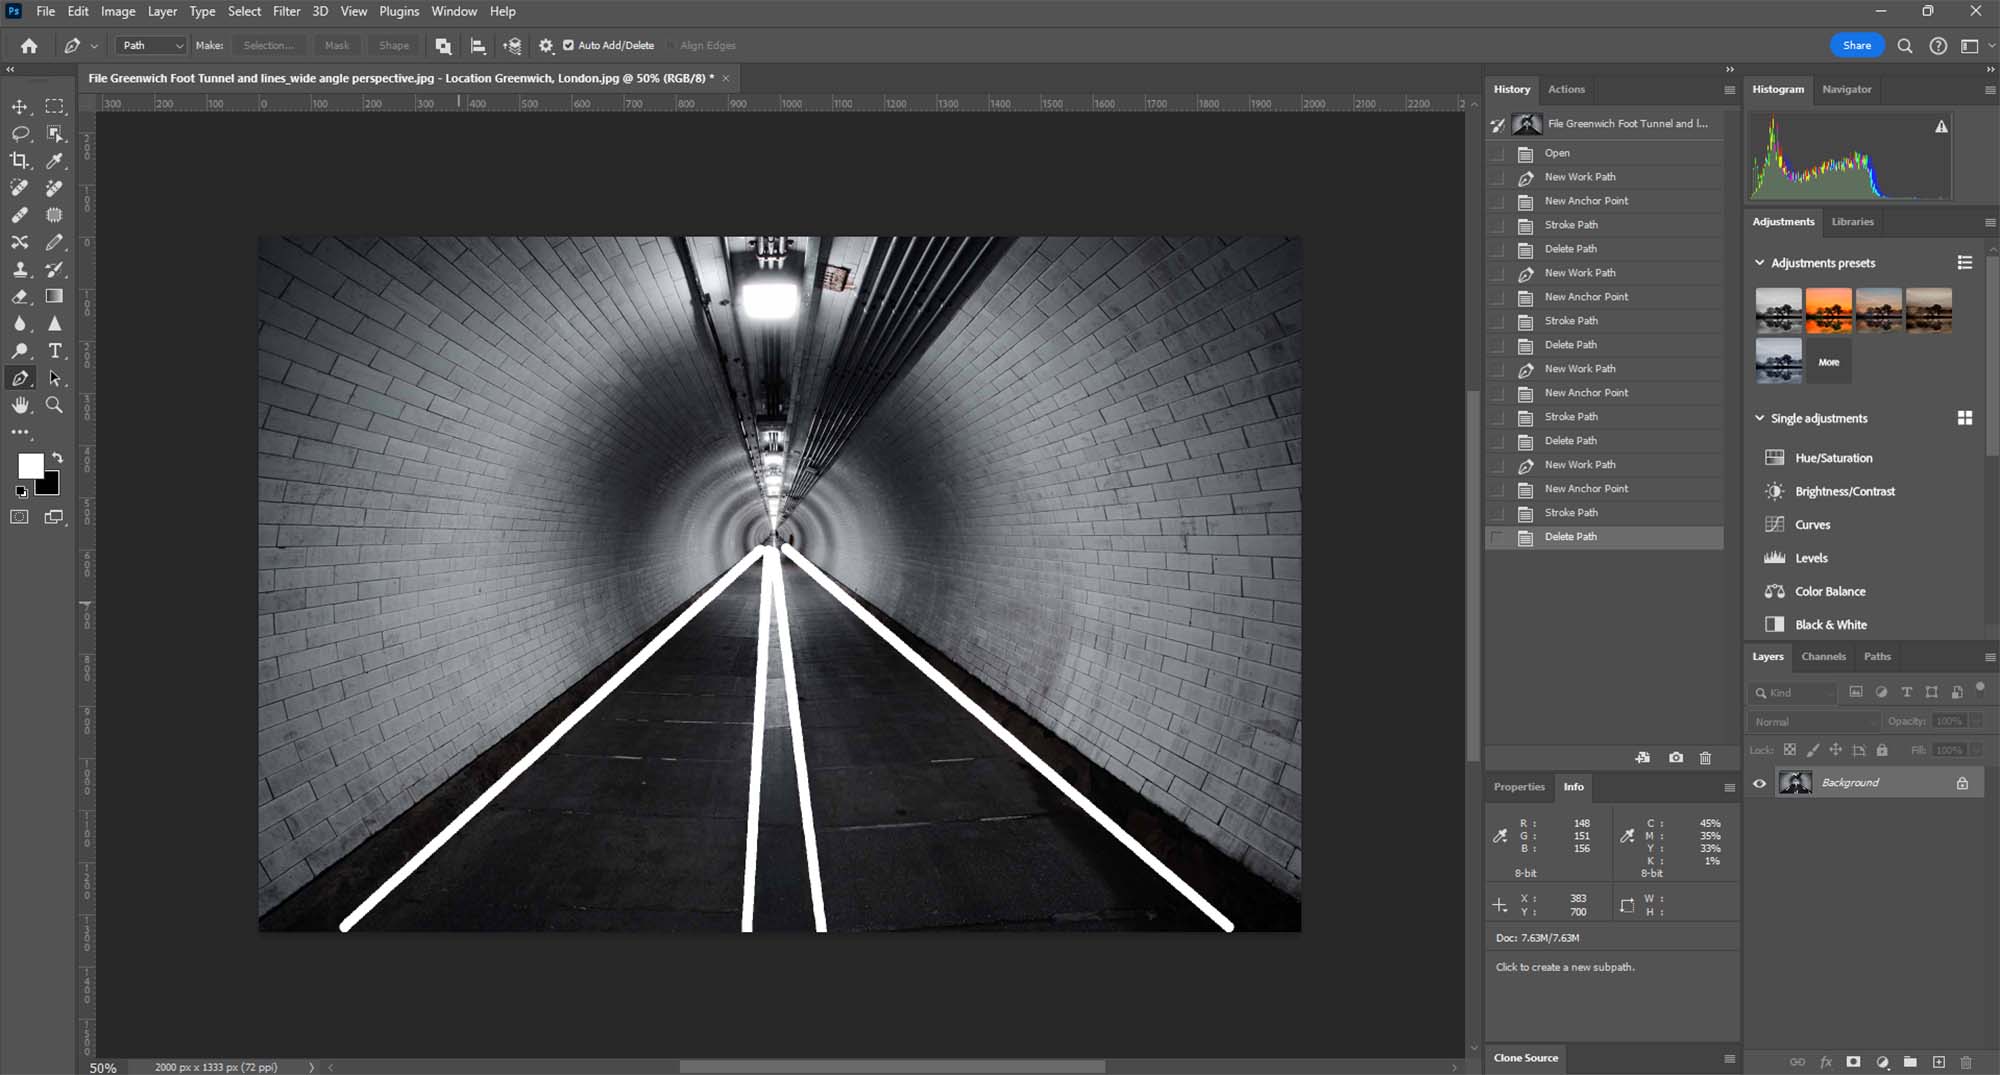
Leading lines are a powerful compositional tool in photography and art, guiding the viewer’s eye through the image. With Photoshop’s Pen Tool, you can create or enhance these lines, giving your image a stronger sense of direction and focus. This technique is particularly useful for landscape, architectural, and street photography, where lines play a crucial role in the composition.
References
O Carroll, B. (2016). 28 Composition Techniques That Will Improve Your Photos. [online] PetaPixel. Available at:
https://petapixel.com/photography-composition-techniques/
[Accessed 12 Dec. 2023]


