How to Let the Eye Wander for Immersive Photos

Introduction: The Intricacy of Complex Scenes

Creating complex scenes in photography is an art that involves arranging multiple elements in a frame in a harmonious yet intricate manner. This guide will delve into how to effectively compose these scenes to captivate and lead the viewer’s eye through a visual journey within your photograph.

Understanding Complex Scene Composition

Complex scene composition is about more than just filling the frame with elements; it’s about creating a narrative, evoking emotions, and guiding the viewer’s eye through the image. The key is to maintain a balance that intrigues without overwhelming.

Creative Process: Building Complex Compositions

  • Identifying Key Elements: Start by identifying the main elements of your scene. These could be subjects, colors, patterns, or textures that you want to highlight.
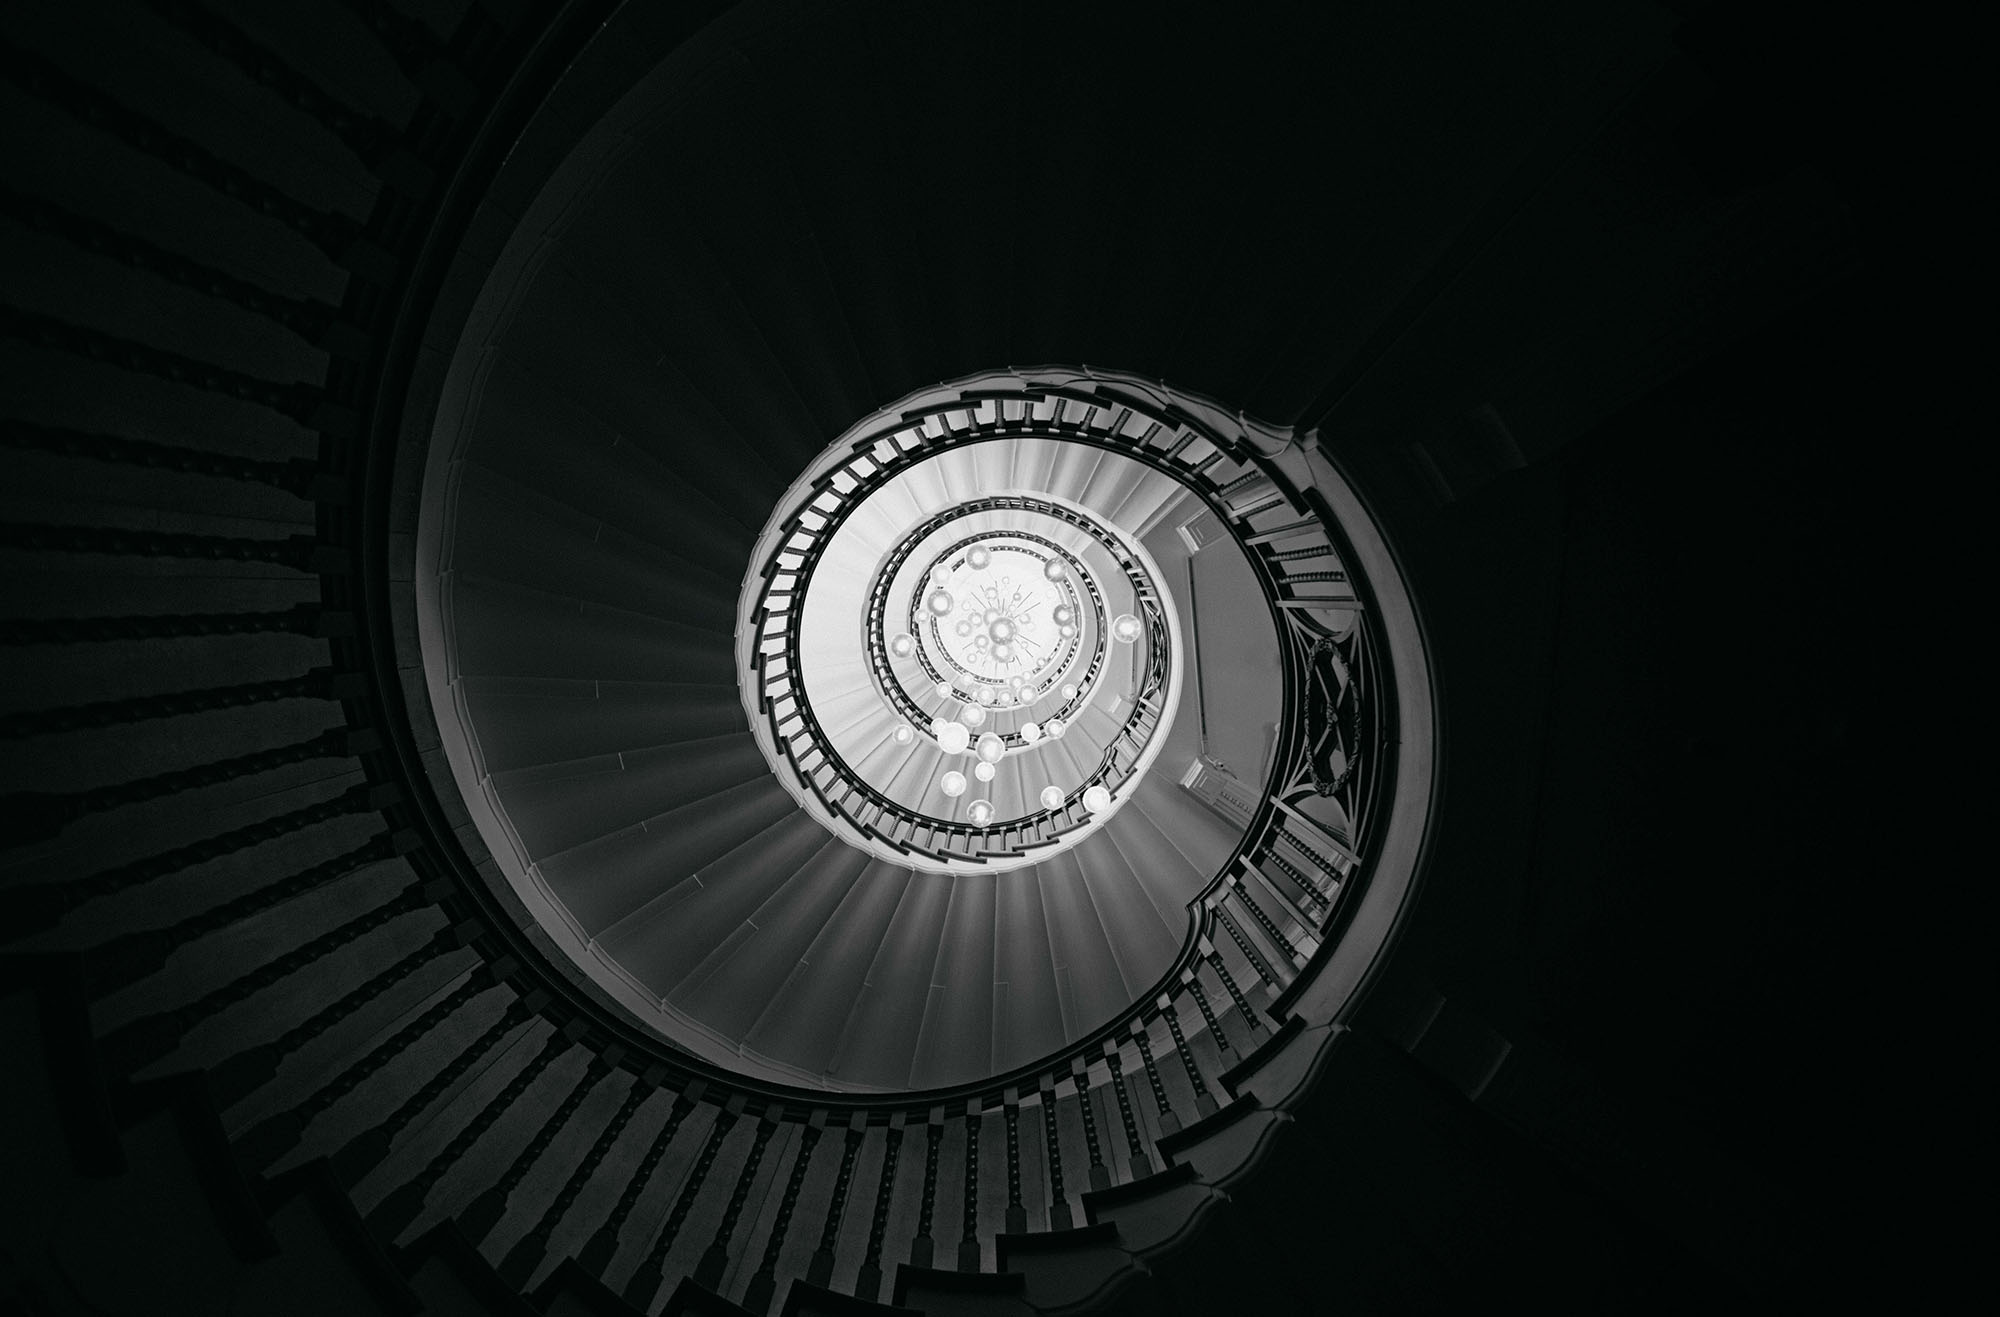
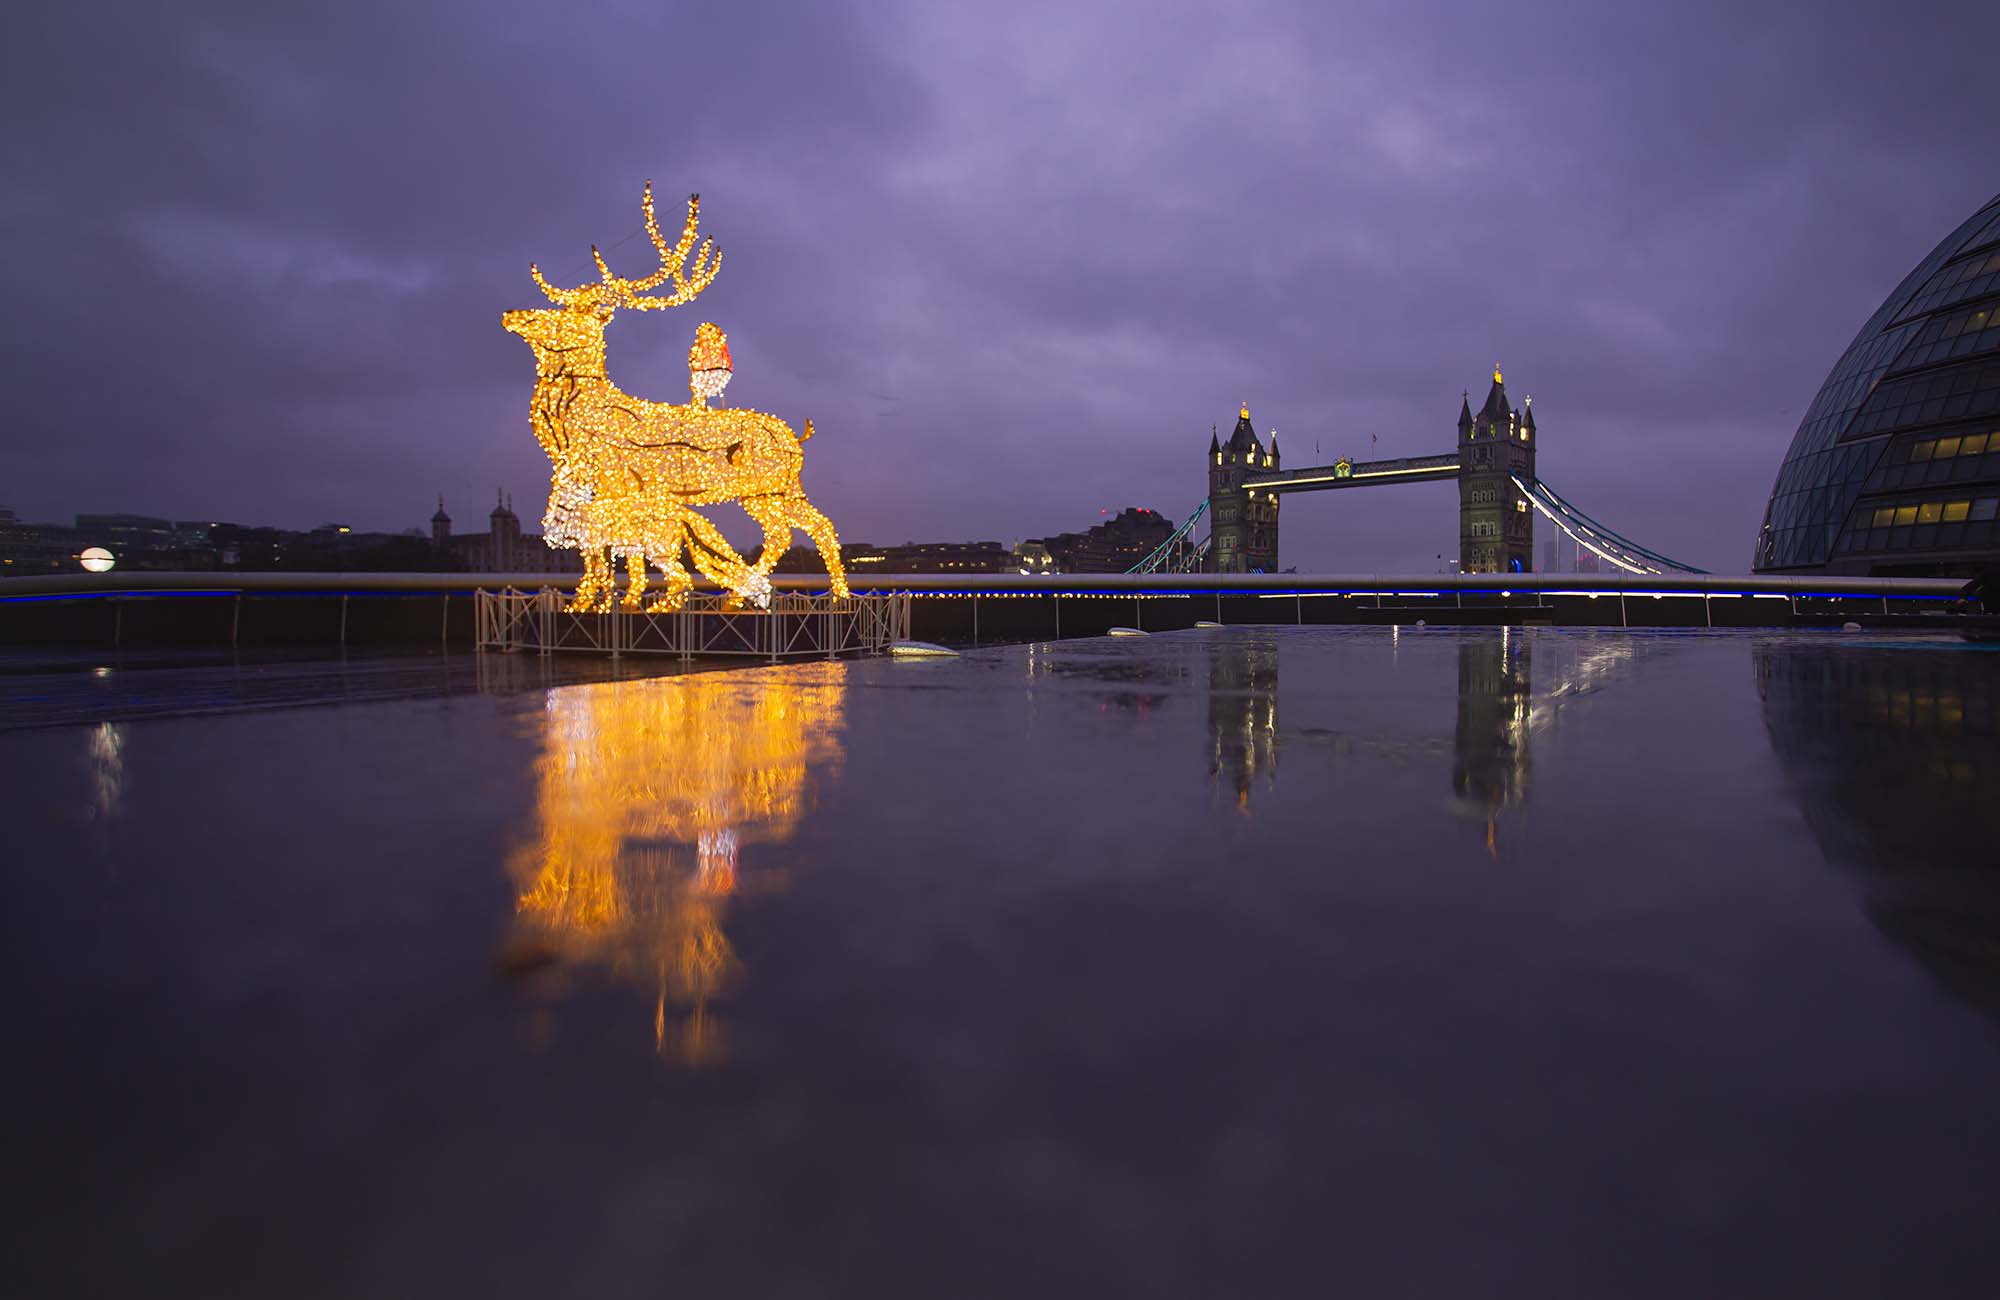
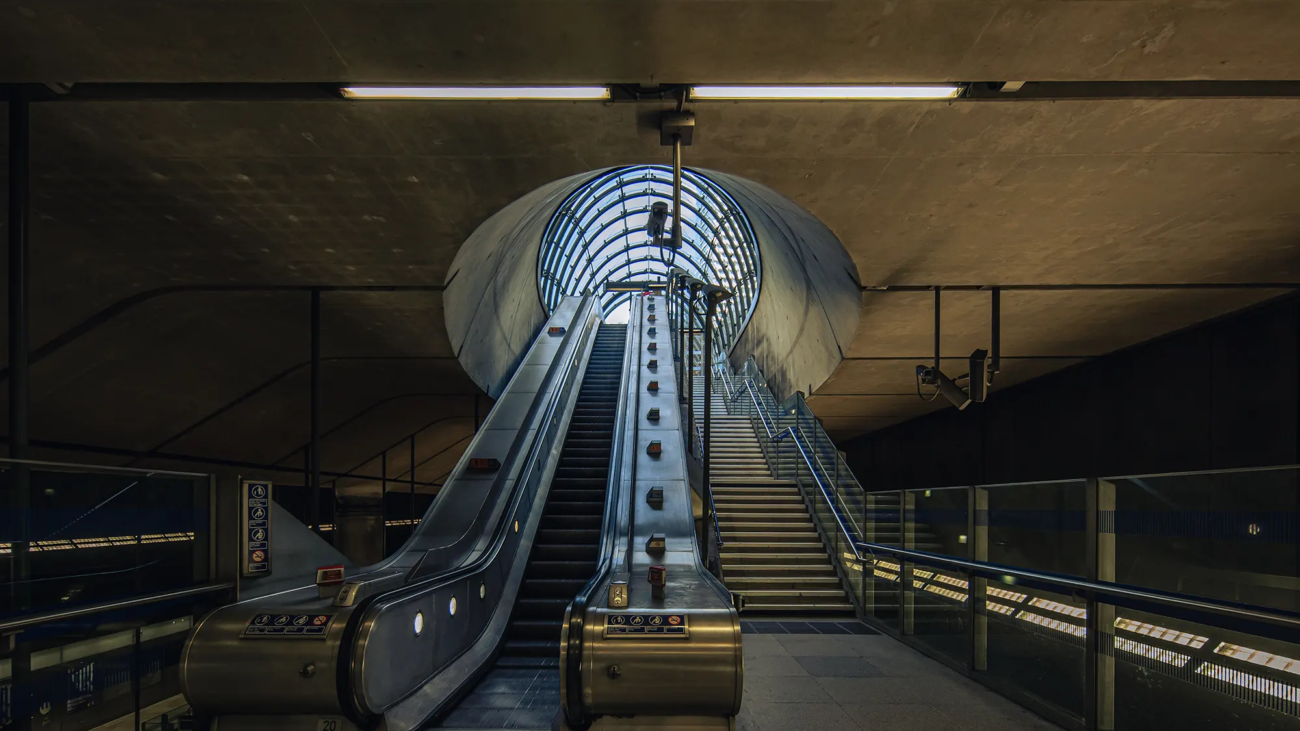
  • Layering Your Composition: Think in terms of layers – foreground, middle ground, and background. Each layer should contribute to the overall scene without cluttering it.
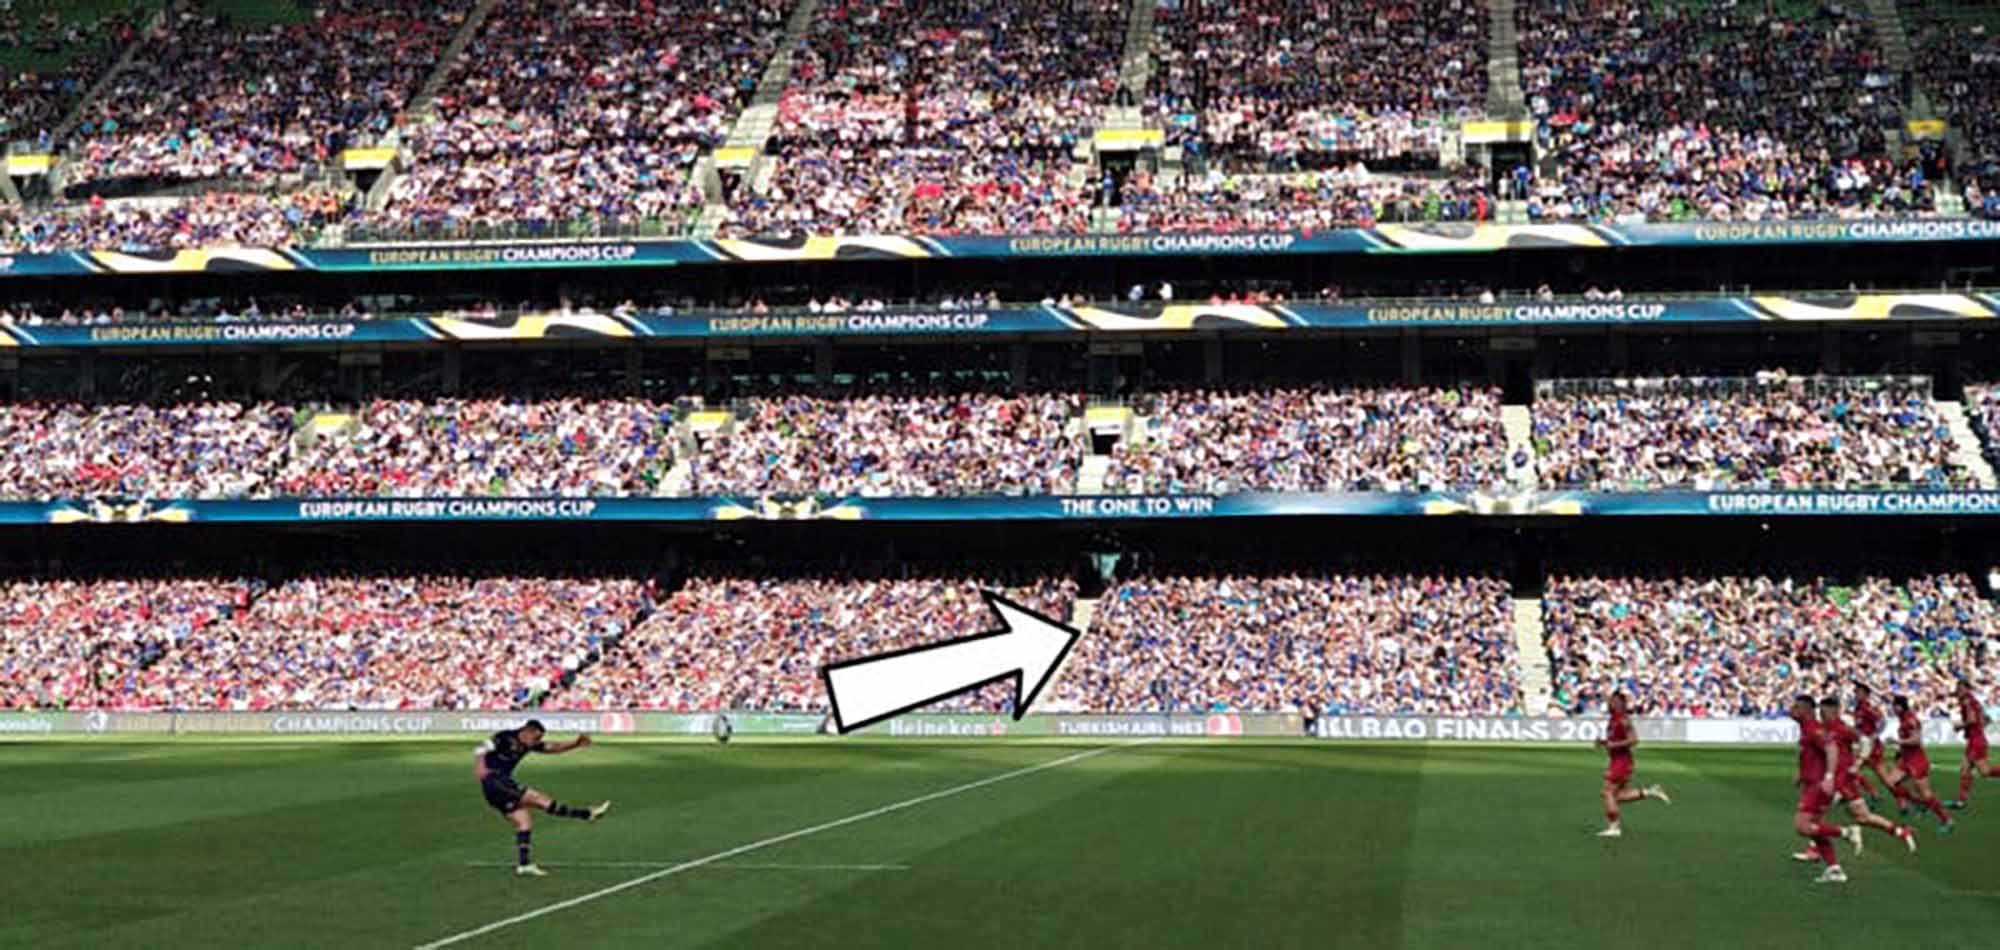
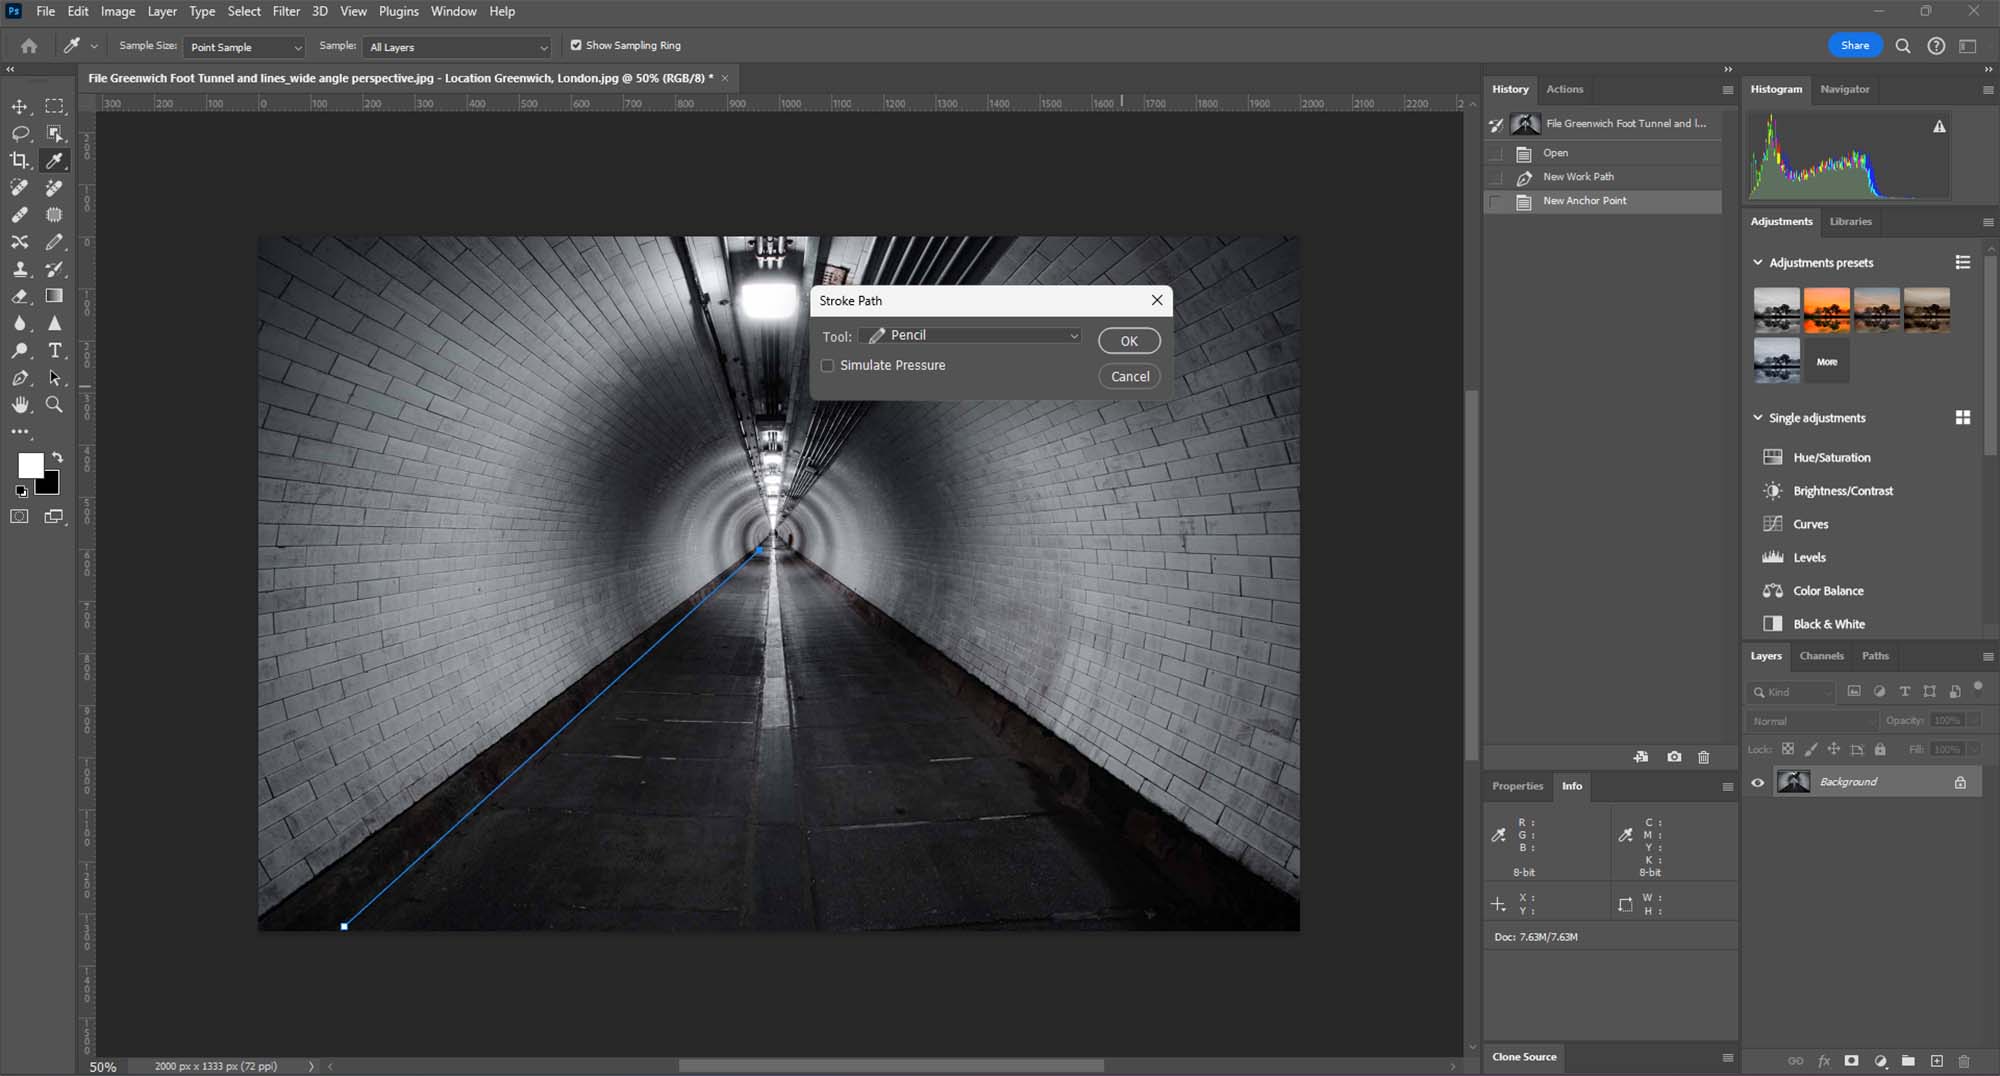
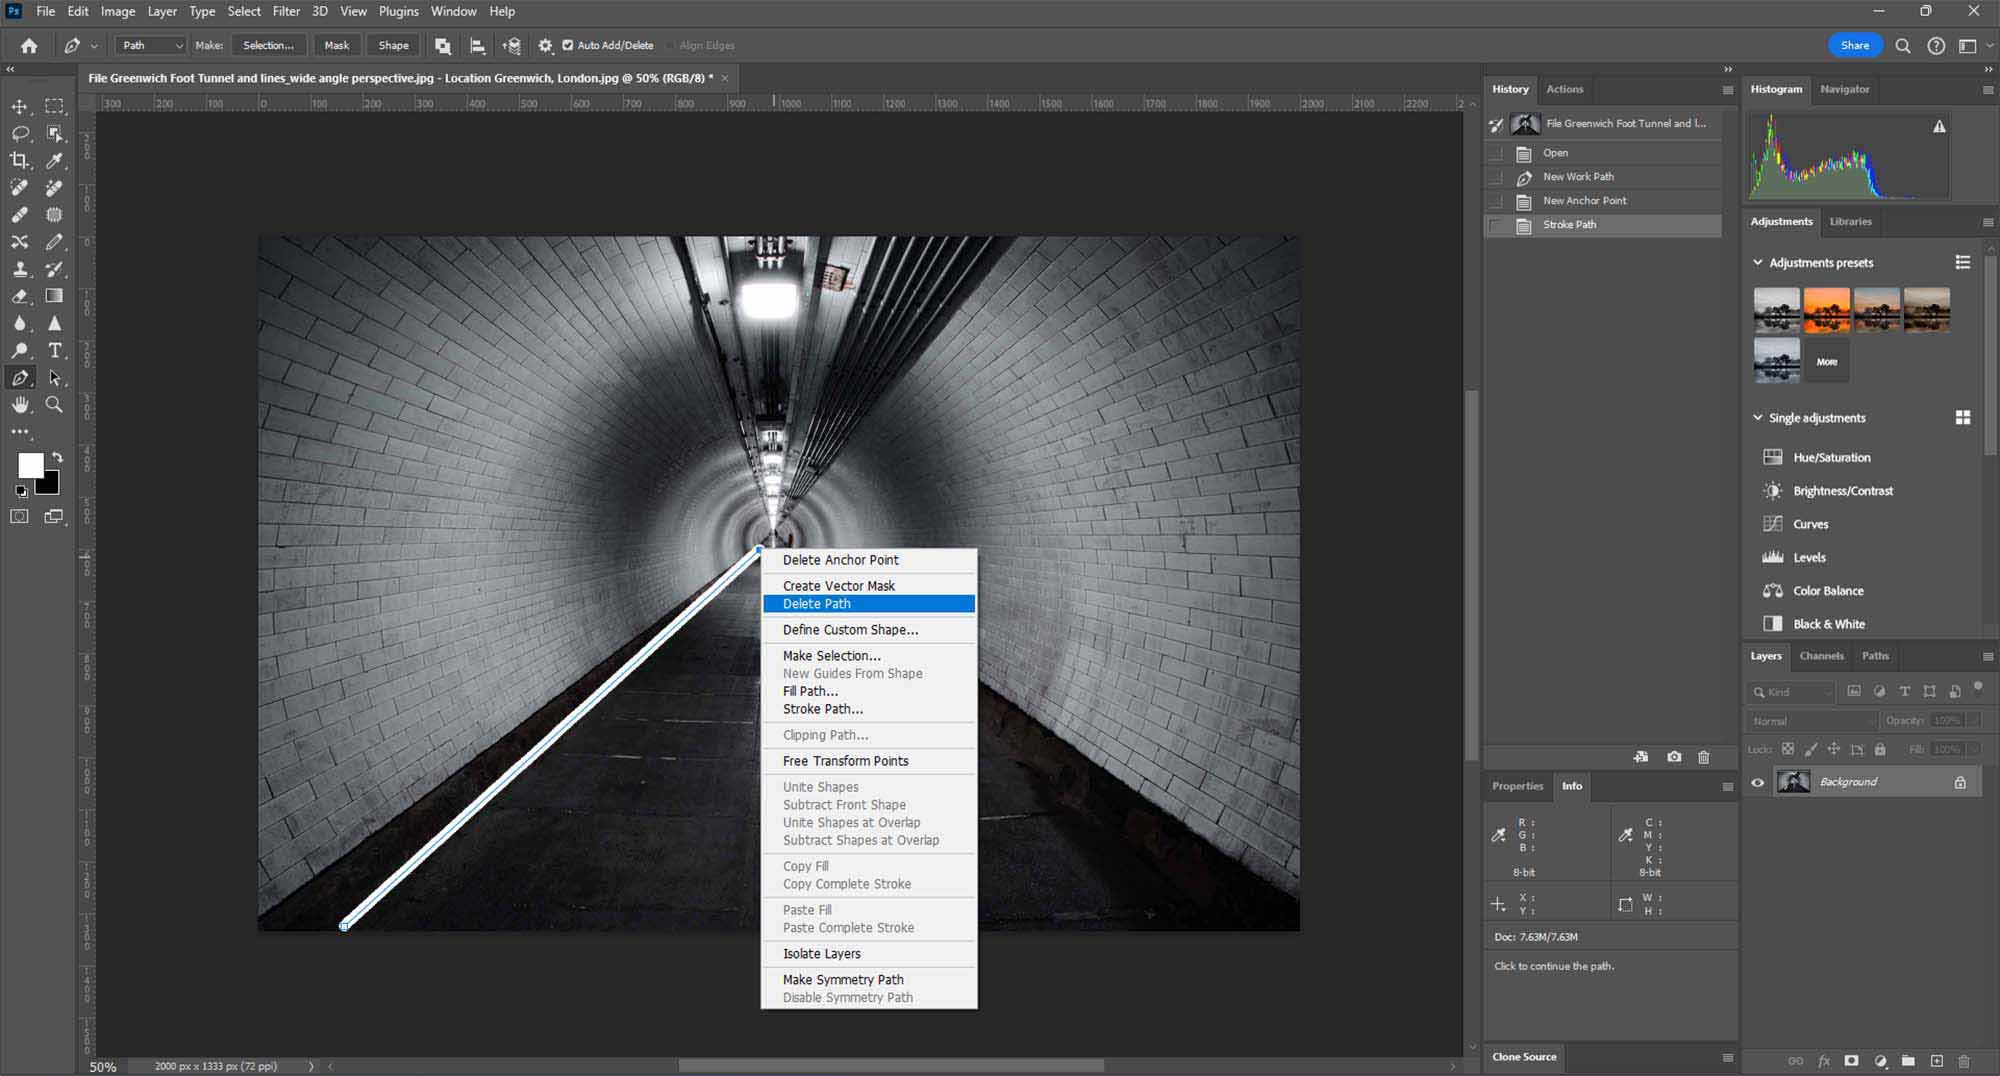
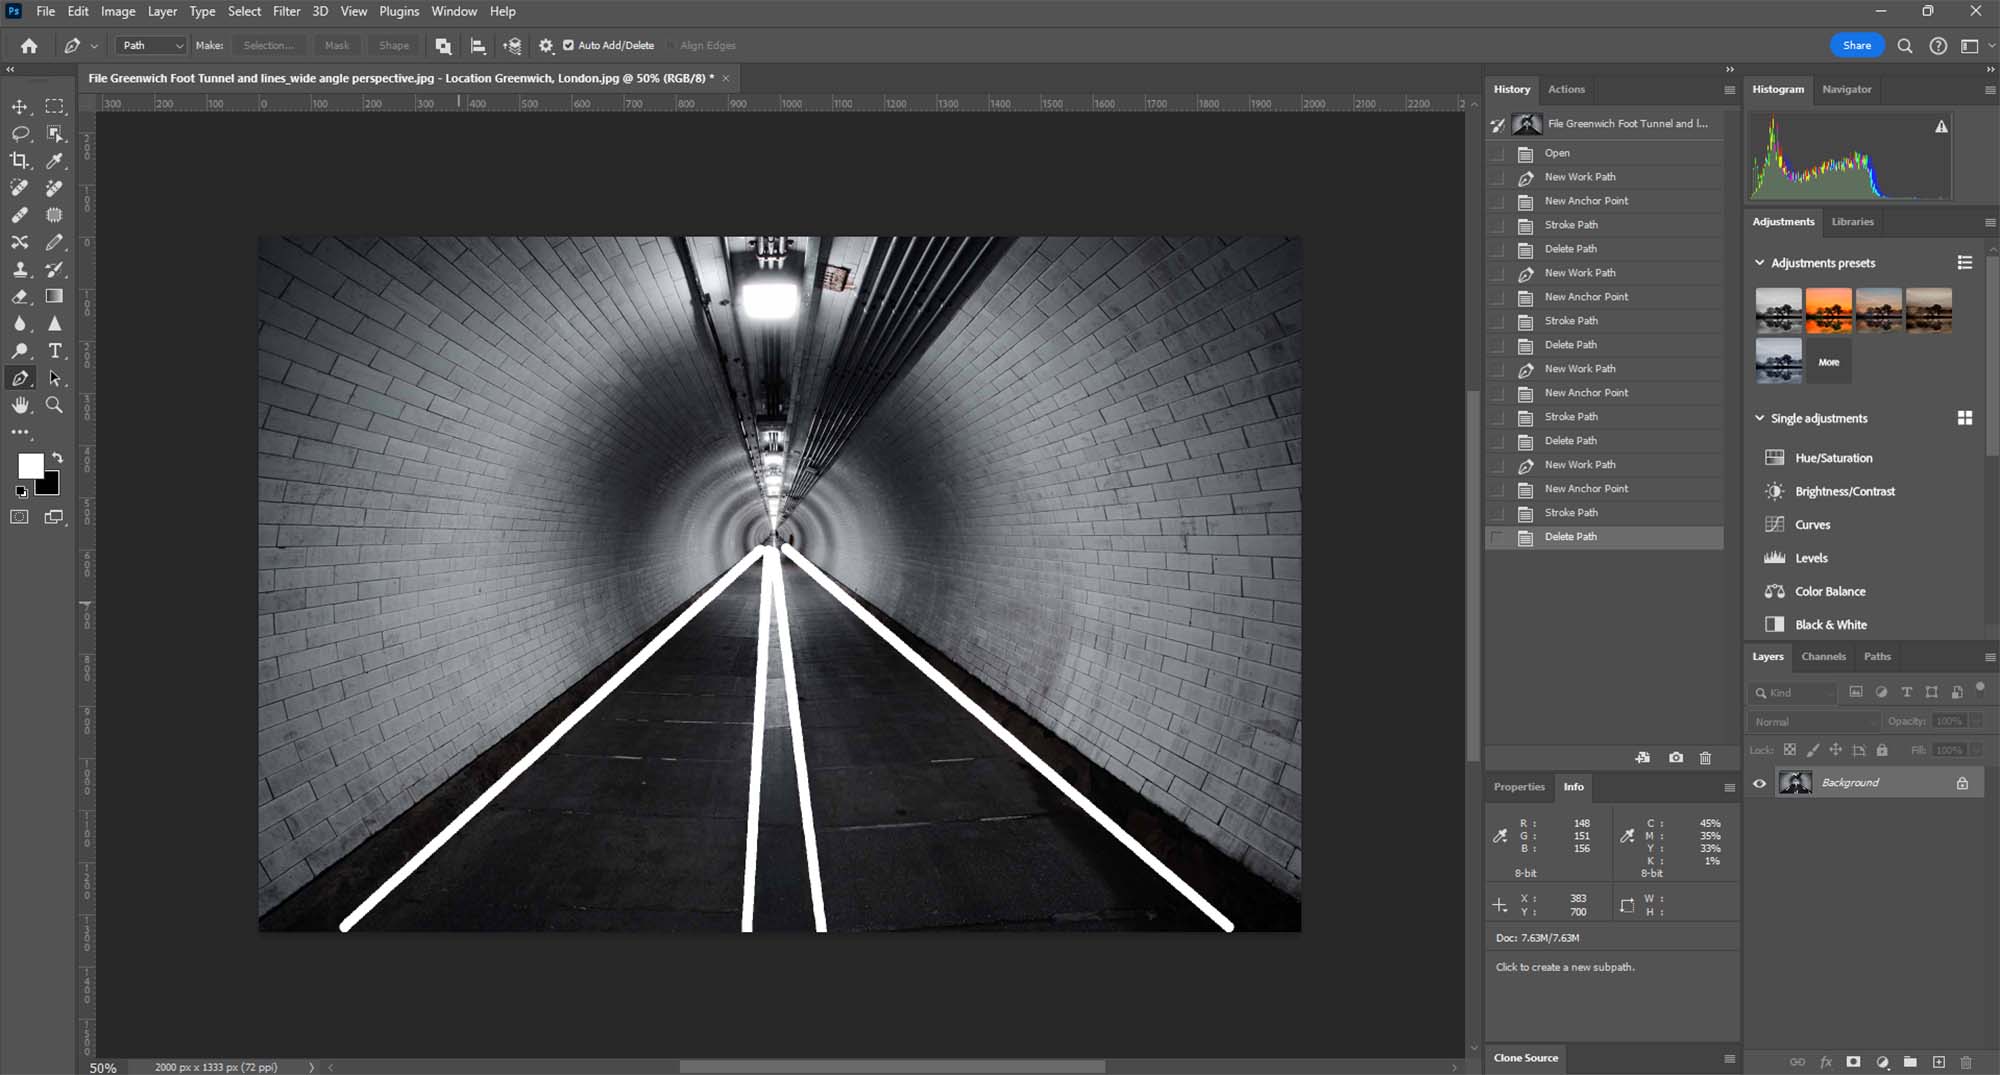
  • Creating Visual Pathways: Arrange elements in a way that creates a natural flow or pathway for the eye to follow through the scene.

Tips for Photographers

  1. Balance is Crucial: Ensure that your composition is balanced. Use color, light, and shadow to create visual harmony amidst the complexity.
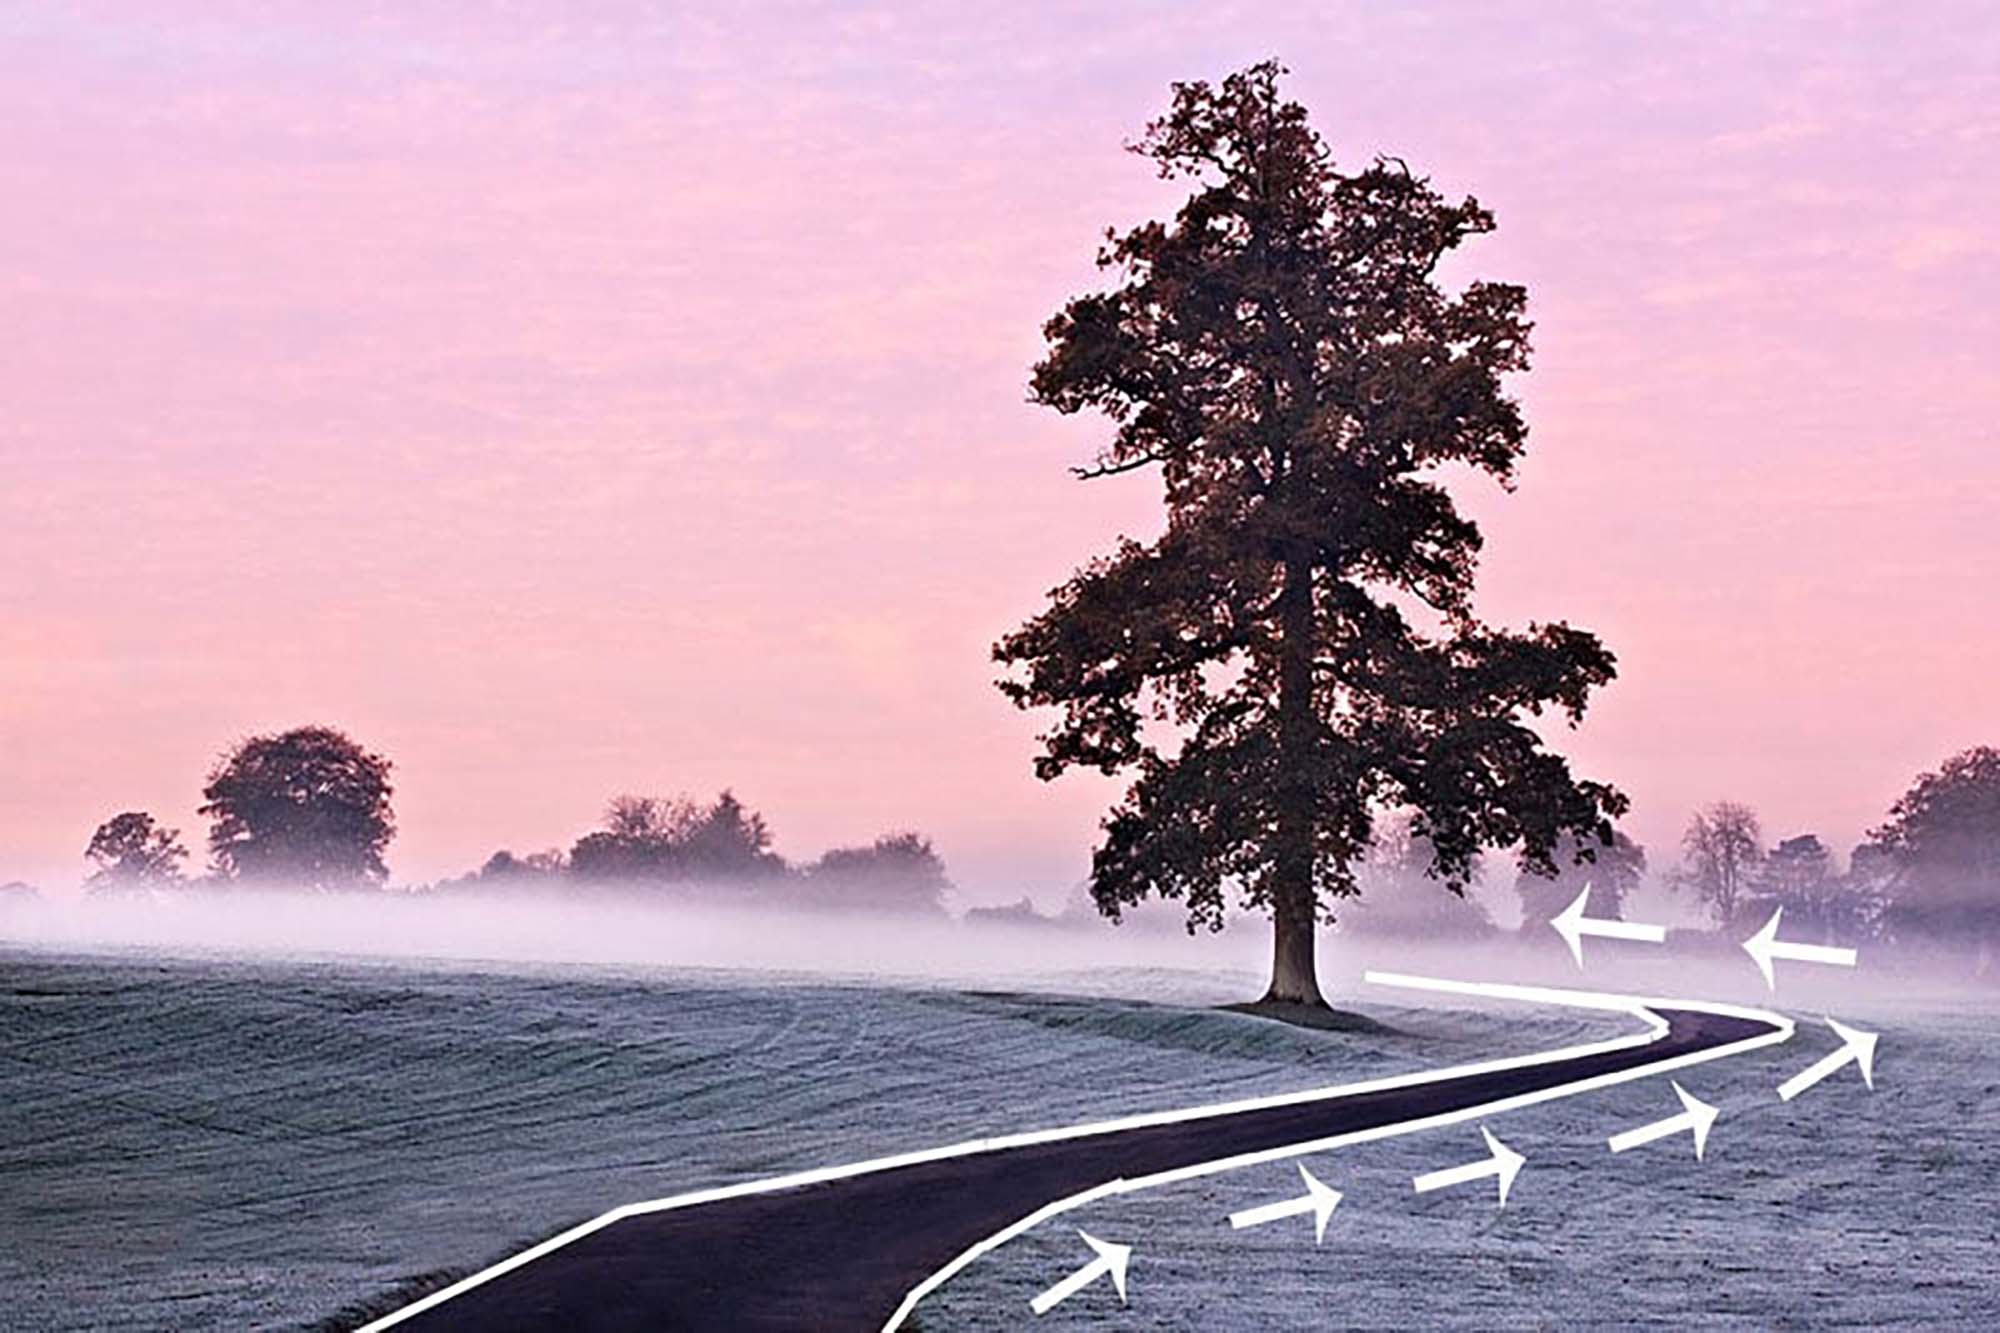
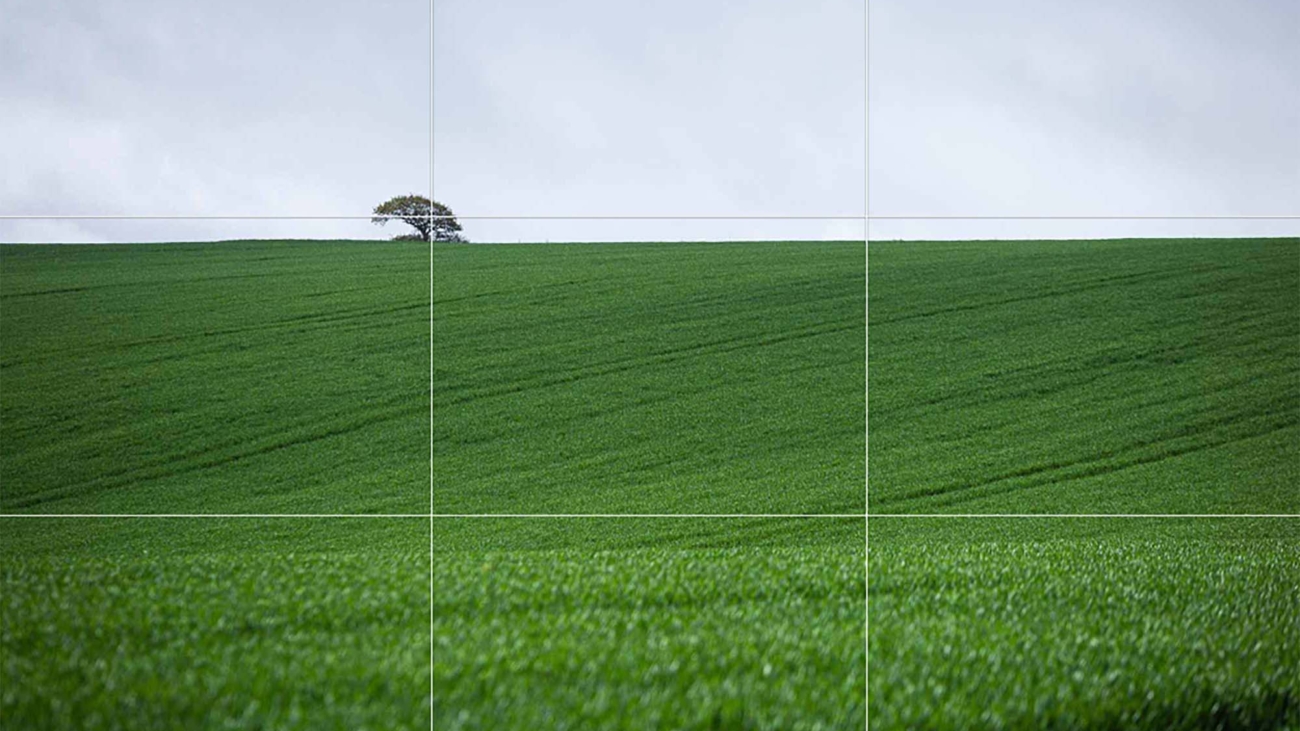
  2. Utilize Leading Lines: Incorporate leading lines to guide the viewer’s eye through the photograph.
  3. Play with Depth of Field: Use depth of field creatively to highlight certain parts of your scene while allowing others to recede into soft focus.
  4. Keep the Viewer Engaged: Arrange elements so that the viewer discovers something new each time they look at the image.

Advanced Techniques in Complex Scene Composition

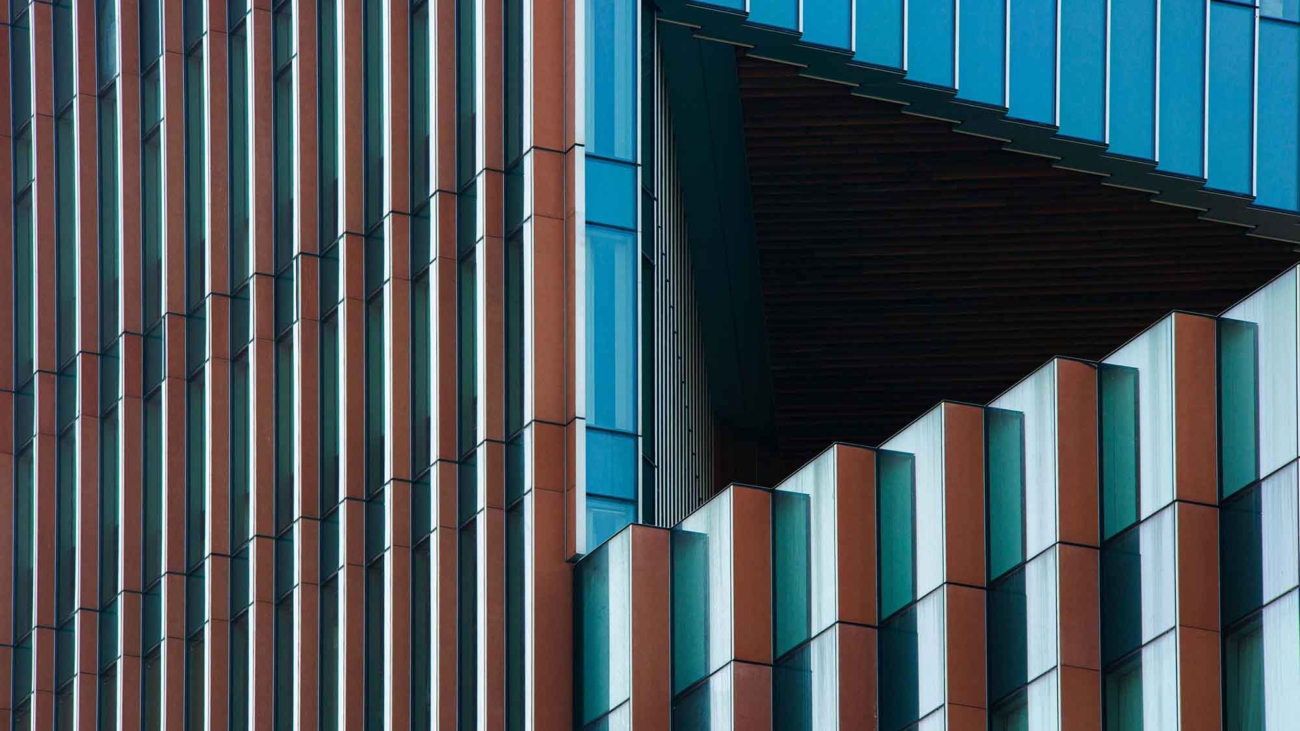
  • Juxtaposition: Use juxtaposition to add interest and contrast within the scene.
  • Color Theory: Apply color theory to create a visual flow and harmony between various elements.
  • Repetition and Patterns: Utilize repetition and patterns to create a rhythm in your composition.

Practical Applications in Various Genres

  • Street Photography: Capture the complexity of urban life, focusing on the interplay between people, architecture, and urban elements.
  • Landscape Photography: Compose layered landscape scenes with elements like trees, rocks, water, and sky to add depth.
  • Event Photography: Capture the hustle and bustle of events, ensuring each element contributes to the story of the event.

Conclusion: The Art of Visual Complexity

Mastering complex scene composition is a journey in learning how to see and convey intricacy in a harmonious way. It challenges photographers to create images that are rich in detail and story, offering new discoveries with every view.

O Carroll, B. (2016). 28 Composition Techniques That Will Improve Your Photos.

References

O Carroll, B. (2016). 28 Composition Techniques That Will Improve Your Photos. [online] PetaPixel. Available at:

https://petapixel.com/photography-composition-techniques/

[Accessed 14 December]

How to Use Backgrounds to Make Your Subject Pop

Introduction: The Power of Backgrounds in Photography

In photography, backgrounds are more than just backdrops; they are storytelling tools that provide context and depth to the subject. This guide explores how to effectively use backgrounds to enhance the narrative quality of your photographs.

Understanding the Role of Backgrounds

A well-chosen background can complement the subject, adding meaning and layers to the story you want to tell. It can set the mood, provide a sense of place, and even offer insights into the subject’s personality or emotions.

Creative Process: Selecting and Utilizing Backgrounds

  • Observing Your Surroundings: Pay attention to the environment around your subject. Look for elements that can add to the narrative of your image.
  • Choosing Complementary Backgrounds: Select backgrounds that complement your subject without overpowering it. Consider how color, texture, and patterns can interact with your subject.
  • Balancing Subject and Background: Ensure that the background doesn’t distract from the subject. Use depth of field and composition techniques to maintain a balance.

Tips for Photographers

  1. Depth of Field Control: Use a shallow depth of field to blur the background and keep the focus on the subject while still providing contextual clues.
  2. Look for Natural Frames: Use elements in the background to naturally frame your subject and draw attention to it.
  3. Consider Lighting: Observe how different lighting conditions affect the background and use it to create the desired mood or effect.
  4. Background as a Storyteller: Think about what the background says about your subject. A busy street can tell a different story than a tranquil park.

Advanced Techniques in Background Utilization

  • Layering: Create layers in your composition by positioning subjects at different distances from the camera, using the background to add depth.
  • Reflective Surfaces: Utilize mirrors, glass, or water in your background to add an interesting dimension to your images.
  • Negative Space: Sometimes, a minimalistic background can be a powerful tool, using negative space to emphasize the subject.

Practical Applications in Various Genres

  • Portrait Photography: Use backgrounds that reflect the personality or mood of the subject, like an artist in a studio or a musician in a concert hall.
  • Landscape Photography: Let the background tell the story of the location, highlighting the unique features of the landscape.
  • Street Photography: Capture candid moments against the backdrop of urban life, using the environment to add context to human interactions.

Conclusion: Crafting Images with Contextual Depth

By effectively using backgrounds, photographers can transform their images from simple shots to compelling stories. A background that provides context and complements the subject can elevate the narrative depth of your photographs.

Aviva Stadium with Rule of Space.

How to Use the Rule of Space for Natural-Looking Photos

Introduction: The Dynamics of the Rule of Space

The Rule of Space in photography is a powerful compositional technique that involves using space in the direction that a subject is facing or moving. This approach adds a sense of motion and narrative to your images, creating a more engaging and dynamic composition.

Understanding the Rule of Space

The Rule of Space is about anticipating movement and direction in a still image. It involves leaving empty space in the frame in the direction a subject is looking or moving towards, which can be a person, an animal, a vehicle, or even a gaze.

Aviva Stadium with Rule of Space.

O Carroll, B. (2016). 28 Composition Techniques That Will Improve Your Photos.

Creative Process: Implementing the Rule of Space

  • Identifying Directional Cues: Observe your subject and determine the direction of movement or the point of focus. This could be the direction a person is looking, walking, or an object is moving.
  • Framing with Purpose: Frame your shot to include space in front of your subject. This space should be proportional to the intensity of the movement or gaze.
  • Balancing the Composition: While including space, ensure that the overall composition is balanced and the subject is not lost in the frame.

Tips for Photographers

  1. Understand Subject Dynamics: Study your subject’s behavior or movement patterns to better anticipate where to leave space.
  2. Use Leading Lines: Combine the Rule of Space with leading lines to enhance the sense of direction and movement.
  3. Experiment with Negative Space: Use negative space effectively to emphasize the direction in which the subject is heading or looking.
  4. Adjusting Position: Sometimes, repositioning yourself can change the dynamic of the space and create a more compelling composition.

Advanced Techniques in Using the Rule of Space

  • Motion Blur: Experiment with motion blur to emphasize the movement, making the directional space more impactful.
  • Juxtaposition: Place another subject in the negative space to create a juxtaposition that adds depth to the narrative.
  • Layering Elements: Incorporate multiple layers in your composition to add depth, using the Rule of Space to guide the viewer through these layers.

Practical Applications in Various Genres

  • Sports and Wildlife Photography: Capture athletes or animals in motion, leaving space in their movement direction.
  • Street Photography: Document people in urban settings, considering the direction of their movement or gaze.
  • Landscape Photography: Use natural elements like rivers or paths to guide the eye, applying the Rule of Space to lead towards a focal point.

Conclusion: Expanding the Visual Narrative

The Rule of Space is more than a compositional guideline; it’s a storytelling tool that adds life and movement to your images. It encourages viewers to engage with the photo, imagining what lies beyond the frame.

References

O Carroll, B. (2016). 28 Composition Techniques That Will Improve Your Photos. [online] PetaPixel. Available at:

https://petapixel.com/photography-composition-techniques/

[Accessed 13 December]

Unique upward view at Goodge Street.

Low Angle Photography: How To Create Powerful Heroic Shots

Introduction: The Power of Low-Angle Photography

Shooting from below is a dynamic approach to photography that involves taking pictures from a lower vantage point, looking up at your subject. This angle can drastically change the viewer’s perception, adding drama, grandeur, or even a sense of awe to your images.

Understanding Low-Angle Shots

Low-angle shots are not just about crouching down; they’re about reimagining the world from a different point of view. This perspective can make ordinary subjects look imposing and give a sense of scale and importance that standard eye-level shots might not achieve.

Unique upward view at Goodge Street.

Creative Process: Mastering the Low-Angle Shot

  • Choosing Your Subject: Look for subjects that benefit from an exaggerated sense of scale or importance. Buildings, trees, and statues are great examples.
  • Positioning and Angle: Experiment with various positions, aiming to shoot upwards at an angle that captures the essence of the subject.
  • Incorporating the Sky: Use the sky as a background to isolate your subject and add a sense of space and openness.

Tips for Photographers

  1. Lens Choice: Wide-angle lenses are ideal for low-angle shooting as they can capture more of the scene and exaggerate perspective.
  2. Focus on Foreground Elements: Incorporate interesting foreground elements to add depth to your low-angle photographs.
  3. Mind the Background: Be aware of what’s in your background. A clear sky can make a great backdrop, while a cluttered background can distract from your subject.
  4. Stability Is Key: Use a tripod or stabilize your camera against a solid surface to avoid camera shake, especially in low light conditions.

Advanced Techniques in Low-Angle Photography

  • Reflections: Look for puddles, glass, or other reflective surfaces to add an extra dimension to your low-angle shots.
  • Silhouettes: Shooting against the light can create striking silhouettes that add drama to your low-angle images.
  • Architectural Dynamics: Use low angles to capture the lines and curves of buildings, creating dynamic architectural shots.

Practical Applications in Various Genres

  • Architectural Photography: Emphasize the height and grandeur of buildings.
  • Nature and Wildlife: Capture the scale and majesty of natural landscapes or the imposing presence of wildlife.
  • Street Photography: Add an element of intrigue to everyday scenes, capturing them from a unique, upward perspective.

Conclusion: Elevating Your Photographic Perspective

Shooting from below allows photographers to explore a world of unique perspectives and compelling compositions. It challenges the norms of photography and encourages a fresh, creative approach to capturing images.

Leading lines in photography composition.

Want Better Photos? Use Leading Lines Like This

Want better photos? Use leading lines like this

Introduction: The Power of Leading Lines

Leading lines are a foundational element in the art of photographic composition. They act as visual guides, leading the viewer’s eye through the image and towards the main subject or focal point. This technique is incredibly effective in creating a sense of movement and depth, making your photographs more engaging and dynamic.

Understanding Leading Lines

Leading lines can be anything in your scene that creates a line or path, such as roads, fences, shorelines, or architectural elements. They can be straight, curved, diagonal, or even zigzagged. The key is how these lines guide the viewer’s eye and how they interact with the other elements in your frame.

Leading lines in photography composition.

O Carroll, B. (2016). 28 Composition Techniques That Will Improve Your Photos.

Creative Process: Implementing Leading Lines

  • Identifying Lines in Your Environment: Begin by observing your surroundings and identifying potential leading lines. Pay attention to how these lines interact with the scene and your subject.
  • Strategic Placement: Position your camera so that the leading lines start from the edge of your frame and guide towards your main subject. Experiment with different angles and perspectives.
  • Balancing the Composition: Ensure that your leading lines enhance, not overpower, the main subject. The lines should be a part of the story, not the entire story.

Tips for Photographers

  1. Use Lines to Create Depth: Leading lines can add depth to a flat image, creating a more three-dimensional feel.
  2. Experiment with Different Types of Lines: Not all leading lines need to be obvious. Sometimes subtle lines, like a row of trees or a pattern on a floor, can be very effective.
  3. Combine with Other Composition Techniques: Leading lines work well when combined with other composition rules like the Rule of Thirds or Framing.
  4. Pay Attention to Line Direction: The direction of the lines can affect the mood of the image. For example, vertical lines can convey power and strength, while curved lines can create a sense of calm and flow.

Advanced Techniques in Using Leading Lines

  • Leading Lines in Portraits: Use environmental elements to guide the viewer’s eye towards the subject in portrait photography.
  • Urban and Architectural Photography: Urban landscapes are filled with leading lines. Use them to create compelling compositions in cityscapes.
  • Natural Leading Lines: In landscape photography, use natural elements like rivers, coastlines, or rows of trees as leading lines.

Practical Applications in Various Genres

  • Landscape Photography: Use paths, rivers, or mountain ridges to lead the eye through the landscape.
  • Street Photography: Streets, sidewalks, or architectural features can create dynamic leading lines in urban settings.
  • Architectural Photography: Use the lines of buildings, windows, and stairs to guide the viewer’s eye.

Conclusion: Elevating Your Photographic Vision

Understanding and utilizing leading lines can significantly elevate your photographic vision and storytelling. This technique is crucial in engaging the viewer and adding depth and direction to your images.

Photoshop demo of leading lines in photography.

Tutorial: Creating Leading Lines Using the Pen Tool in Photoshop

Step 1: Open Your Image

  1. Load the Image: Start by opening the image you wish to edit in Photoshop. Ensure you’re working on the correct layer in case your project has multiple layers.

Step 2: Selecting the Pen Tool

  1. Accessing the Pen Tool: Locate the Pen Tool in Photoshop’s toolbar, typically on the left side of the screen. The icon looks like a fountain pen tip. Click on it or press P on your keyboard to select it.
Urban leading lines in Photoshop demonstration.
Landscape photography leading lines in Photoshop.

Step 3: Drawing with the Pen Tool

  1. Creating a Path with Anchors: Click on your image where you want your leading line to start. This creates the first anchor point. Click again where you want the line to go, creating a path between the two points. You can click and drag to create curved lines. Continue this process to trace or create leading lines within your image.

Step 4: Stroking the Path

  1. Choosing the Stroke Path Option: Once you have your desired path, it’s time to turn it into a visible line. Right-click (or Control-click on a Mac) on the path and select ‘Stroke Path’ from the context menu.

  2. Selecting the Pencil Tool: In the Stroke Path dialog box, choose the Pencil tool. This will create a more defined and solid line. Adjust the size and properties of the Pencil tool beforehand as needed.

  3. Applying the Stroke: After selecting the Pencil tool, click ‘OK’ to apply the stroke to the path. This will render the path as a visible line on your image, creating the effect of leading lines.

Abstract leading lines in Photoshop.

Step 5: Removing the Path

  1. Deleting the Path: Once the stroke is applied, you don’t need the path anymore. To remove it, either go to the Paths panel and delete the current path or simply hit the ‘Delete’ key while the path is active.
Dynamic sports photography with leading lines.

Conclusion

Leading lines are a powerful compositional tool in photography and art, guiding the viewer’s eye through the image. With Photoshop’s Pen Tool, you can create or enhance these lines, giving your image a stronger sense of direction and focus. This technique is particularly useful for landscape, architectural, and street photography, where lines play a crucial role in the composition.

References

O Carroll, B. (2016). 28 Composition Techniques That Will Improve Your Photos. [online] PetaPixel. Available at:

https://petapixel.com/photography-composition-techniques/

[Accessed 12 Dec. 2023]

Symmetrical urban scene near London Bridge.

How to Use Symmetry and Patterns in Photos

How to Use Symmetry and Patterns in Photos

Introduction: The Power of Balance and Symmetry

Centered composition and symmetry in photography are more than just techniques; they are the essences of visual balance and harmony. When executed correctly, they can transform an ordinary scene into a captivating image, drawing the viewer’s eye and evoking a sense of tranquility and order.

Understanding Centered Composition and Symmetry

At its core, centered composition involves placing your subject in the middle of the frame, creating an equal balance on either side. Symmetry, on the other hand, refers to a mirrored balance, where elements on one side of the image closely resemble those on the other. These techniques are particularly powerful in scenes where balance and harmony are the focal points.

Symmetrical urban scene near London Bridge.

Creative Process: Implementing Symmetry and Balance

  • Visualizing Symmetry: Train your eye to identify naturally occurring symmetry in your environment. Reflective surfaces like water, architectural structures, and even shadows can provide perfect opportunities for symmetrical compositions.
  • Framing Your Subject: When using centered composition, consider the background elements. A centered subject can be made more compelling by an interesting or contrasting backdrop.
  • Using Grids: Many cameras have grid functionalities that can be super helpful in aligning your subject perfectly in the center of the frame.

Tips for Photographers

  1. Look for Natural Symmetry: Nature often presents itself with intrinsic symmetry. Look for these opportunities in your surroundings.
  2. Experiment with Different Angles: Sometimes, changing your perspective slightly can make a big difference in achieving perfect symmetry.
  3. Balance with Colors and Light: Symmetry isn’t just about shapes; colors and lighting play a crucial role. Balance these elements to enhance the symmetry in your shots.
  4. Post-Processing: Use editing software to fine-tune your images. Cropping and straightening tools are essential for perfecting centered compositions.

Advanced Techniques in Centered Composition

  • Reflective Surfaces: Utilize mirrors, water bodies, and glass surfaces to create intriguing symmetrical compositions.
  • Shadow Play: Experiment with shadows to add an element of surprise and depth to your symmetrical compositions.
  • Architectural Photography: Buildings and urban landscapes are ideal for practicing symmetry. Look for leading lines, doorways, and windows that offer natural frames and symmetrical patterns.

Practical Applications in Various Genres

  • Landscape Photography: Use symmetry to capture reflections in lakes or rivers, or to frame a mountain peak perfectly centered between its surroundings.
  • Portrait Photography: For portraits, symmetry can add a dramatic effect. Center your subject against a balanced backdrop for a striking image.
  • Street Photography: Symmetry can be found in the hustle of city life. Look for patterns, reflections, and balanced street scenes.

Conclusion: Symmetry as an Art Form

Centered composition and symmetry are more than just rules; they are artistic tools that, when used creatively, can produce stunning and memorable photographs. These techniques require a keen eye for detail, a sense of balance, and an understanding of how to make ordinary scenes extraordinary.

Centered composition demonstration in Photoshop.

Tutorial: Creating a Centered Composition in Photoshop

Step 1: Open Your Image

  1. Load the Image: Begin by opening the image you want to edit in Photoshop. Make sure you’re working on the desired layer if your project has multiple layers.

Step 2: Enabling Rulers

  1. Access View Menu: Navigate to the top menu bar in Photoshop and click on ‘View’. This menu contains various options to adjust the visibility of certain elements in your workspace.

  2. Selecting Rulers: In the ‘View’ dropdown menu, find and click on ‘Rulers’. Alternatively, you can use the shortcut Ctrl + R (Cmd + R on a Mac) to toggle the rulers on and off.

  3. Applying Rulers: Once selected, you’ll see rulers appear along the top and left sides of your Photoshop workspace. These rulers are used for precise placement and alignment.

Refining symmetry in Photoshop composition.

Step 3: Centering the Composition

  1. Centering the Ruler: To center the ruler, you need to set the zero point at the center of your image. Click on the corner where the two rulers meet (top left corner), and drag it to the center of your image. You can use the guidelines that appear or refer to the dimensions displayed on the rulers for accurate placement.

  2. Using Guides for Centered Composition: After setting the zero point, you can drag out guides from the rulers to mark the center of your image. Click on the top ruler and drag down to create a horizontal guide, and do the same with the left ruler for a vertical guide. Place these guides exactly where they intersect at the center of your image.

  3. Adjusting Your Image: Use these central guides to align key elements of your photo. For a centered composition, you’ll want to place the subject or main focus of your image at the intersection of these guides. This can be done by moving the image layer or by using the Crop Tool to adjust the overall composition.

Step 4: Finalizing Your Composition

  1. Review and Adjust: Take a moment to review your composition. Ensure that the main elements are centered as per your requirement and the composition looks balanced.

  2. Apply Changes: Once satisfied with the centered composition, save your changes. You can remove the guides by dragging them back to the rulers or by clearing them from the ‘View’ menu.

Advanced centered composition in Photoshop.

Conclusion

Centered compositions can be powerful and visually striking. By using Photoshop’s rulers and guides, you can accurately create a centered composition, ensuring that your image’s elements are perfectly aligned for maximum impact.

Verdant English countryside under a clear sky.

What Makes Telephoto Landscape Photography So Powerful And Overlooked

Introduction

Landscape photography is not just about capturing what you see; it’s about conveying how you see it. The use of a telephoto lens in landscape photography opens up a realm of possibilities, allowing photographers to compress distances, isolate subjects, and capture details that transform the ordinary into the extraordinary.

The Unseen Majesty of Far-Off Landscapes

A telephoto lens, typically ranging from 70mm to 200mm or more, offers a unique perspective in landscape photography. It can transform a scene, bringing distant elements into sharp focus and creating a sense of intimacy with the vastness of nature. Mountains become more majestic, forests more intricate, and horizons more captivating.

Storytelling Through Isolation

In the vast canvas of a landscape, a telephoto lens allows photographers to isolate singular elements, turning them into the protagonists of the scene. A single tree against the backdrop of rolling hills, a solitary boat on a vast lake, or a distant farmhouse set against the mountainside – each becomes a story waiting to be told.

The Layered World: Compressing Depth for Impact

Telephoto lenses compress the perceived distance between foreground and background, creating a layered effect that adds depth and drama to a photograph. This technique is particularly powerful in landscapes, where the layering of hills, valleys, and cloud formations can create a striking visual narrative.

Colorful sunset clouds over Rabat.

Creative Process: The Art of Seeing Differently

The creative process with a telephoto lens in landscape photography is as much about patience and observation as it is about technical skill. It involves understanding the interplay of light and shadow, recognizing patterns and textures from a distance, and anticipating how elements in nature might align to create a compelling composition.

  1. Observation and Patience: Spend time observing your landscape. Notice how the light changes throughout the day and how it interacts with the elements within your frame.
  2. Composition and Framing: With a narrower field of view, composition becomes crucial. Experiment with different angles and positions to find the most compelling way to frame your subject.
  3. Embrace the Weather: Overcast days, misty mornings, and even light rain can add mood and depth to your landscapes. Don’t shy away from less-than-perfect weather conditions.

Tips for Aspiring Landscape Photographers

For those starting in telephoto landscape photography, here are some tips to guide your journey:

  1. Invest in a Quality Tripod: Stability is key in telephoto photography. A sturdy tripod will help eliminate camera shake and ensure sharp images.
  2. Experiment with Focal Lengths: Different focal lengths offer different perspectives. Experiment to find the right balance between subject isolation and environmental context.
  3. Understand Your Lens: Spend time getting to know your lens. Understand its strengths and limitations, especially in terms of aperture and depth of field.
  4. Practice Manual Focus: Sometimes, auto-focus may not accurately capture your intended subject. Practicing manual focus gives you more control, especially in complex visual environments.

Conclusion: A Journey of Discovery

Embarking on landscape photography with a telephoto lens is a journey of discovery and creativity. It challenges conventional perspectives, encourages exploration of the unseen, and enhances storytelling through visuals. The power of a telephoto lens lies not just in its ability to bring distant subjects closer but in its capacity to transform the way we perceive and interpret the natural world around us.

Abstraction in Architecture showing a Colorful kaleidoscope of Manhattan Loft Gardens.

How To Understand Abstraction In Architecture Through Geometry

Introduction: The Photographer’s Role in Revealing Architectural Abstraction

As photographers, we’re often taught to see the world through light, lines, and form—but when it comes to architecture, there’s a deeper layer waiting to be uncovered. Abstraction in architecture isn’t just about minimalism or geometric patterns; it’s about perceiving the essence of a structure beyond its function or façade. Through the photographer’s lens, abstraction becomes a visual language—one that distills buildings into rhythm, repetition, contrast, and shape.

Unlike architects, who design from the inside out, we document from the outside in. That difference in perspective is powerful. Photography gives us the ability to transform concrete into concept, to frame a detail so closely that it becomes unfamiliar, or to step so far back that the building becomes a brushstroke in the landscape.

But how do we train our eye to see abstractly? How can we use geometry to reveal, not just represent, the spaces we move through every day? In this guide, we’ll break down the artistic and technical approaches that allow photographers to make architectural abstraction not just visible—but unforgettable.


Understanding Abstraction in Architecture Through Form and Design


What Is Abstraction in Architecture?


At its core, abstraction in architecture is the process of distilling form down to its fundamental elements—line, shape, texture, and space. It removes the narrative, strips away function, and asks the viewer to focus instead on pure form. For photographers, this abstraction is fertile ground for visual exploration. It allows us to isolate moments of design that might otherwise be overlooked: a repeating series of windows, the negative space between two walls, the intersection of planes under morning light.

Unlike representational photography, which often aims to document a building in its entirety, abstract architectural photography zeroes in on fragments. These fragments may not “explain” the structure, but they reveal something deeper—its rhythm, its proportions, or its emotional resonance.


The Geometry Behind Abstract Design


Geometry is the architect’s toolkit—and the photographer’s playground. From the triangle-heavy compositions of brutalist architecture to the smooth elliptical curves of contemporary museums, geometric thinking runs through every stage of the design process. Abstraction invites us to lean into that geometry. A single corner, captured in sharp contrast, might read like a painting. A steel column, reflected and reframed, can become an arrow cutting through negative space.

This isn’t accidental. Many architects rely heavily on geometry to guide their concepts—from sacred ratios in classical buildings to modular grids in modern design. As photographers, our job is to uncover these systems and translate them visually.


Modern and Postmodern Structures as Abstract Subjects


Contemporary architecture lends itself beautifully to abstraction. Think of the fragmented lines of Zaha Hadid’s designs or the crystalline forms of Daniel Libeskind. These buildings often defy symmetry and challenge our sense of balance—yet that tension is exactly what makes them compelling photographic subjects.

In photographing modern and postmodern buildings, abstraction becomes not just a stylistic choice, but almost a necessity. Their scale and complexity resist traditional framing. Instead, they invite cropping, isolation, and reinterpretation. The result? Images that blur the line between documentation and fine art.

Abstraction in Architecture of Southwark bridge in B&W.


Seeing Geometry Through the Lens: How Photographers Frame Abstraction


Line, Symmetry, and Negative Space


Geometry isn’t just something we capture—it’s something we compose with. As photographers, we’re constantly making decisions about where a line leads, how two shapes relate, and when to leave something out. A flat wall isn’t just a wall—it can be a canvas for balance, tension, and rhythm. The subtle curve of a staircase or the jagged silhouette of a rooftop becomes a gesture in space.

Symmetry, whether perfect or broken, is one of the most powerful tools we have to abstract a scene. When we center a doorway or mirror a reflection, we invite the viewer to focus not on what the object is, but on how it’s structured. That shift in attention is the essence of abstraction in architecture.

And then there’s negative space—the silence around the structure. In architectural photography, emptiness is as important as form. By isolating the subject against a clean sky or blank wall, we amplify its presence and transform a practical detail into a poetic composition.


Patterns, Repetition, and Texture


Architecture is full of systems: rows of windows, modular facades, tiled floors. These repeating elements can be photographed in ways that turn function into form. The longer you stare, the less it looks like a building—and the more it feels like visual music.

Texture plays a subtler but equally vital role. A concrete wall photographed at an angle might cast soft shadows that accentuate its roughness. A glass facade can reflect not just light but movement, color, even time. In abstract photography, surface becomes subject.


Light and Shadow: Shaping the Invisible


There is no abstraction without light. A plain surface becomes a sculpture when lit from the side. A shadow falling across a staircase transforms it from a route into a rhythm. Architectural photographers often work at the edges of the day—golden hour, blue hour—not just for aesthetic reasons but because that’s when light becomes structure.

We don’t need a building to say something. We need it to be still long enough for the light to reveal what it already contains. That’s what abstraction is—it’s what’s always there, waiting to be seen.

Abstraction in Architecture of Southwark bridge in B&W.


Field Techniques: Capturing Abstract Architecture in Real Settings

Equipment and Lenses That Enhance Geometry

Abstract architectural photography doesn’t demand the most expensive gear—but it does reward precision. Tilt-shift lenses, for example, allow you to maintain straight verticals while reframing structures creatively. Wide-angle lenses let you exaggerate scale and stretch space into surreal compositions. But sometimes, a simple 50mm prime is all you need to isolate form without distortion.

What matters more than the lens is how you use it. A telephoto lens can compress distance and reveal unexpected patterns in a facade. A macro lens might bring you close enough to a textured wall that it stops looking like architecture and starts reading like abstract art. The key is to choose gear that lets geometry speak clearly.

Choosing Vantage Points and Perspectives

The building doesn’t move—you do. That’s the advantage of the photographer. Elevate your view from a nearby rooftop, crouch low to exaggerate height, or align your camera so that edges frame the shot with mathematical elegance. Every step you take shifts the relationship between the lines in the scene—and with it, the abstraction you’re creating.

Reflection is another tool in your kit. Glass, water, metal—these surfaces let you duplicate, distort, or obscure form. A single shot through a windowpane can layer architecture on top of itself, creating ghostly repetitions and nested geometries.

Minimalism and Isolation in Composition

One of the most effective strategies in abstract photography is subtraction. Don’t show everything—show only what matters. Crop aggressively. Center one detail. Frame so tight that the context disappears. When a photo doesn’t “make sense” immediately, it forces the viewer to engage more deeply, to look again.

Minimalism isn’t about emptiness; it’s about emphasis. When you strip away clutter, you give shape the chance to stand alone. And in architectural photography, that can turn a mundane support beam into a sculpture.

From Observation to Interpretation: Developing an Abstract Eye

You can’t force abstraction—it has to emerge from how you see. Developing an “abstract eye” as a photographer means learning to look at buildings as more than structures. Instead of asking, What is this? ask, What does this feel like? What shapes are hidden in plain sight? The more you train yourself to notice form, the more you’ll recognize the moments when geometry becomes something else: movement, mood, metaphor.

Walking through a city becomes a kind of sketching exercise. You start to see how morning light slices between towers. How a row of vents becomes a barcode. How reflection can fracture form until the familiar looks foreign. These are not accidents—they’re opportunities.

One powerful habit is to slow down. Choose a single building. Walk around it for 30 minutes without taking a photo. Notice the way its lines intersect, where the materials change, what it hides when viewed from the side. When you finally lift your camera, you’ll know what to look for.

And don’t wait for perfect conditions. Some of the most abstract images are taken in harsh sunlight, rain, or deep shadow. These extremes help break away from realism and into emotion—something far more powerful than documentation.

Abstraction in Architecture of Southwark bridge in B&W.


Post-Processing Abstract Architectural Photos


Enhancing Geometry Through Contrast and Clarity


Shooting abstract architecture is only half the equation—editing is where structure often becomes sculpture. One of the most effective ways to emphasize abstraction in architecture is by boosting local contrast and sharpness along edges. Architectural lines thrive on definition. With clarity adjustments, mid-tones sharpen and give geometric elements a crisp, almost tactile feel.

Dodging and burning—subtly lightening or darkening parts of an image—can guide the viewer’s eye through the frame, reinforcing flow and rhythm. With abstraction, you’re not just correcting reality; you’re interpreting it.


Cropping for Abstraction


Sometimes a photo only becomes abstract after the fact. Cropping is a powerful way to eliminate narrative, context, or clutter. A scene that originally included people, signage, or street details can be reduced to just curves, contrast, or texture.

In post-production, challenge yourself to see the image again—can you rotate it? Can you flip it upside down? Sometimes the most compelling abstract photos are the ones that disorient, reframe, and force the viewer to pause.


Color vs. Black and White for Mood and Structure


Color can be expressive, but it can also be distracting. In abstract architectural photography, black and white has a long legacy for a reason—it strips away surface and brings geometry forward. When color remains, it must serve the structure: monochromes that heighten emotion, complementary tones that emphasize tension.

There’s no rule—some buildings beg for their red accents to pop. Others come alive only when reduced to shape and shadow. The post-processing phase is where you decide which truth to tell.

Abstraction in Architecture of Southwark bridge in B&W.


Why Abstraction in Architecture Resonates — and Why I Keep Coming Back to It


There’s something about abstraction in architecture that continues to pull me in, even after years of photographing buildings. It’s not just about form or composition—it’s about what the structure starts to say when everything else is stripped away. A wall becomes a brushstroke. A shadow becomes a pause. A reflection becomes a question.

When I shoot abstractly, I’m not trying to explain a building. I’m trying to feel it. To find the part of it that doesn’t need context or permission. That emotional connection is what I chase—and what I hope the viewer feels too. Maybe it’s a quiet stillness. Maybe it’s disorientation. Maybe it’s awe. Whatever it is, it lives in that space between recognition and imagination.

Abstraction also challenges me intellectually. When I frame something in a way that removes its function or identity, I start to ask new questions: What am I really looking at? What’s hidden here? And I love that viewers do the same. They pause. They lean in. They try to solve the image. And in that moment, they’re not just seeing—they’re engaging.

Over time, abstraction has become more than just a technique in my photography. It’s become part of my visual language. It’s how I process space. How I create rhythm. How I say something without words.

I’ve learned that you don’t need iconic buildings or perfect light to make abstract work. You need patience. Curiosity. The willingness to see something ordinary from an angle no one else has considered. That’s how abstraction becomes not just a style—but a signature.

Frequently Asked Questions

To me, abstraction in architecture means isolating a building’s essence—its shapes, rhythms, or surfaces—and capturing it without needing to explain what it is. It’s about creating an image that communicates feeling or structure, not just function. A wall becomes more than a wall when you show how it bends light or cuts through space.

Start by slowing down. Look at buildings without trying to capture the whole thing—focus on lines, contrast, and materials. Ask yourself, what happens if I crop here? What if I turn the frame sideways? Abstraction often begins where context ends.

No, but certain tools help. A wide-angle lens can exaggerate perspective, while a telephoto lens flattens space and reveals patterns. What matters most is how you use light, line, and framing—not the gear.

It depends on the image. Black and white can reduce distraction and make geometry stand out, especially when working with strong contrast or texture. But some structures rely on color for their abstract impact. I decide in post—based on which version best supports the mood I want to evoke.

You can do it anywhere. Abstraction isn’t about the fame of the building—it’s about how you see it. Some of my favorite abstract shots come from side streets, parking garages, or municipal buildings. It’s about perspective, not prestige.