Layered framing in Maynooth, Ireland.

This Framing Hack Will Transform Your Photos

Introduction: The Art of Framing in Composition

Framing within a frame is a compelling compositional technique that involves using elements within your scene to create a ‘frame’ around your subject. This method adds depth, context, and intrigue to your photographs, turning ordinary scenes into layered stories.

Understanding ‘Frame Within a Frame’

This technique is all about using elements in your environment, such as windows, doorways, arches, or even natural elements like tree branches, to create a secondary frame within your photograph. This inner frame leads the viewer’s eye to the primary subject, enhancing the narrative and depth of the image.

Framed view of St Mark's Square, Venice.

O Carroll, B. (2016). 28 Composition Techniques That Will Improve Your Photos.

Creative Process: Implementing Framing Techniques

  • Identifying Framing Elements: Start by scouting for natural or architectural elements that can act as frames in your composition.
  • Positioning Your Subject: Place your subject in a way that the framing element encapsulates or complements it, creating a focus point.
  • Experimenting with Perspectives: Change your angle and perspective to see how different frames can alter the story or mood of your image.

Tips for Photographers

  1. Look for Unique Frames: Beyond windows and doors, look for unique framing opportunities like gaps in fences, reflections, or shadows.
  2. Play with Light and Shadow: Use light and shadows within your frame to add mood and emphasize your subject.
  3. Depth of Field: Experiment with different apertures to either blur the frame for a subtle effect or keep it sharp for a more pronounced framing.
  4. Balancing Elements: Ensure your frame complements the subject without overpowering it. The frame should lead to the subject, not distract from it.

Advanced Techniques in Framing

  • Multiple Layers: Incorporate multiple layers of framing for a more complex and intriguing composition.
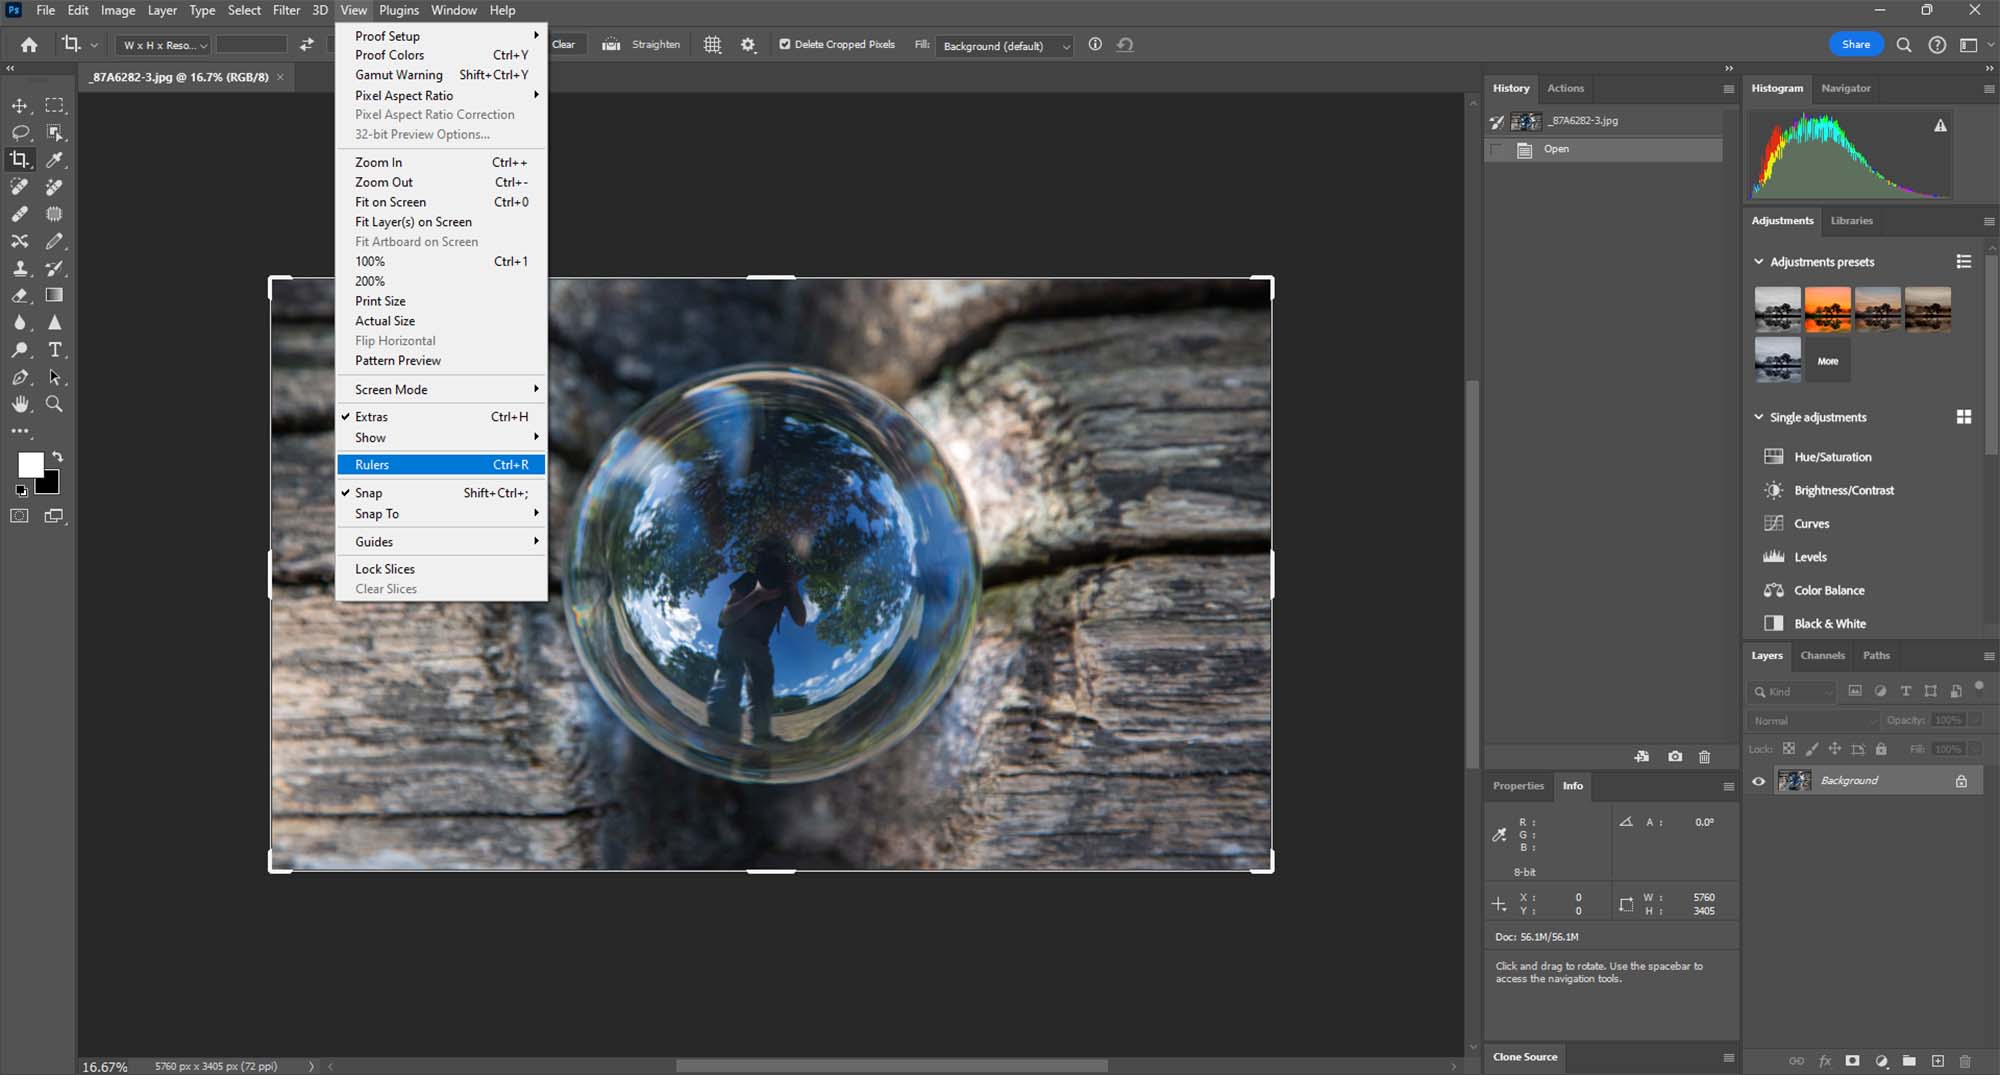
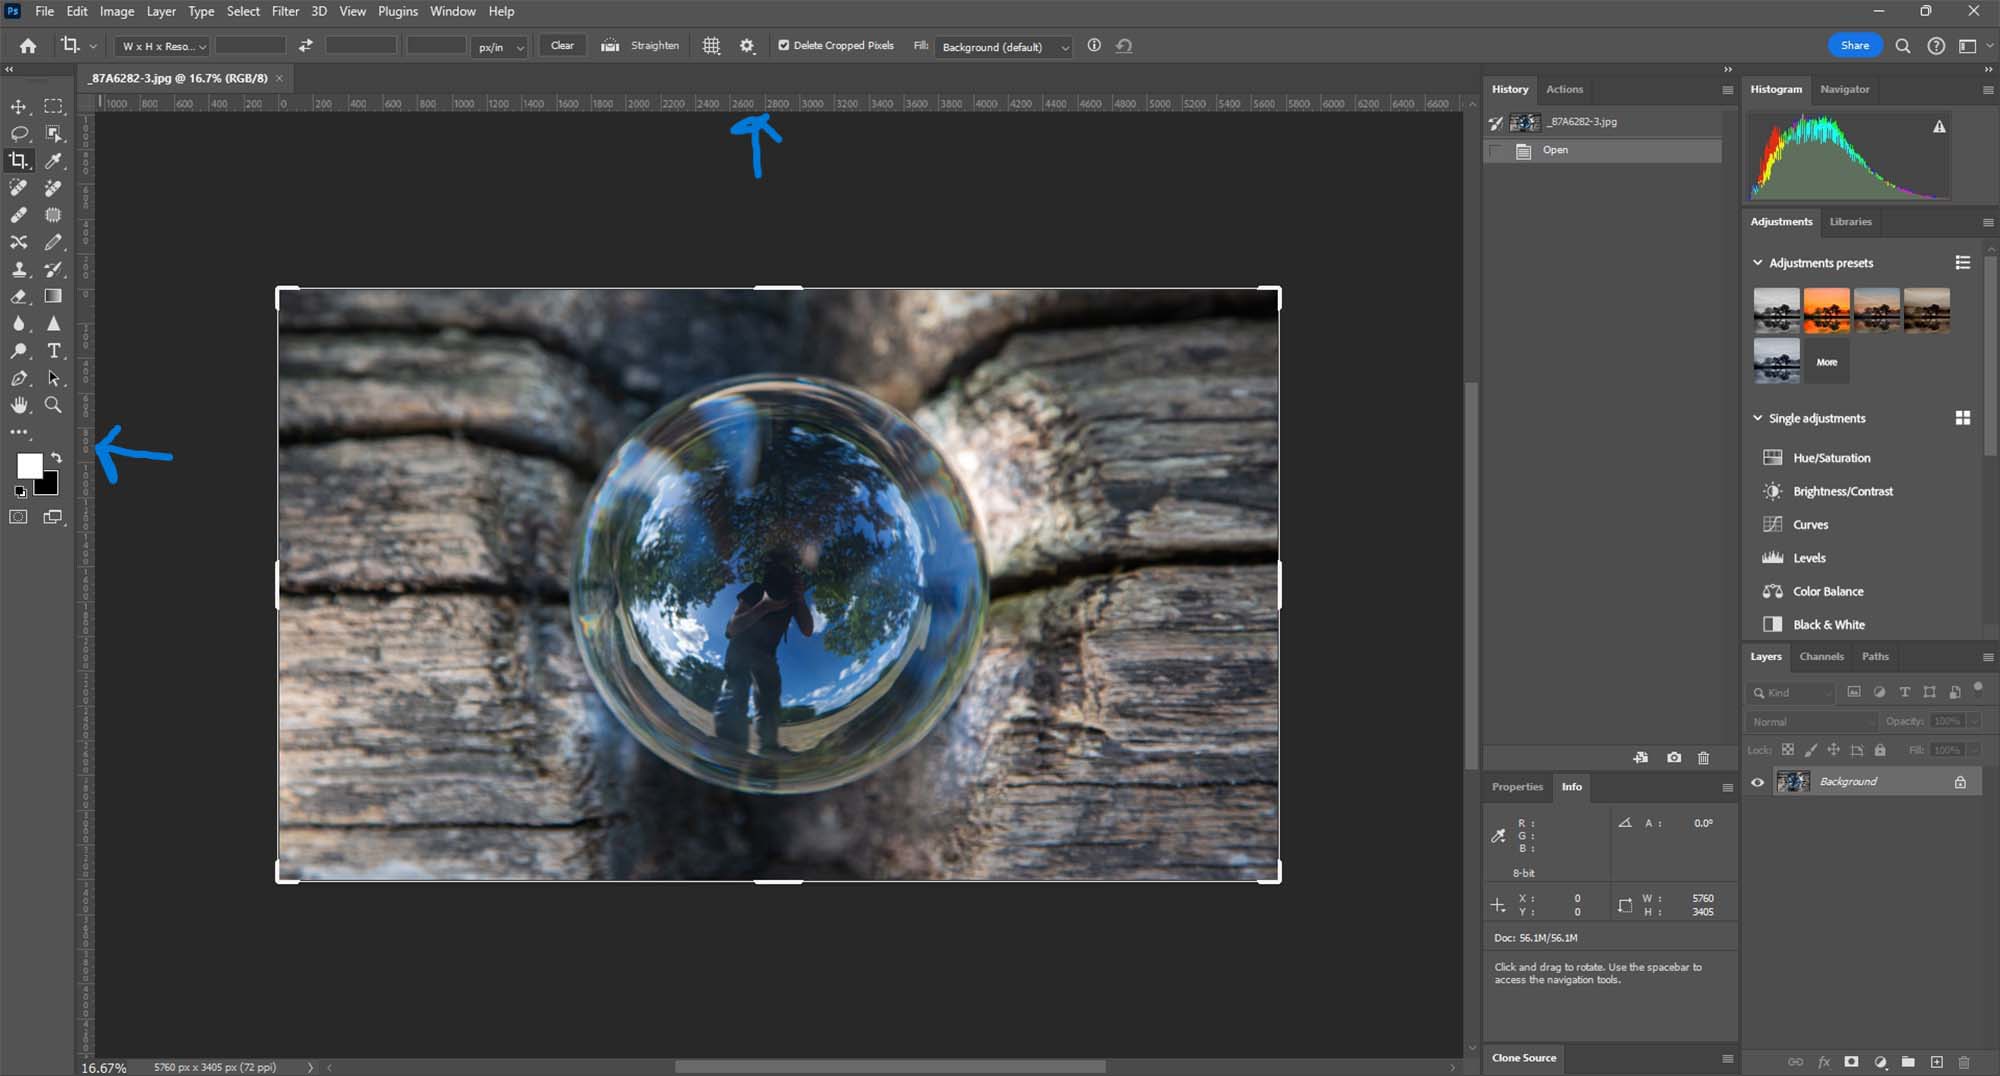
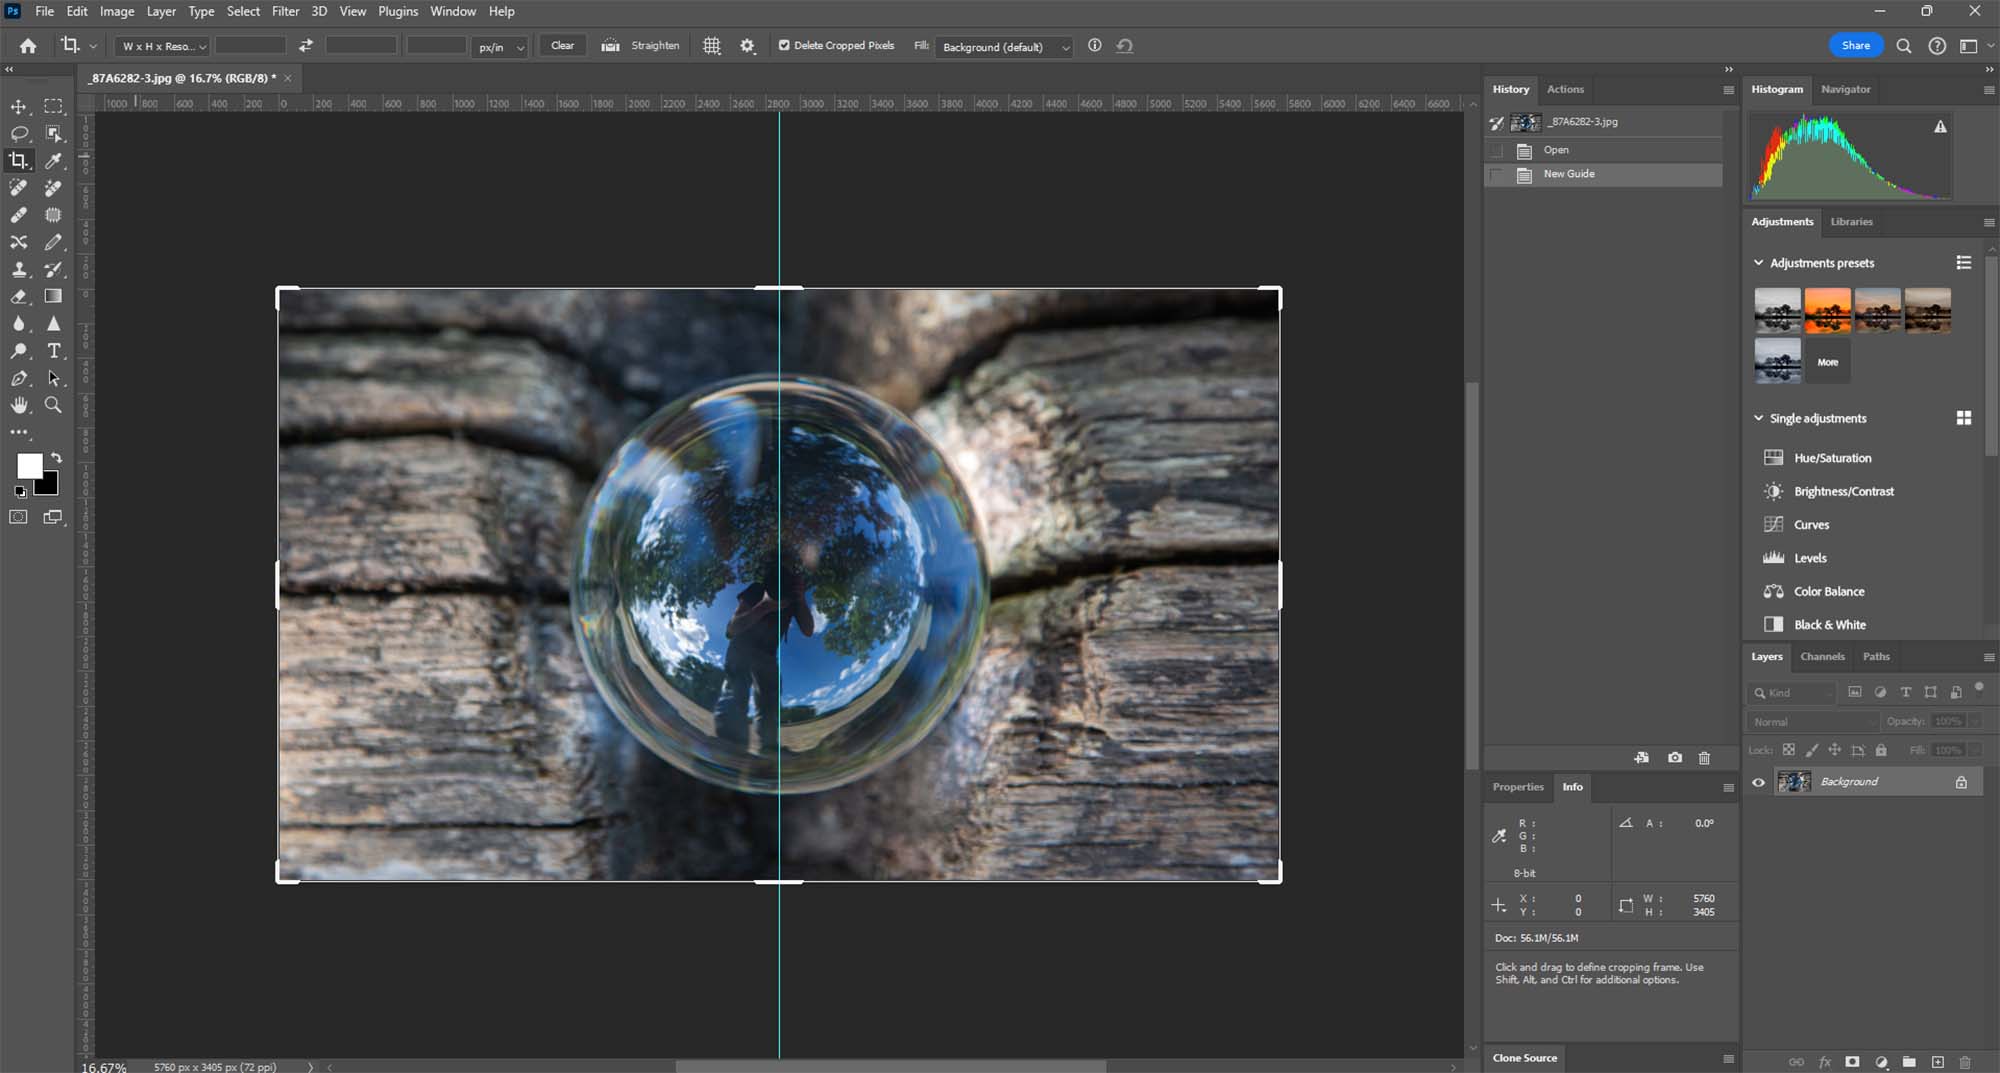
  • Reflections as Frames: Use reflections in water, mirrors, or glass to create a unique framing effect.
  • Contrasting Elements: Combine contrasting elements within your frame and subject for a dramatic effect.

Practical Applications in Various Genres

  • Landscape Photography: Use tree branches or rock formations to frame a stunning vista or a setting sun.
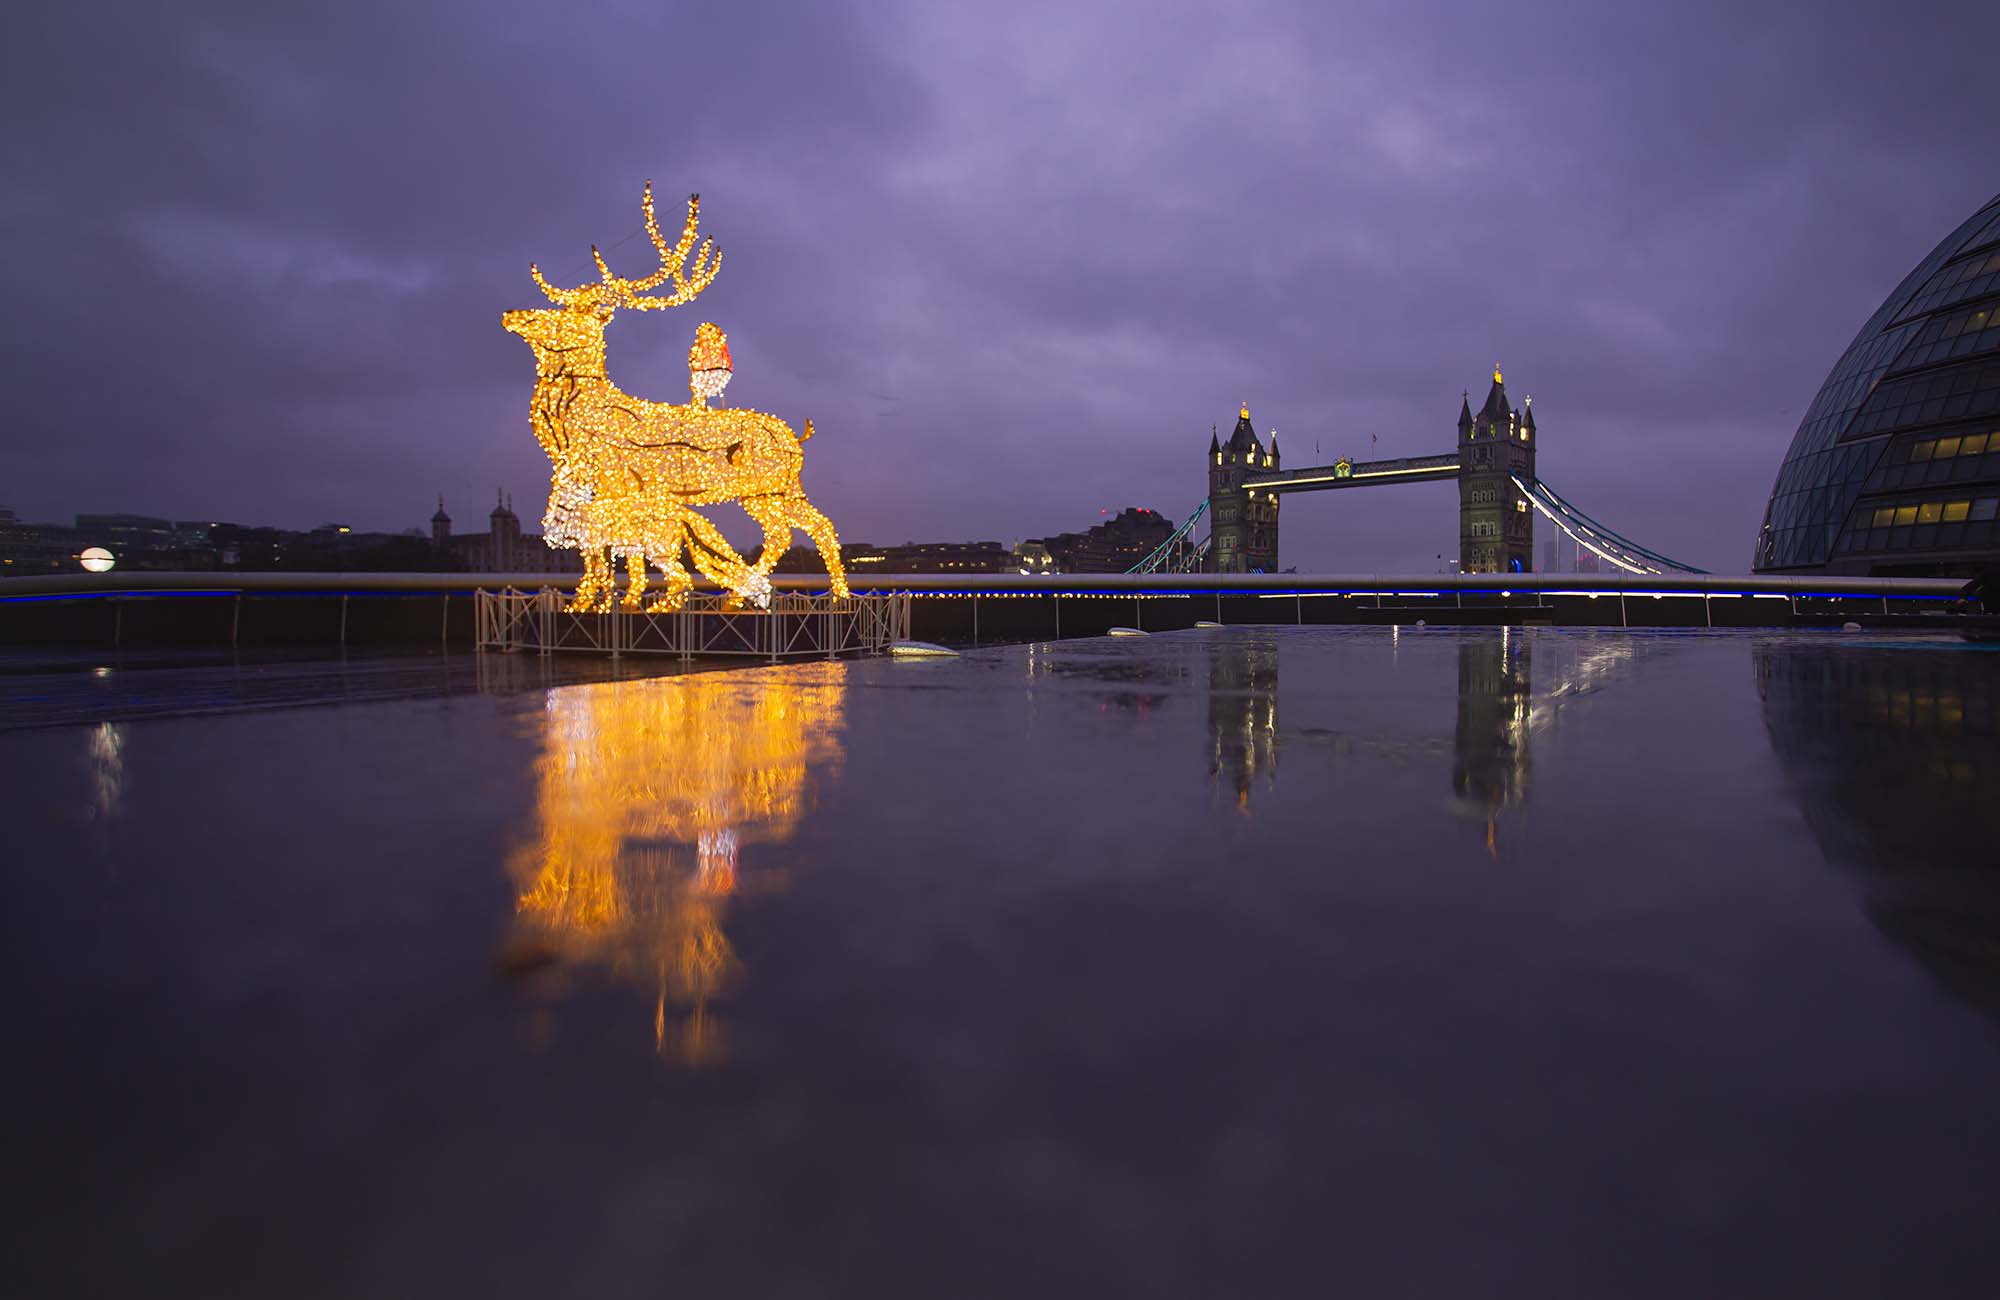
  • Urban Photography: Urban environments are rich with framing opportunities like bridges, tunnels, and building facades.
  • Portrait Photography: Frame your subject with environmental elements to add context and depth to your portraits.

Conclusion: Refining Your Photographic Eye

Mastering the ‘Frame Within a Frame’ technique is a journey towards refining your photographic eye and enhancing your ability to tell stories through images. It requires practice, creativity, and an attentive observation of your surroundings.

References

O Carroll, B. (2016). 28 Composition Techniques That Will Improve Your Photos. [online] PetaPixel. Available at:

https://petapixel.com/photography-composition-techniques/

[Accessed 12 Dec. 2023]

Symmetrical urban scene near London Bridge.

How to Use Symmetry and Patterns in Photos

How to Use Symmetry and Patterns in Photos

Introduction: The Power of Balance and Symmetry

Centered composition and symmetry in photography are more than just techniques; they are the essences of visual balance and harmony. When executed correctly, they can transform an ordinary scene into a captivating image, drawing the viewer’s eye and evoking a sense of tranquility and order.

Understanding Centered Composition and Symmetry

At its core, centered composition involves placing your subject in the middle of the frame, creating an equal balance on either side. Symmetry, on the other hand, refers to a mirrored balance, where elements on one side of the image closely resemble those on the other. These techniques are particularly powerful in scenes where balance and harmony are the focal points.

Symmetrical urban scene near London Bridge.

Creative Process: Implementing Symmetry and Balance

  • Visualizing Symmetry: Train your eye to identify naturally occurring symmetry in your environment. Reflective surfaces like water, architectural structures, and even shadows can provide perfect opportunities for symmetrical compositions.
  • Framing Your Subject: When using centered composition, consider the background elements. A centered subject can be made more compelling by an interesting or contrasting backdrop.
  • Using Grids: Many cameras have grid functionalities that can be super helpful in aligning your subject perfectly in the center of the frame.

Tips for Photographers

  1. Look for Natural Symmetry: Nature often presents itself with intrinsic symmetry. Look for these opportunities in your surroundings.
  2. Experiment with Different Angles: Sometimes, changing your perspective slightly can make a big difference in achieving perfect symmetry.
  3. Balance with Colors and Light: Symmetry isn’t just about shapes; colors and lighting play a crucial role. Balance these elements to enhance the symmetry in your shots.
  4. Post-Processing: Use editing software to fine-tune your images. Cropping and straightening tools are essential for perfecting centered compositions.

Advanced Techniques in Centered Composition

  • Reflective Surfaces: Utilize mirrors, water bodies, and glass surfaces to create intriguing symmetrical compositions.
  • Shadow Play: Experiment with shadows to add an element of surprise and depth to your symmetrical compositions.
  • Architectural Photography: Buildings and urban landscapes are ideal for practicing symmetry. Look for leading lines, doorways, and windows that offer natural frames and symmetrical patterns.

Practical Applications in Various Genres

  • Landscape Photography: Use symmetry to capture reflections in lakes or rivers, or to frame a mountain peak perfectly centered between its surroundings.
  • Portrait Photography: For portraits, symmetry can add a dramatic effect. Center your subject against a balanced backdrop for a striking image.
  • Street Photography: Symmetry can be found in the hustle of city life. Look for patterns, reflections, and balanced street scenes.

Conclusion: Symmetry as an Art Form

Centered composition and symmetry are more than just rules; they are artistic tools that, when used creatively, can produce stunning and memorable photographs. These techniques require a keen eye for detail, a sense of balance, and an understanding of how to make ordinary scenes extraordinary.

Centered composition demonstration in Photoshop.

Tutorial: Creating a Centered Composition in Photoshop

Step 1: Open Your Image

  1. Load the Image: Begin by opening the image you want to edit in Photoshop. Make sure you’re working on the desired layer if your project has multiple layers.

Step 2: Enabling Rulers

  1. Access View Menu: Navigate to the top menu bar in Photoshop and click on ‘View’. This menu contains various options to adjust the visibility of certain elements in your workspace.

  2. Selecting Rulers: In the ‘View’ dropdown menu, find and click on ‘Rulers’. Alternatively, you can use the shortcut Ctrl + R (Cmd + R on a Mac) to toggle the rulers on and off.

  3. Applying Rulers: Once selected, you’ll see rulers appear along the top and left sides of your Photoshop workspace. These rulers are used for precise placement and alignment.

Refining symmetry in Photoshop composition.

Step 3: Centering the Composition

  1. Centering the Ruler: To center the ruler, you need to set the zero point at the center of your image. Click on the corner where the two rulers meet (top left corner), and drag it to the center of your image. You can use the guidelines that appear or refer to the dimensions displayed on the rulers for accurate placement.

  2. Using Guides for Centered Composition: After setting the zero point, you can drag out guides from the rulers to mark the center of your image. Click on the top ruler and drag down to create a horizontal guide, and do the same with the left ruler for a vertical guide. Place these guides exactly where they intersect at the center of your image.

  3. Adjusting Your Image: Use these central guides to align key elements of your photo. For a centered composition, you’ll want to place the subject or main focus of your image at the intersection of these guides. This can be done by moving the image layer or by using the Crop Tool to adjust the overall composition.

Step 4: Finalizing Your Composition

  1. Review and Adjust: Take a moment to review your composition. Ensure that the main elements are centered as per your requirement and the composition looks balanced.

  2. Apply Changes: Once satisfied with the centered composition, save your changes. You can remove the guides by dragging them back to the rulers or by clearing them from the ‘View’ menu.

Advanced centered composition in Photoshop.

Conclusion

Centered compositions can be powerful and visually striking. By using Photoshop’s rulers and guides, you can accurately create a centered composition, ensuring that your image’s elements are perfectly aligned for maximum impact.