Introduction: Exploring the Golden Ratio
The Golden Ratio, a mathematical ratio of 1:1.618, has been revered as the ‘Divine Proportion’ and is considered the secret to creating aesthetically pleasing compositions. In photography, applying the Golden Ratio can lead to beautifully balanced and naturally appealing images.
Understanding the Golden Ratio
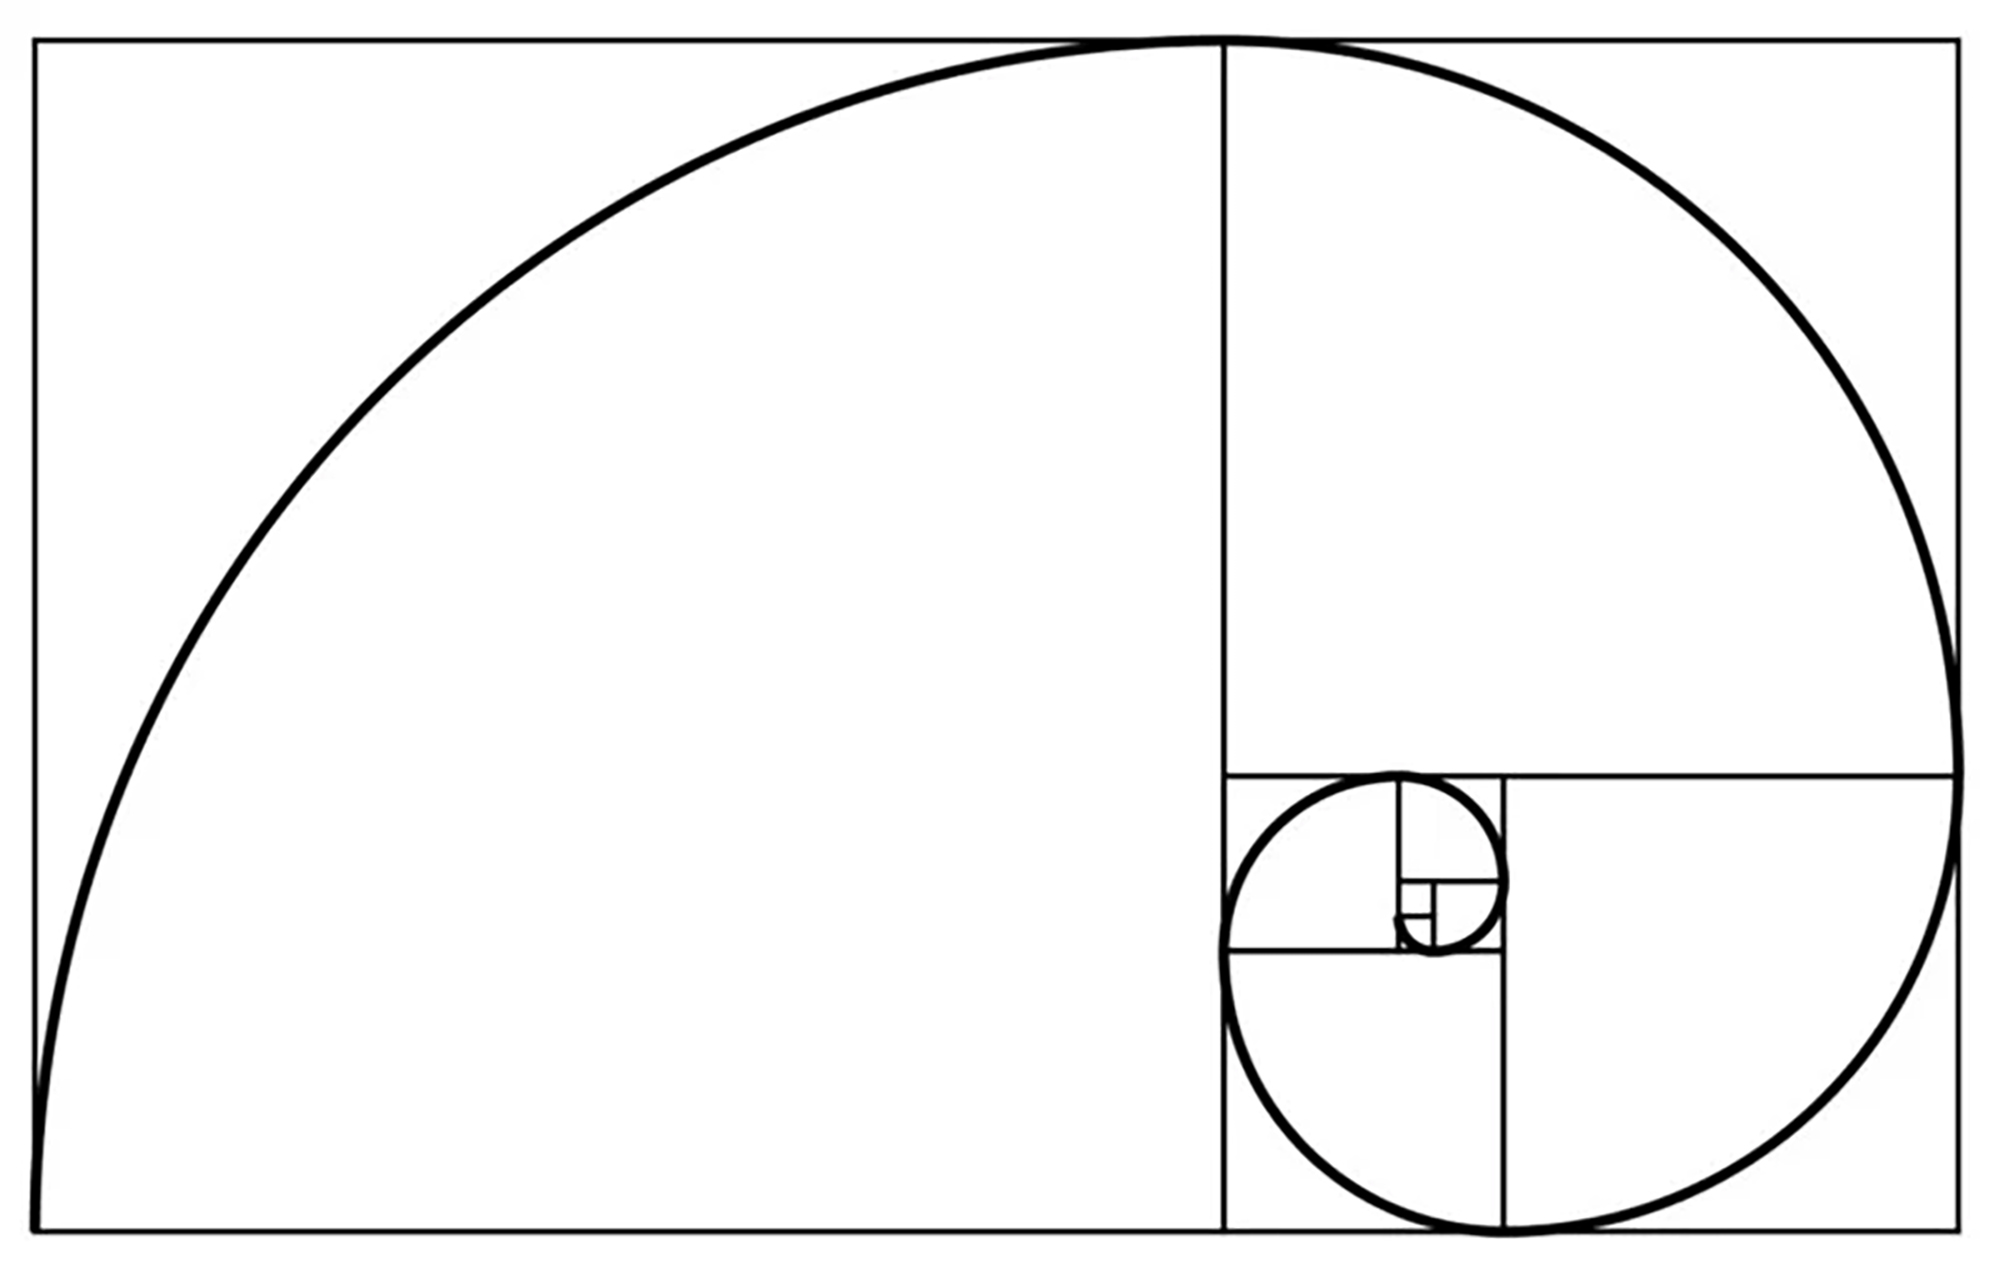
The Golden Ratio can be represented by the Fibonacci Spiral or Phi Grid, providing a framework for placing key elements within a composition. It suggests that images are most pleasing when their compositional elements align with these ratios.
Creative Process: Utilizing the Golden Ratio
- Fibonacci Spiral: Visualize the Fibonacci Spiral in your frame and place the main subject at the smallest part of the spiral. This placement naturally draws the viewer’s eye through the image.
- Phi Grid: Use the Phi Grid, similar to the Rule of Thirds grid, but with lines placed according to the Golden Ratio. Position important elements along these lines or at their intersections.
- Balancing Elements: Arrange secondary elements in your scene to balance the main subject according to the Golden Ratio, creating a harmonious composition.
Tips for Photographers
- Practice Visualization: Regularly practice visualizing the Golden Ratio overlay in different scenes to enhance your compositional skills.
- Use Editing Software: Many photo editing tools offer Golden Ratio overlays that can be used during post-processing to refine your composition.
- Nature’s Patterns: Look for natural occurrences of the Golden Ratio in the environment, like in the spirals of shells or the arrangement of leaves.
- Subtle Application: The use of the Golden Ratio doesn’t have to be exact or overt; subtle applications often lead to the most aesthetically pleasing compositions.
Advanced Techniques in Golden Ratio Photography
- Dynamic Landscapes: Use the Golden Ratio to guide the placement of horizons, trees, or pathways in landscape photography.
- Portrait Framing: Position the subject’s face or eyes at the focal point of the Golden Ratio for a natural, pleasing portrait.
- Architectural Symmetry: Apply the Golden Ratio to capture the symmetry and proportions in architectural photography.
Practical Applications in Various Genres
- Macro Photography: Frame your macro subjects, such as flowers or insects, following the Golden Ratio for a natural, balanced look.
- Street Photography: Apply the Golden Ratio to arrange elements in street scenes, creating a sense of movement and harmony.
- Abstract Photography: Use the Golden Ratio to create intriguing abstract compositions that draw the viewer’s eye.
Conclusion: Mastering the Art of Composition
The Golden Ratio is more than a mathematical formula; it’s a pathway to creating deeply satisfying and visually appealing photographs. Its application can elevate the impact and beauty of your compositions, resonating with viewers on a subconscious level.
Tutorial: Using the Golden Spiral for Composition in Photoshop
Step 1: Open Your Image
- Load the Image: Begin by opening the image you want to edit in Photoshop. Make sure you’re on the right layer if your project has multiple layers.
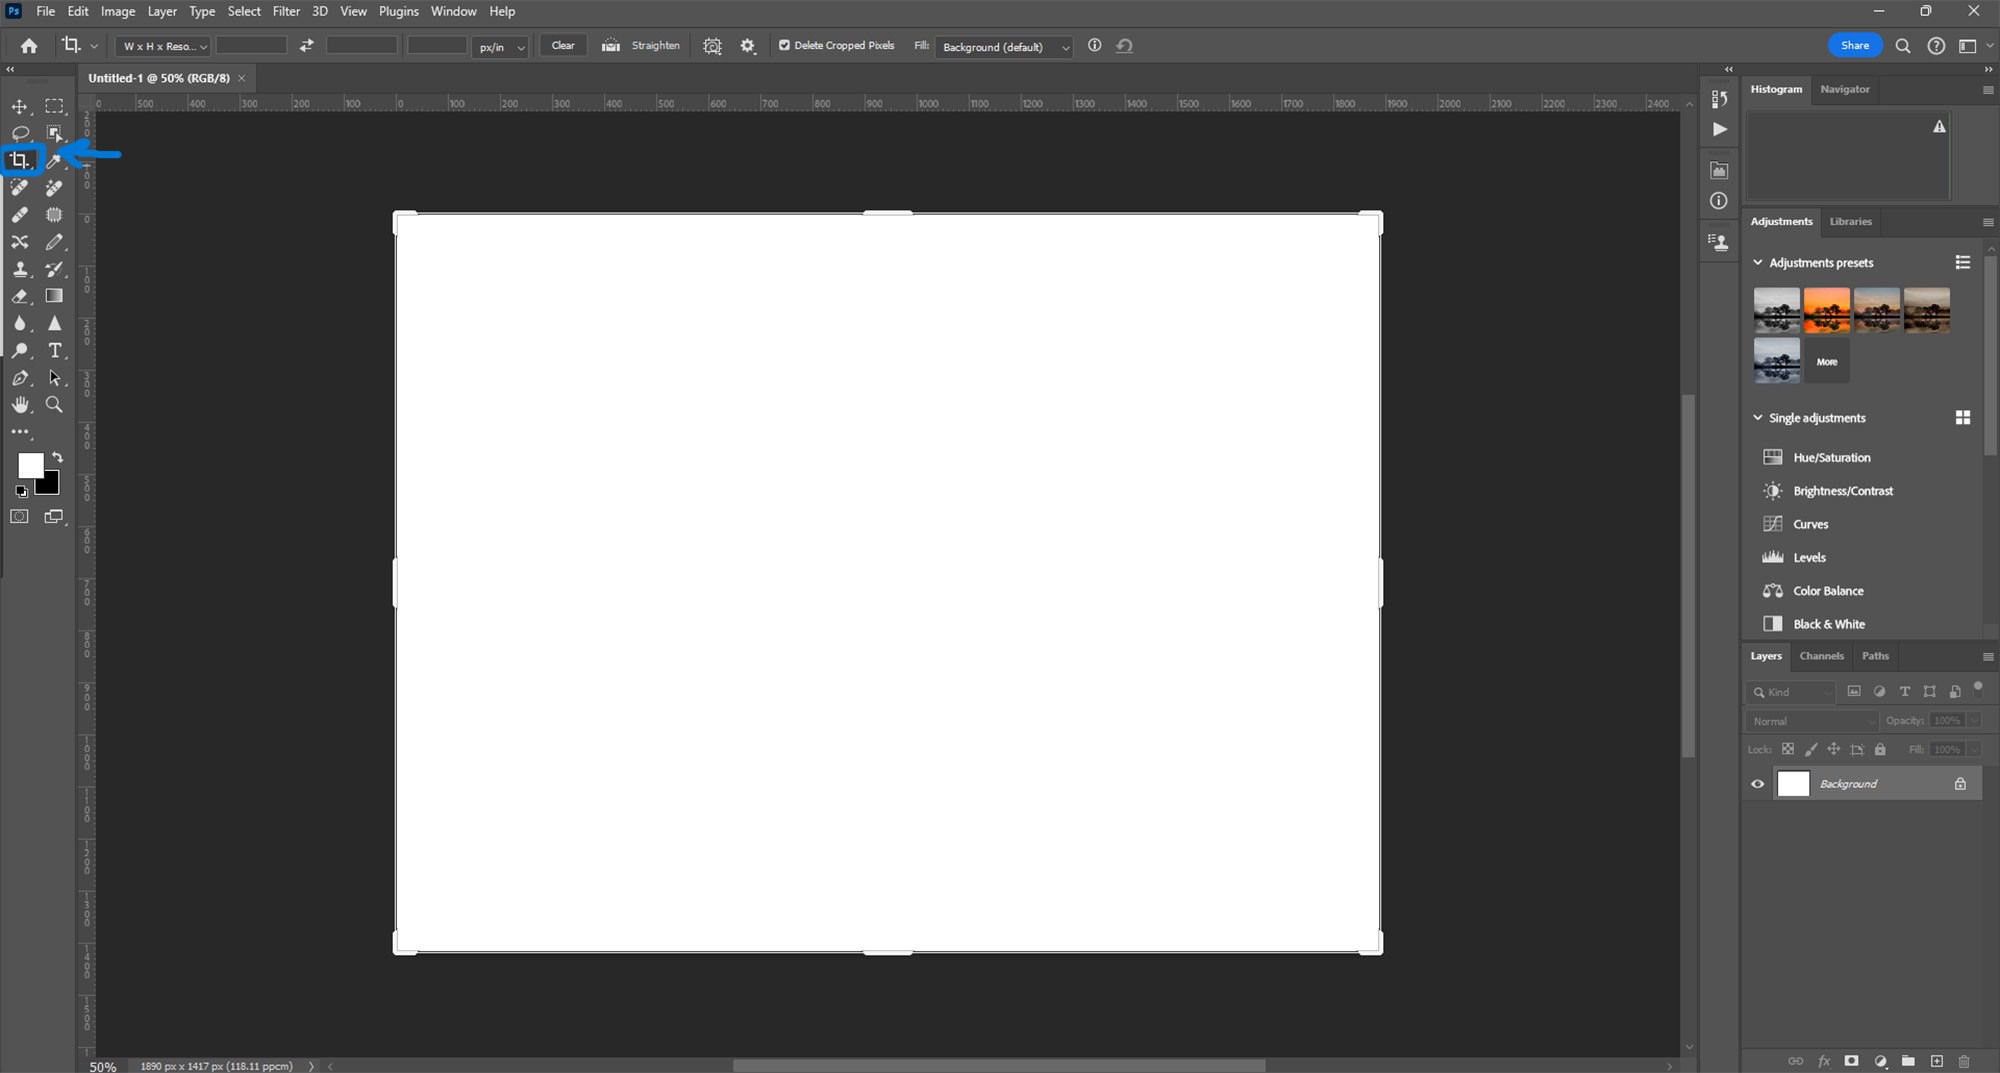
Step 2: Selecting the Crop Tool
- Accessing the Crop Tool: Locate the Crop Tool in Photoshop’s toolbar, typically on the left side of the screen. The icon resembles two intersecting right angles. Click on it or press
Con your keyboard to select it.
Step 3: Changing the Grid to Golden Spiral
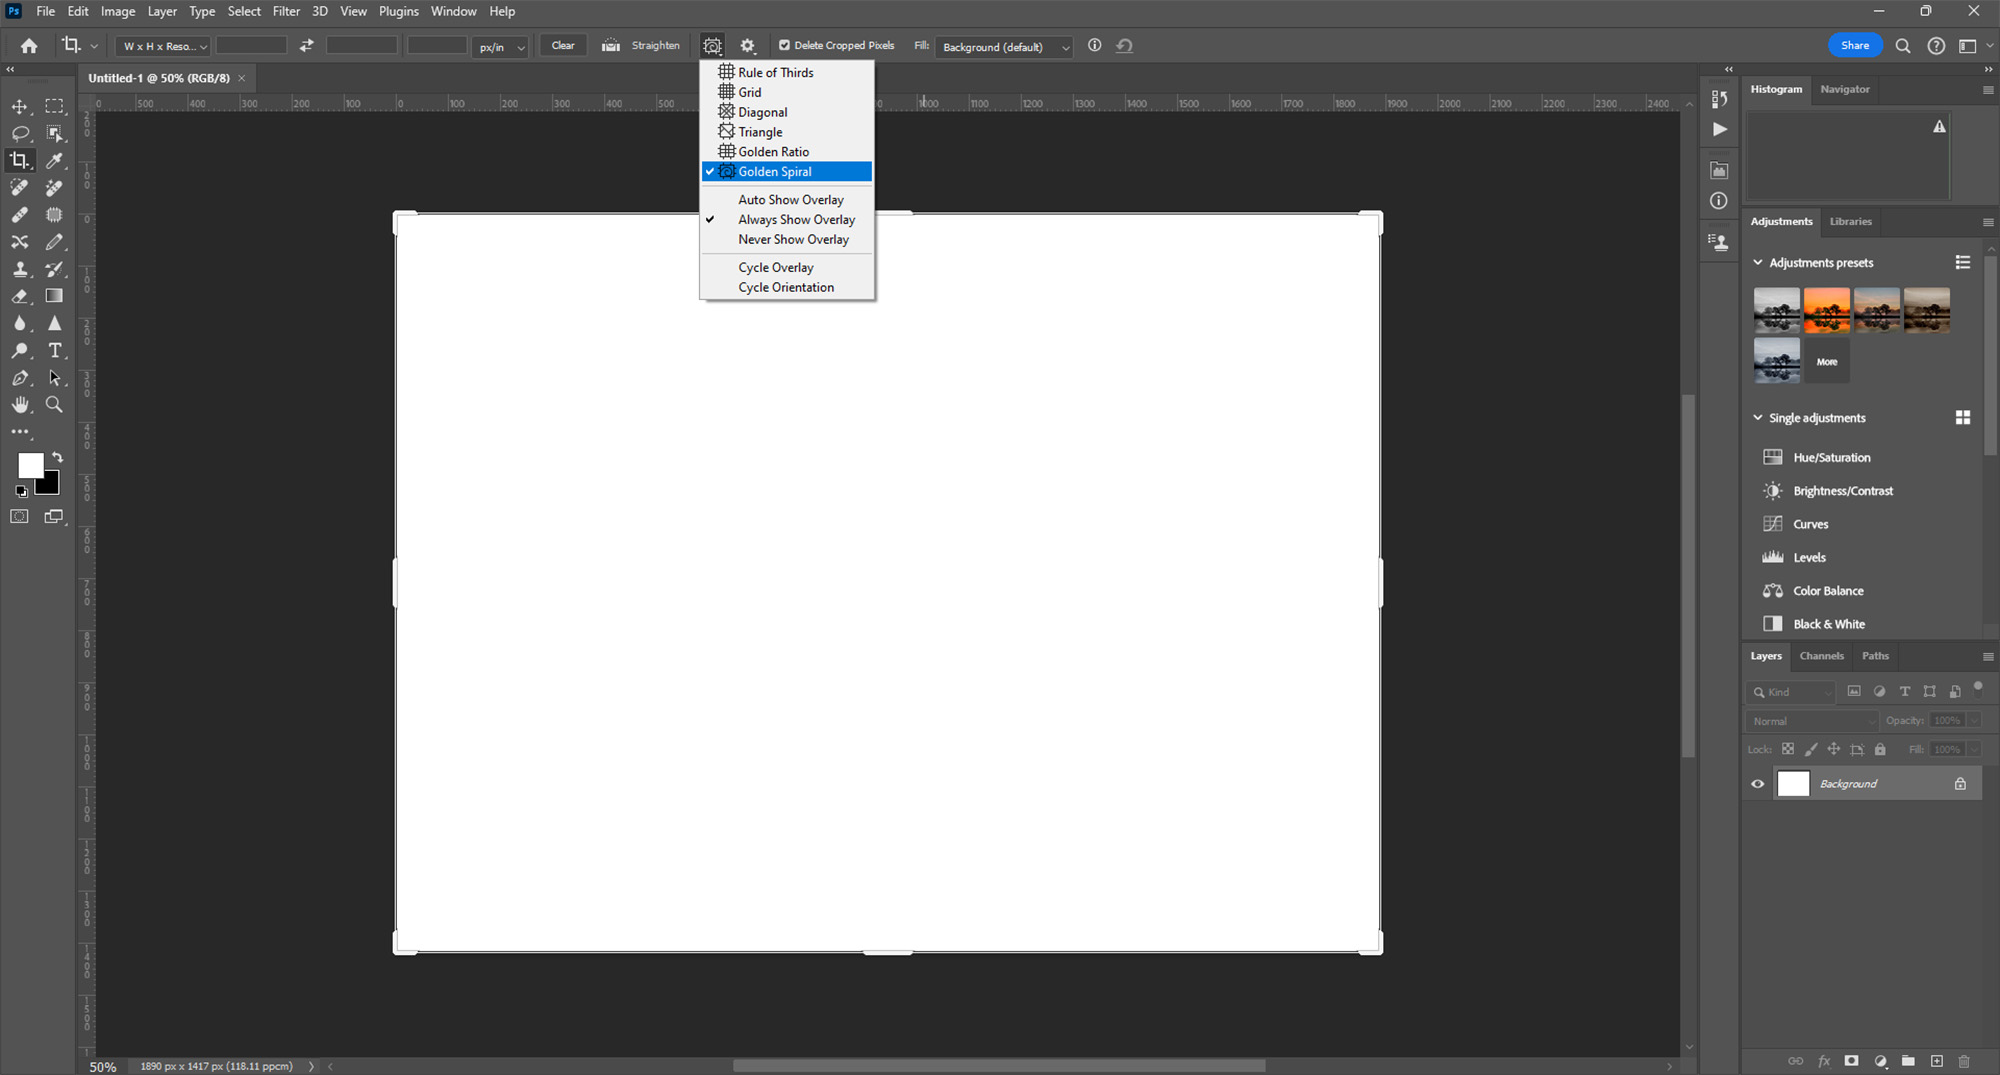
Accessing Crop Tool Options: With the Crop Tool active, look at the options bar at the top of the Photoshop window.
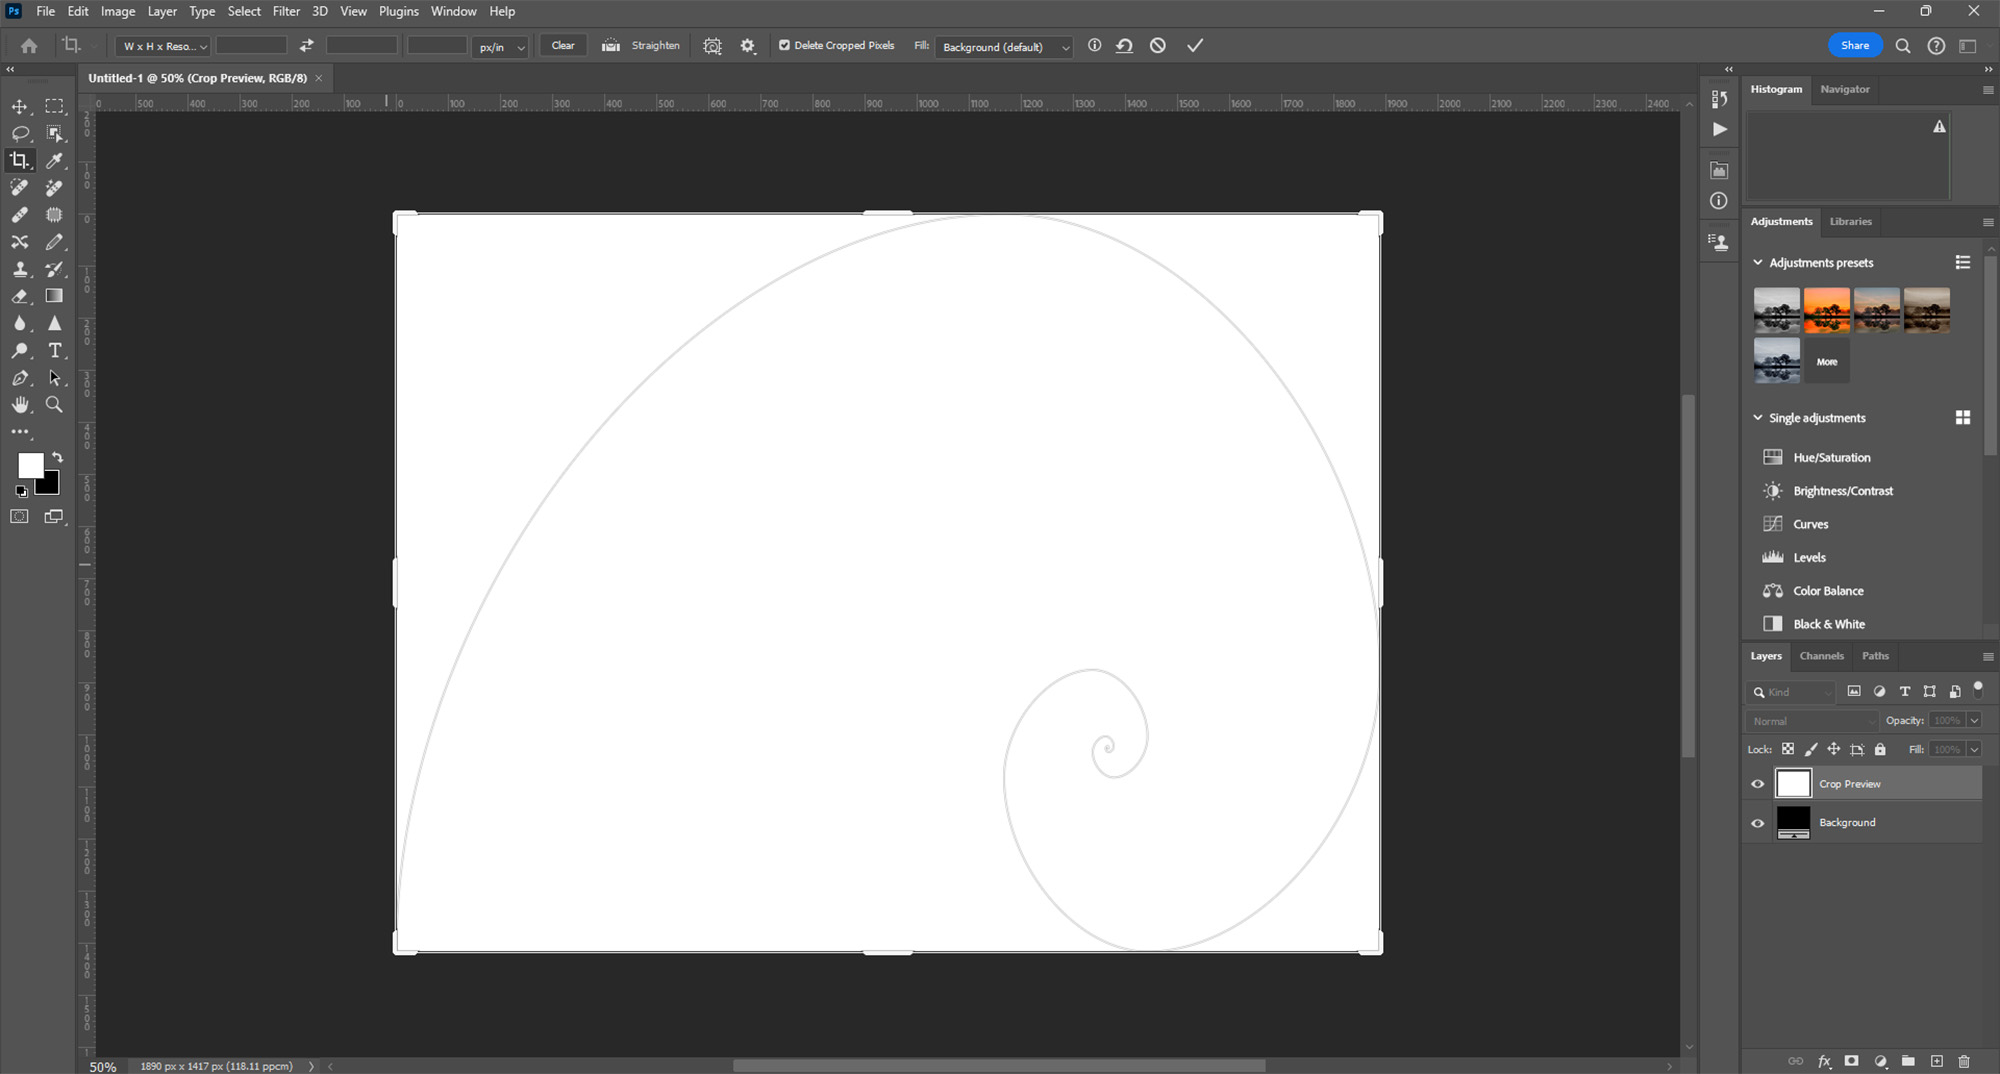
Selecting the Golden Spiral Grid: Click on the overlay options, which might be set to ‘Rule of Thirds’ by default. From the dropdown menu, select the ‘Golden Spiral’ (or ‘Fibonacci Spiral’) option. This changes the crop grid to the Golden Spiral layout.
Step 4: Adjusting the Composition Using the Golden Spiral
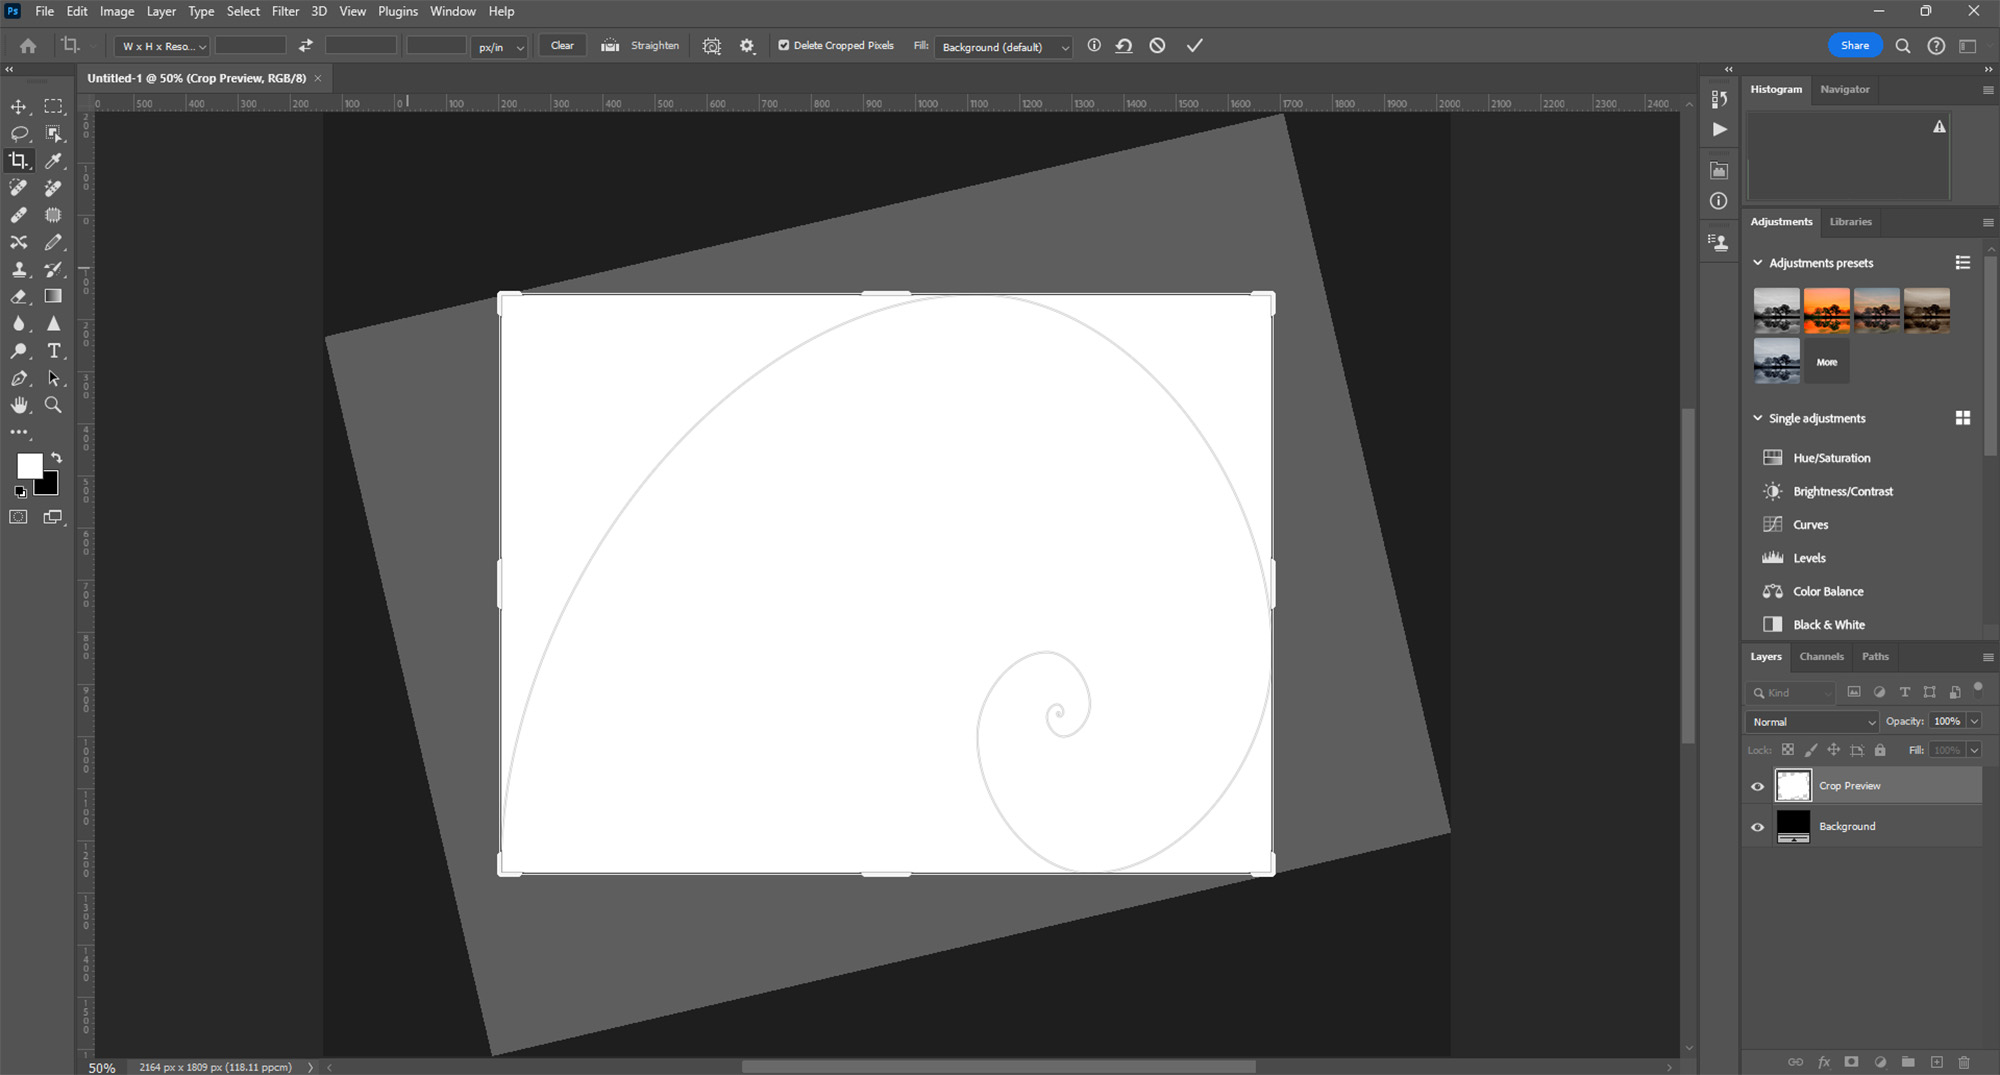
Positioning the Golden Spiral: Click and drag the corners of the crop frame to adjust your composition. The goal is to align the elements of your photo with the curve of the Golden Spiral. This often involves placing the main subject at the smallest part of the spiral, where the eye is naturally drawn.
Rotating the Spiral: You can change the orientation of the Golden Spiral by clicking on the cycle orientation icon in the options bar or by pressing
Shift + O. This rotates the spiral, allowing you to align it with various elements in your image depending on its layout.Applying the Crop: Once you’re satisfied with the composition, press Enter or click the checkmark at the top of the window to apply the crop. This will adjust your image to fit the new composition based on the Golden Spiral.
Conclusion
The Golden Spiral is a classic composition tool derived from the Fibonacci sequence, often used to create aesthetically pleasing and naturally balanced photos. By using Photoshop’s Crop Tool with the Golden Spiral overlay, you can easily adjust your images to follow this pattern, enhancing their visual impact and appeal.
O Carroll, B. (2016). 28 Composition Techniques That Will Improve Your Photos.
References
O Carroll, B. (2016). 28 Composition Techniques That Will Improve Your Photos. [online] PetaPixel. Available at:
https://petapixel.com/photography-composition-techniques/
[Accessed 14 December]


